
BIG-IP
®
Access Policy Manager
®
:
Customization
Version 13.0
Table of Contents
Customization Basics.................................................................................................................7
Overview: Customization and localization..........................................................................7
About basic, general, and advanced customization................................................7
About language choices..........................................................................................7
About localization in the generated UI.....................................................................7
About visual policy editor and general customization similarities............................7
How APM generates UI pages................................................................................8
About UI page structure.......................................................................................... 9
Which objects can be customized? ........................................................................9
About access profile objects and settings ............................................................ 10
General Customization.............................................................................................................11
General page style settings for access profiles................................................................11
General page style settings illustration..................................................................11
Font settings for access profiles.......................................................................................12
Layout settings for access profiles................................................................................... 13
Layout settings illustration.....................................................................................13
Page header settings for access profiles......................................................................... 14
Page footer settings for access profiles........................................................................... 15
Image settings for access profiles....................................................................................15
Form settings for access profiles..................................................................................... 15
Form settings illustration....................................................................................... 16
Form element settings for access profiles........................................................................16
Form element settings illustration..........................................................................17
Advanced customization image settings..........................................................................18
About general customization for logon pages..................................................................18
Logon page field customization illustration............................................................18
Logon page settings..............................................................................................20
About mobile browser support......................................................................................... 21
Coding Tips and Examples......................................................................................................23
About advanced customization........................................................................................23
About customization variables......................................................................................... 23
About PHP code.............................................................................................................. 23
About CSS code.............................................................................................................. 23
Coding recommendations................................................................................................23
Access profile common .css and .inc files.............................................................24
Access profile logout .inc files............................................................................... 25
Access profile logon .inc files................................................................................ 25
Access profile decision box .inc files.....................................................................25
Access profile message box .inc files....................................................................25
Access profile ending page .inc files..................................................................... 25
Webtop .css and .inc files......................................................................................26
About advanced customization images............................................................................26
About best practices for advanced customization images............................................... 27
Example: Adding an image to an access policy page......................................................28
Uploading images for use in customization...........................................................29
Storing images for advanced customization of a specific page.............................30
Table of Contents
3
Updating message box code with a custom image...............................................30
Example: Adding an image to a profile and a page ........................................................ 32
Uploading images for use in customization...........................................................32
Storing images for advanced customization of policy pages.................................32
Adding an image in the page header code............................................................33
Adding an image in the logon page code..............................................................34
Advanced Customization Using Templates........................................................................... 37
About advanced customization templates........................................................................37
The Customization Tool........................................................................................................... 39
About the Customization tool...........................................................................................39
Starting the Customization tool............................................................................. 39
About customization views and form factors....................................................................39
Configuring Settings in Basic Customization View...............................................................41
About Basic Customization view......................................................................................41
Customizing Basic settings................................................................................... 41
Personalizing Client Appearance in General View................................................................ 47
What is client personalization?.........................................................................................47
Uploading images for use in customization......................................................................47
Personalizing client colors, logos, and icons....................................................................47
Previewing customization changes....................................................................... 47
Appearance properties for BIG-IP Edge Client..................................................... 48
Localizing screen appearance for BIG-IP Edge Client.....................................................49
Previewing customization changes....................................................................... 49
Text properties for BIG-IP Edge Client.................................................................. 49
Personalizing Access Profile Appearance Settings..............................................................51
What is access profile personalization?...........................................................................51
Personalizing page appearance for common access profile settings.............................. 51
Previewing customization changes....................................................................... 51
General page style settings for access profiles.....................................................51
Font settings for access profiles............................................................................52
Page header settings for access profiles...............................................................52
Page footer settings for access profiles.................................................................53
Layout settings for access profiles........................................................................ 53
Image settings for access profiles.........................................................................53
Form settings for access profiles...........................................................................54
Form element settings for access profiles.............................................................54
Advanced customization image settings............................................................... 55
Personalizing page appearance for access profile logout settings.................................. 55
Advanced customization image settings............................................................... 55
Personalizing page appearance for access policy pages................................................ 55
Customization settings for access policy items.....................................................56
Localizing messages for BIG-IP Edge Client................................................................... 56
Previewing customization changes....................................................................... 56
Customization settings for BIG-IP Edge Client localization...................................57
Personalizing Webtop Appearance Settings in General View..............................................59
What is webtop appearance personalization?................................................................. 59
Table of Contents
4
Personalizing page appearance for webtops................................................................... 59
Webtop network connectivity status icons settings............................................... 59
CSS sprite image setting.......................................................................................59
Web Applications Session Timeout settings......................................................... 59
Web Applications Hometab settings......................................................................61
Full webtop settings...............................................................................................64
Full webtop popup window setting........................................................................ 65
Advanced customization image settings............................................................... 65
Personalizing Images for Resources in Advanced View.......................................................67
What is resource image personalization?........................................................................ 67
Personalizing resource images........................................................................................67
Localizing Messages and Images in General View................................................................69
What is full and mobile browser localization?.................................................................. 69
Localizing messages for common access profile settings............................................... 69
Localizing layout and content of the logon page..............................................................69
Framework installation settings............................................................................. 70
Endpoint security settings..................................................................................... 71
Localizing layout and content of logout pages................................................................. 72
Logout component settings...................................................................................73
Localizing error messages...............................................................................................73
General error settings............................................................................................74
AAA error settings.................................................................................................74
Installation error settings.......................................................................................75
Resource error settings.........................................................................................76
Dynamic configuration error settings.....................................................................77
Other configuration error settings..........................................................................77
Localizing logon pages.................................................................................................... 77
Logon page settings..............................................................................................77
Localizing decision pages................................................................................................78
General decision page settings.............................................................................78
Advanced customization image settings............................................................... 79
Localizing message box pages........................................................................................79
Advanced customization image settings............................................................... 79
Localizing ending pages.................................................................................................. 79
Advanced customization image settings............................................................... 80
Localizing Webtops in General View...................................................................................... 81
What is webtop localization?............................................................................................81
Localizing webtops...........................................................................................................81
Webtop form and message settings......................................................................81
BIG-IP Edge Client webtop settings......................................................................83
Settings for showing and hiding information on webtops...................................... 83
Webtop logout and relaunch settings....................................................................84
Webtop activity section setting..............................................................................84
Webtop new session settings................................................................................84
Webtop web applications session timeout settings...............................................84
Webtop hometab settings......................................................................................85
Full webtop settings...............................................................................................86
Full webtop popup window settings.......................................................................87
Full webtop Citrix logon form settings................................................................... 88
Full webtop Citrix installer settings........................................................................88
Full webtop Citrix browser setting......................................................................... 89
Table of Contents
5
Localizing captions for webtop sections...........................................................................89
Localizing Captions for Resources in General View.............................................................91
What is resource caption localization?.............................................................................91
Localizing captions...........................................................................................................91
Changing Customized Properties in Advanced View............................................................93
About Advanced Customization view...............................................................................93
Editing files in Advanced View.............................................................................. 93
Customizing the APM logon page...........................................................................................97
Overview: Customizing the logon page............................................................................97
Customizing a logo on the logon screen............................................................... 97
Resources and Documentation...............................................................................................99
Additional resources and documentation for BIG-IP Access Policy Manager..................99
Legal Notices.......................................................................................................................... 101
Legal notices..................................................................................................................101
Table of Contents
6

Customization Basics
Overview: Customization and localization
Customization and localization are ways to change the text and the language that users see, and to change
the appearance of the user interface for Access Policy Manager
®
.
About basic, general, and advanced customization
The Customization tool provides three types of customization.
Basic
Basic customization provides a limited set of options intended for quick modification of the objects
that are most commonly displayed to users. It can be used to customize and localize common text
labels and captions for objects. It can also be used to configure the basic look and feel for pages.
General
General customization enables configuration of a few additional objects and provides many more
options for customizing objects, such as:
• The size, color, and placement of forms and screens.
• The look and feel of objects with more opportunities to replace images.
• Text on the screen, including headers and footers.
• Messages, including installation and error messages.
Any text or image that can be configured from visual policy editor, can also be configured using the
general customization GUI.
Advanced
Advanced customization provides for any customization that can be effected using Cascading Style
Sheets (CSS) and HTML.
About language choices
The set of languages that are available for use in an access policy is specified in the access profile. When
customizing access profile objects, the accepted languages for the access profile are available for
selection. When customizing resource objects, the languages for all access profiles are also available for
selection.
About localization in the generated UI
Access profile objects and resource objects can have different language settings from one another. If it is
available, the language of the user session is selected for use in the UI; otherwise, the default language
for the access profile is selected.
About visual policy editor and general customization similarities
Some access policy items can be customized using either the visual policy editor or the Customization
tool. After changes are made and saved in one (the visual policy editor, for example), updates are
available to view in the other (the Customization tool); the reverse is also true.

Message Box customization
It is possible to choose a language and to specify message and link text for the Message Box in either
user interface.
Figure 1: Visual policy editor Message Box customization
Figure 2: General customization for Message Box
How APM generates UI pages
Access profile objects and resource objects (customized independently from an access profile) are the
same in terms of semantics and structure. Each object has a basic group of customization settings. An
access profile, however, has more than one group of customization settings. Customized UI page
Customization Basics
8

generation works similarly, in that the process takes an object, adds customization settings to it, and
produces XML. Then, it adds a UI page template to the XML data to create a UI page.
Figure 3: Process for creating a customized UI page
About UI page structure
The UI page structure is always the same when using basic or general customization. It includes three
areas: header, footer, and content.
Figure 4: UI template
Settings (color, font, text, and so on) for the header and footer can be defined in access profile
customization. Settings for the location and alignment of the content area can also be defined in access
profile customization. Settings for an object that is displayed in the Contents area can be defined in
customization of the object.
The UI page structure can be changed using advanced customization. It is possible to provide per-page
headers or footers or to completely omit the header, the footer, or both.
Which objects can be customized?
Resource objects can be customized and reused in any access profile with an access policy that assigns
resources. The following resource objects can be customized:
• Network access resources
• Remote desktops
BIG-IP Access Policy Manager: Customization
9
• Webtops
• Webtop links
• Portal access resources
• App tunnels
• SAML resources
Access profiles and the objects that they contain can be customized. Access profile objects are specific to
the particular access profile and are not available for reuse in other access profiles.
About access profile objects and settings
When performing customization, an access profile includes common settings, and settings for some of
the objects that are included in the access policy.
Common
These settings affect any UI page that displays when the access profile runs. The settings affect text,
such as headers and footers and commonly used messages, and look and feel.
Logout
Settings are available to specify an image and text for a page that displays on logout, when access is
denied, when a new session must be started, and so on.
Logon Pages
Settings are available for logon page-type actions (logon page, HTTP 401 response, HTTP 407
response, VMware View logon) that are included in the access policy (directly or through the
inclusion of a macro). Settings affect the text and look and feel for the specific object.
Message Pages
Settings are available for each specific Message Box action included in the access policy. The settings
affect the text and look and feel for the specific object.
Decision Pages
Settings are available for each specific Decision Box action included in the access policy. The
settings affect the text and look and feel for the specific object.
Ending Pages
Settings are available for an Ending Deny page and affect the text and look and feel for the page.
Customization Basics
10

General Customization
General page style settings for access profiles
The table lists settings for customizing general page style in the General Customization view. Style sheet
(CSS) settings are available for customization in the Advanced Customization view.
Name Description
Page alignment Alignment of the contents against the body if the width of the contents
(Page width) is less than 100%.
Page background color Background color of the page; corresponds to CSS body { background-
color: #XXXXX }.
Page width (px or %) Width of the header, footer, and contents tables.
General page style settings illustration
The figure shows the result of setting page alignment to right and page width to 50% in the general page
style settings for an access profile.

Figure 5: Access profile page general customization result
Font settings for access profiles
The table lists font settings for general page style customization. The style sheet (CSS) settings that are
mentioned are available for customization in the Advanced Customization view.
Name
Description
Font family (comma-
separated)
Font used on page; corresponds to CSS * { font-family:… }
Headline font size (px) Corresponds to CSS font-size of headlines
Text font size (px) Corresponds to CSS font-size of all other (non-headline) elements
General Customization
12

Layout settings for access profiles
The table lists settings for customizing page layouts from the general customization view. Style sheet
(CSS) settings are available for customization in the Advanced Customization view.
Name Description
Form cell width (px
or %)
Maximum width of the form cell.
Image cell width (px
or %)
Maximum width of the image cell, or empty area if no image is provided. This
setting has no effect if Page layout is set to Form Center.
Main table
background color
Background color of the contents table. Overrides Page background color in
General Page Style Settings. Corresponds to CSS table#main_table
{ table_background_color: #XXXXXX } .
Page layout Location of the form cell: left, right, or center. When set to Form Left or
Form Right and an image is specified, it displays opposite the form. When set
to Form Center, whether an image is specified or not, no image displays.
(Access policy items that support images are affected, including logon page,
decision box, and message box.)
Layout settings illustration
This figure shows the proportions of a page with these page layout settings:
• Page layout - Form left
• Image cell width - 50%
• Form cell width - 50%
BIG-IP Access Policy Manager: Customization
13

Figure 6: Access profile page layout default settings
The form cell is on the left. The image cell is opposite the form cell. The form cell and the image cell
each fill 50% of the width of the content area.
Page header settings for access profiles
The table lists settings for customizing the page header style from the general customization view. Style
sheet (CSS) settings are available for customization in the Advanced Customization view.
Name
Description
Disconnect icon Image for disconnect button, 48 x 48 pixels or smaller.
Header background color Corresponds to CSS table#page_header { background-
color: #XXXXXX }.
Header left image (Full Size) Corporate logo image, 80 x 80 pixels or smaller.
General Customization
14

Name Description
Header left image (Mobile Devices
Size)
Corporate logo image, 32 x 32 pixels or smaller.
Page footer settings for access profiles
You can customize the following settings for the page footer style with the Customization tool. Style
sheet (CSS) settings are available for customization in the Advanced Customization view.
Name Description
Footer font size (px) Corresponds to CSS table#page_footer { font-size: …. }
Image settings for access profiles
You can customize the following settings for the main page image with the Customization tool.
Name
Description
Default image Image to display in the image cell.
Image left margin
(px)
Left margin of the image.
Image right margin
(px)
Right margin of the image.
Image top margin
(px)
Top margin of the image.
Side image
alignment
Horizontal alignment of the image within the image cell.
Form settings for access profiles
You can customize the following settings for the login form with the Customization tool. Style sheet
(CSS) settings are available for customization in the Advanced Customization view.
Name
Description
Form alignment Alignment of the form within the form cell.
Form background
color
Background color for the form. Corresponds to CSS table#main_table
table#credentials_table{ background-color: %
[form_background_color] }
Form height (px, %,
or auto)
Specifies the height of the form; when specified as %, it is a percentage of the
height of the form cell.
Form left margin (px) Left margin of the form.
Form right margin
(px)
Right margin of the form.
Form top margin (px) Top margin of the login form.
BIG-IP Access Policy Manager: Customization
15

Name Description
Form width (px or %) Specifies width of the form width; when specified as %, it is a percentage of
the width of the form cell.
Form settings illustration
This figure illustrates a form and its settings within a form cell.
Figure 7: Access profile form cell, form, and form settings
Form element settings for access profiles
You can customize the appearance of elements in the logon form using these settings in the General
Customization view.
Name
Description
Field alignment Alignment of the fields against the form.
Field width (%) Width of the input, password, and select fields as a percentage of the form width.
Header
alignment
Alignment of the header in the form.
Label alignment Alignment of labels to the corresponding input fields.
General Customization
16

Name Description
Label position Position of field labels: above or to the left of their respective fields.
Label width (%) Specifies a uniform width for field labels as a percentage of the form width.
Form element settings illustration
This figure illustrates the elements in a form configured with these setting values.
• Header alignment: center
• Label alignment: right
• Label width: 40%
• Label position: left
• Field alignment: right
• Field width: 50%
Figure 8: Access profile form elements and settings
BIG-IP Access Policy Manager: Customization
17

Advanced customization image settings
You set advanced customization images to make images you add through the image browser available to
your advanced customization pages.
The Advanced Customization Images properties pages allow you to set advanced customization images
from the image browser to associate with advanced customization image names. You can then use the
image name to add an image to an advanced customization page.
To select an image from the image browser to associate with an image for advanced customization, click
the button next to the current (or default) image name, and select Replace.
About general customization for logon pages
Logon page customization depends to some extent on the logon page properties that are configured in the
visual policy editor. Logon page properties include five fields that can be configured to accept some type
of input or not (when the input type is set to none). Any field that does not accept input is hidden from
the user at logon; however, it is not hidden in the customization user interface.
General customization for a logon page supports changing:
• The text on the screen, including the prompts for input fields.
• The image to display.
Note: These properties can also be updated from the visual policy editor. The same file is updated
whether personalizing the logon page from general customization or the visual policy editor.
Logon page field customization illustration
The type of input that a logon page field accepts can only be specified in the visual policy editor. If the
type is none, the field cannot be customized in the visual policy editor and, at logon, it is hidden from the
user. However, all five fields are always available for customization from the General Customization
view.
General Customization
18

Figure 9: Logon Page customization of fields, language, and text in the visual policy editor (partial
view)
BIG-IP Access Policy Manager: Customization
19

Figure 10: Logon Page customization of language and text in the General Customization view
Logon page settings
You can customize the following settings for logon pages that appear in web browsers and on mobile
devices with the Customization tool.
Name
Description
Front Image Customization
Form Header Text Text that displays above the form.
Input Field #n Values Localized text for any input field (number 1 to 5) of type select or radio.
(Input types are specified in the visual policy editor), Values and text are
defined in this format "value1=>text1;value2=>text2", and so on. For
example: server1=>Corporate;server2=>Finance;server3=>Sales The
values and text must be defined in the visual policy editor for the field before
you can customize the text.
Note: From the customization interface, personalize the text fields
(Corporate, Finance, Sales) only.
Logon Page Input Field
# (1-5)
Text that is displayed on the logon page for each of the logon page agents,
defined in the Logon Page Agent screen area.
Logon Button Caption of form submit button.
New Password Prompt Text displayed when requesting a new Active Directory password.
General Customization
20

Name Description
Password and
Password Verification
do not Match
Error message displayed for password entries that do not match one another.
Save Password
Checkbox
Text displayed adjacent to the check box that allows users to save their
passwords in the logon form. This field is used only in the secure access
client, and not in the web client.
Verify Password
Prompt
Text displayed next to password confirmation field when a new Active
Directory password is requested.
About mobile browser support
Mobile browsers and full browsers share the same UI page template HTML, but use different CSS files to
optimize presentation for the type of device. To tune the mobile browser CSS, you must edit CSS files
using the Advanced Customization view.
BIG-IP Access Policy Manager: Customization
21
General Customization
22

Coding Tips and Examples
About advanced customization
With advanced customization, it is possible to change almost anything with a certain knowledge of
HTML, CSS, and JavaScript. UI templates, which consist of HTML and PHP files, and CSS files, are
available for edit directly from the Advanced Customization view.
About customization variables
Customization variables are special symbols, such as %[variable_name], in a UI template. A
customization variable is a placeholder for actual customization and localization values. When a UI page
is generated from a UI template, customization variables are replaced with actual values.
Important: Customization uses the same UI templates for all languages. Therefore, F5
®
recommends that
when you customize UI templates, you reuse customization variables for localized texts. Otherwise, you
risk creating localization conflicts.
About PHP code
Customization uses PHP code inside UI templates.
Important: F5
®
recommends that when you customize UI templates, you do not delete or modify PHP
code.
About CSS code
In the hierarchy of the advanced customization user interface, all CSS code is located under Access
Profile > Common. The folder contains various versions of the Access Policy Manager
®
(APM
®
) CSS
code with names such as apm_mobile.css and apm_full.css. When displaying generated UI pages,
APM picks the correct .css file for the client (mobile browser, full browser, BIG-IP
®
Edge Client
®
).
If you create a UI template that partially or completely replaces the default structure provided by F5
®
, F5
recommends that you do not change existing CSS definitions but add your own with different names
(IDs). Otherwise, you run the risk that other non-customized pages will be misrendered.
To replace a main table with your div, on the logon page for example, replace <table
id="main_table" class="logon_page"> with your <table id="cust-main"
class="cust-logn-page">.
Coding recommendations
With advanced customization, you can partially or completely replace the default structure for pages. To
avoid unexpected problems however, follow these recommendations when editing .css and .inc files.

.css file
• Do not change existing CSS definitions but add your own with different names (IDs). Otherwise,
you run the risk that other non-customized pages will be misrendered.
• In your new code, reuse existing customization variables (%[variable_name]) rather than
creating new ones; doing so prevents localization conflicts.
• Do not change PHP code.
.inc file
In most cases, you can safely replace the code in .inc files.
Updating a .css file with additional code to customize a logon page table
The first line of the code for the existing logon page table is: <table id="main_table"
class="logon_page">. Retain that code and add code for a div or a table that you want to use
instead. For example, the code for a new table might start like this: <table id="cust-main"
class="cust-logn-page">.
Access profile common .css and .inc files
You can customize the following files for access profiles in the Advanced Customization view.
Name
Description
apm_full.css File that contains all CSS for desktop browsers; also contains this PHP:
• apmCssCustomizationReg - array with variables that come from general
customization data.
• parsedVersionMajor and parsedVersionMinor - versions of Mozilla,
used to fix specific issues with CSS .
apm_mobile.css File that contains all CSS for mobile browsers. If you want mobile pages to
look exactly the same as full browser pages, you can replace the contents of
apm_mobile.css contents with the contents of apm_full.css.
footer.inc The include file that specifies the footer text line.
apm_edge.css File contains all CSS for BIG-IP
®
Edge Client
®
pages.
Important: F5
®
recommends that you do not edit this file.
javascript_disabled.i
nc
File that is included with every page and displayed only when the browser does
not support JavaScript.
header.inc File that specifies the page header content for access profile pages on all
devices. The file includes this PHP:
• viewport_data – contents of meta name id="viewport".
• label_position – position of labels against corresponding input fields
(see general customization Access Profile/Common/Layout Settings)
• page_layout – position of input cell (see Access Profile/Common/Layout
Settings)
• page_image_default – default image cell image (see Access Profile/
Common)
• header_logo – corporate logo
The file includes JavaScript: setViewport() – function that changes scale
basing on orientation.
Coding Tips and Examples
24

Name Description
apm_mobile_ppc.css Styles for old Windows mobile device.
Access profile logout .inc files
You can customize the following files for access profiles in the Advanced Customization view.
Name Description
my.acl.inc ACL denied page if user tries to access prohibited URL.
urlfilter_blocked.inc Secure Web Gateway (SWG) access denied page if user tries to access
prohibited URL.
access_notfound.inc The HTML, JavaScript, and PHP code that presents a page when access is not
granted.
logout.inc Default logout page.
Access profile logon .inc files
You can customize the following files for access profiles in the Advanced Customization view.
Name
Description
logon.inc Customization of logon page.
http_401.inc Customization of HTTP 401 error (unauthorized) page.
view.inc Customization of VMware View logon page.
Access profile decision box .inc files
You can customize the following files for access profiles in the Advanced Customization view.
Name
Description
decision_box.inc Specifies the layout for the HTML that appears in a decision box.
Access profile message box .inc files
You can customize the following files for access profiles in the Advanced Customization view.
Name
Description
message_box.inc Specifies the layout for the HTML that appears in a message box.
Access profile ending page .inc files
You can customize the following files for access profiles in the Advanced Customization view.
Name
Description
my.acl.inc ACL denied page if user tries to access prohibited URL.
urlfilter_blocked.inc Secure Web Gateway (SWG) access denied page if user tries to access
prohibited URL.
access_notfound.inc The HTML, JavaScript, and PHP code that presents a page when access is not
granted.
BIG-IP Access Policy Manager: Customization
25

Name Description
logout.inc Default logout page.
Webtop .css and .inc files
You can customize the following files for webtops in the Advanced Customization view.
Name Description
hometab.inc Not applicable; file pop up.
webtop_popup.css Pop up file CSS.
webtop_help.inc Help file for webtop.
desktopClass.js.inc Main JavaScript file for webtop.
About advanced customization images
In the General Customization view, each access profile, access profile page, and webtop includes an
Advanced Customization Images setting. The setting provides storage for up to ten images that are then
available for use in the Advanced Customization view. An image specified in the setting is managed with
the parent object; it is exported, imported, copied, or deleted along with the parent object. It persists with
the parent object through backup and upgrade procedures. An image is specified as a name-value pair.
Name
Images names (image00 through image09) are fixed; they are only placeholders. An image name, for
example image00, does not correspond to a location on a page or to an image that is already used in
the UI. The numerals, 00, do not indicate order or precedence. The image name can used as a variable
in the code for a parent object in the Advanced Customization view. This code specifies image00 as a
variable: <img src="%[image00]"/>.
Value
Image values provide file paths and the file names for image files. To use the image, the value can be
copied from the setting in the General Customization view into the code in the Advanced
Customization view. A default value /public/images/my/tr.gif indicates that a customized
image has not been specified.
Coding Tips and Examples
26
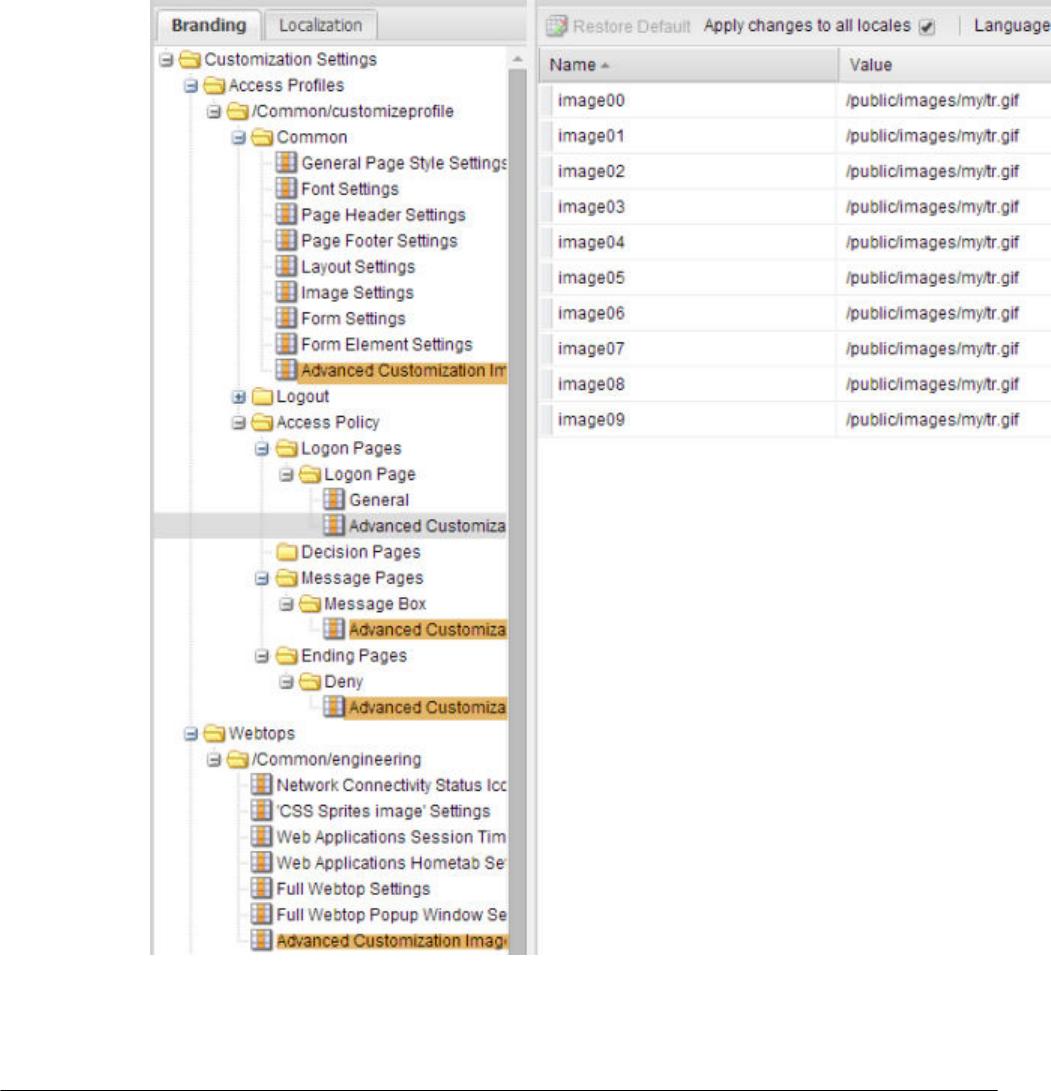
Figure 11: Advanced Customization Images settings for some customization objects
About best practices for advanced customization images
You can think of the Advanced Customization Images settings as libraries of images. Each library has a
scope: the object that manages the library can always use images from it; sometimes child objects can
also use images from the library of a parent object. Advanced Customization Images settings offer a lot
of flexibility. When deciding where to store images, consider how much flexibility you need and whether
using images from a parent object library provides adequate control.
Access Profile Advanced Customization Images
If you store images in the Advanced Customization Images setting for an access profile, you can use
the images not only in the access profile code but also in the code for access policy pages. The
advantage of this approach is that if you need to update images, you only need to change them in one
BIG-IP Access Policy Manager: Customization
27

setting. However, if you want to ensure that images on an access policy page remain the same
regardless of changes to images in the access profile Advanced Customization Images setting, this
might not be the approach you want to use.
Access Policy pages Advanced Customization Images
If you store images in the Advanced Customization Images setting for an access policy page, you can
use the images in the code for that page only. You can store the same images that are stored at the
access profile level, different images, a mix of both, or no images.
Webtop Advanced Customization Images
If you store images in the Advanced Customization Images for a webtop, you can use the images in
the code for that webtop only. However, general customization provides many settings in which to
specify icons; it might be simpler to use it.
Example: Adding an image to an access policy page
In this example, a custom image is stored in the Advanced Customization Images settings for one of the
access policy pages, a message box page. In the Advanced Customization view, the code for the message
box page is updated to add a custom image to the right side of the page.
Figure 12: Sample custom image
Figure 13: Default message page
Coding Tips and Examples
28

Figure 14: Customized message page with image
Note: This example includes tasks to complete in the General Customization view before you update the
code and code changes to make in the Advanced Customization view.
Uploading images for use in customization
You can add images for Access Policy Manager
®
customization with the image browser. You can then
select and use these images by means of settings within the Customization tool.
1. On the Main tab, click Access > Profiles / Policies > Customization > General.
The Customization tool appears in General Customization view, displaying Form Factor: Full/
Mobile Browser settings.
2. On the menu bar, click Image Browser.
The image browser opens in a new screen.
3. Select the image filter method from the Filter Messages list.
• Select Default Images to view the included default Access Policy Manager images.
• Select User Uploaded Images to view the custom uploaded images.
4. Add and remove images.
• To add an image, click Add Image, select the image, and click Open.
• To remove an image, select the image in the image browser, and click Delete Image.
BIG-IP Access Policy Manager: Customization
29

Storing images for advanced customization of a specific page
This example explains how to store a custom image for use in the advanced customization of an access
policy message page. To follow this example, you need an access profile with an access policy that
contains a Message Box action item.
Specify an image in the Advanced Customization Images setting for an object so that the image can be
used in advanced customization of the object.
1. From the General Customization view, expand the Access Profiles folder.
Folders for each access profile display.
2. Expand the folder for an access profile.
3. Expand these folders Access Policy > Message Pages > Message Box.
Note: Message Box is the default name for a message box item. You might see a different name, or
names if the access policy includes multiple message boxes; expand one of them.
Settings for the message box access policy item display.
4. Click the Advanced Customization Images setting.
Image names and values display in the right pane.
5. Click the value for one of the images.
If not already updated for use in advanced customization, the value is /public/images/my/
tr.gif.
A pulldown menu icon displays.
6. Click the pulldown menu icon and click Replace.
A popup screen displays images.
7. To choose an image, click it; then click Change.
The popup screen closes. A new value displays for the image.
8. Press Enter to finalize the change, and click Save.
9. Make a note of the image name; you need it when you perform advanced customization.
You can use the image name as a variable in advanced customization of the parent object only. A
message box page is the parent object in this example.
The image is now available for use in advanced customization of the message box item.
Updating message box code with a custom image
You need to have the value of the name of image available from the Advanced Customization Images
setting for the particular message box that you want to update.
You remove and replace the code that specifies the image to display so that a customized image displays
instead.
1. From the View list, select Advanced Customization.
The advanced customization (tree) view displays.
2. Navigate to the message box item to be customized.
a) Expand the Access Profiles folder and expand the folder for the access profile you want to
customize.
b) Expand these folders Access Policy > Message Pages > Message Box.
Coding Tips and Examples
30

Note: Message Box is the default name for a message box item. You might see a different name, or
names if the access policy includes multiple message boxes; expand one of them.
Settings for the message box access policy item display.
3. Click message_box.inc.
Code displays in the Advanced Customization Editor.
4. Scroll down to this code.
<table id="main_table" class="message_box">
<tr>
<? if( $GLOBALS["page_layout"] == "form_right" ){ ?><td id="main_table_image_cell"><img
src="<? print( $GLOBALS["page_image_default"] ); ?>"></td><? } ?>
<td id="main_table_info_cell">
<table id="interaction_table">
<tr>
<td id="interaction_table_header"><? print('%[form_message]'); ?></td>
</tr>
<tr>
<td class="interaction_table_text_cell"><? print('<a href="#"
onclick="javascript:SubmitResult(1);return 1;">%[link]</a>'); ?></td>
</tr>
<tr>
<td class="interaction_table_footer"></td>
</tr>
</table>
</td>
<? if( $GLOBALS["page_layout"] == "form_left" ){ ?><td id="main_table_image_cell"><img
src="<? print( $GLOBALS["page_image_default"] ); ?>"></td><? } ?>
</tr>
</table>
5. After the first table row open tag (<tr>), remove this line of code.
<? if( $GLOBALS["page_layout"] == "form_right" ){ ?><td id="main_table_image_cell"><img
src="<? print( $GLOBALS["page_image_default"] ); ?>"></td><? } ?>
The code that checks the page layout and specifies the image cell is removed.
6. Before the last table row close tag (</tr>), remove this line of code.
<? if( $GLOBALS["page_layout"] == "form_left" ){ ?><td id="main_table_image_cell"><img
src="<? print( $GLOBALS["page_image_default"] ); ?>"></td><? } ?>
Code that checks the page layout and specifies the image cell is removed.
7. Before the last table row close tag (</tr>), insert this line of code, replacing nn with the image
number.
<td id="main_table_image_cell"><img src="%[imagenn]"/></td>
8. In the Advanced Customization Editor area, click Save Draft.
In the navigation tree, message_box.inc now displays in italics.
9. On the menu bar, click Save.
In the navigation tree, message_box.inc is no longer italicized. In the screen header, the Apply
Access Policy link displays.
10. In the screen header, click the Apply Access Policy link.
A screen displays the access profile list with the access profile you have been editing selected.
11. Click the Apply Access Policy button.
You can now verify the result of this customization from a browser by trying to access a virtual server in
which this access profile is specified.
BIG-IP Access Policy Manager: Customization
31

Example: Adding an image to a profile and a page
In this example, a custom image is stored in the Advanced Customization Images settings for an access
profile. Then, the value of the image is used in advanced customization of the access profile page header.
The header displays on all access policy pages, including the logon page. Then, the value of the image is
used in additional advanced customization of the access policy logon page.
Figure 15: Sample custom image
Uploading images for use in customization
You can add images for Access Policy Manager
®
customization with the image browser. You can then
select and use these images by means of settings within the Customization tool.
1. On the Main tab, click Access > Profiles / Policies > Customization > General.
The Customization tool appears in General Customization view, displaying Form Factor: Full/
Mobile Browser settings.
2. On the menu bar, click Image Browser.
The image browser opens in a new screen.
3. Select the image filter method from the Filter Messages list.
• Select Default Images to view the included default Access Policy Manager images.
• Select User Uploaded Images to view the custom uploaded images.
4. Add and remove images.
• To add an image, click Add Image, select the image, and click Open.
• To remove an image, select the image in the image browser, and click Delete Image.
Storing images for advanced customization of policy pages
To follow this example, you need an access profile with an access policy that contains a Logon Page
action item.
Specify an image in the Advanced Customization Images setting for an access profile to use the image
in advanced customization of the access profile and any access policy pages.
Note: An image stored in the Common settings for an access profile can be used in the advanced
customization of any access policy page provided that you use the image value instead of the image name
to specify the src attribute for the image.
1. From the General Customization view, expand the Access Profiles folder.
Folders for each access profile display.
Coding Tips and Examples
32

2. Expand the folder for an access profile.
3. Expand the Common folder.
A list of settings displays.
4. Click the Advanced Customization Images setting.
Image names and values display in the right pane.
5. Click the value for one of the images.
If not already updated for use in advanced customization, the value is /public/images/my/
tr.gif.
A pulldown menu icon displays.
6. Click the pulldown menu icon and click Replace.
A popup screen displays images.
7. To choose an image, click it; then click Change.
The popup screen closes. A new value displays for the image.
8. Press Enter to finalize the change, and click Save.
9. Click the value for the image again; copy the value in the field and paste it into a text file.
The value should be something like this: /public/images/customization/Common/
ProfileName_general_ui/image00_en.png. You need to know the value when you perform
advanced customization.
The image is now available for use in advanced customization of the message box item.
Adding an image in the page header code
In this example, an image is added to the access profile page header. Make sure that the value of the
image is available exactly as specified in the Advanced Customization Images setting for the particular
access profile that you want to update.
Add code to specify an image to display in the page header.
1. From the View list, select Advanced Customization.
The advanced customization view displays.
2. In the navigation tree, expand the Access Profiles folder and expand the folder for the access profile
you want to customize.
3. Expand the Common folder.
4. Click header.inc.
Code displays in the Advanced Customization Editor area of the screen.
5. Scroll to the end of the file to this code.
<table id="page_header">
<tr >
<td id="header_leftcell"><img src='<?=$GLOBALS["header_logo"]?>'/></td>
<td id="header_rightcell"><? if( !empty( $GLOBALS["header_show_disconnect_button"] ) )
{ ?><button id="disconnect" onclick="javascript: /*
window.onbeforeunload=window.document.onbeforeunload=window.document.body.onbeforeunload=nul
l; */ if(top.F5_HT_logOut){ F5_HT_logOut(); }else{ window.location.href='/
my.logout.php3'; }"><img src="%[disconnect_icon]"/><span>%[disconnect_text]</span></
button><?} if( !empty( $GLOBALS["webtop_header_message"] ) ){?><span
id="webtop_header_message"><img src='<?=$GLOBALS["fw_header_icon"]?>' id='fw_header_icon'><?
=$GLOBALS["webtop_header_message"]?></span><?}?></td>
</tr>
</table>
6. After the table close tag (</table>), insert this line of code.
<img src="image_value_from_advanced_customization_settings" />
7. In the Advanced Customization Editor area, click Save Draft.
BIG-IP Access Policy Manager: Customization
33

In the navigation tree, header.inc now displays in italics.
8. On the menu bar, click Save.
In the navigation tree, header.inc is no longer italicized. In the screen header, the Apply Access
Policy link displays.
9. In the screen header, click the Apply Access Policy link.
A screen displays the access profile list with the access profile you have been editing selected.
10. Click the Apply Access Policy button.
11. To verify the result, in the General or Advanced Customization view, click Preview and navigate to
and click any access policy page.
Figure 16: Logon page with customized page header
Adding an image in the logon page code
This example shows one way to change the image that is displayed on a logon page. Have the value of
the image available exactly as it is specified in the Advanced Customization Images setting for the
parent access profile.
Add code to specify an image to display after the logon page.
1. From the View list, select Advanced Customization.
The advanced customization view displays.
2. Navigate to the logon page item to be customized.
Coding Tips and Examples
34

a) Expand the Access Profiles folder and expand the folder for the access profile you want to
customize.
b) Expand these folders Access Policy > Logon Pages > Logon Page.
Note: Logon Page is the default name for a logon page item. You might see a different name, or
names if the access policy includes multiple logon pages; expand one of them.
Settings for the logon page access policy item display.
3. Click logon.inc.
Code displays in the Advanced Customization Editor area of the screen.
4. Scroll to the end of the file to this code.
}
--></script>
</td>
<? if( $GLOBALS["page_layout"] == "form_left" ){
?><td id="main_table_image_cell"><img src="<? print('%[front_image]'); ?>"></td><?
} ?>
</tr>
</table>
<? include_customized_page("general_ui", "footer.inc"); ?>
<? include_once("sam/webtop/renderer/vk.inc"); ?>
<div id="MessageDIV" class="inspectionHostDIVSmall"></div>
</body>
</html>
5. After the table close tag (</table>), insert this line of code.
<img src="image_value_from_advanced_customization_settings" />
6. In the Advanced Customization Editor area, click Save Draft.
In the navigation tree, login.inc now displays in italics.
7. On the menu bar, click Save.
In the navigation tree, logon.inc is no longer italicized. In the screen header, the Apply Access Policy
link displays.
8. In the screen header, click the Apply Access Policy link.
A screen displays the access profile list with the access profile you have been editing selected.
9. Click the Apply Access Policy button.
10. To verify the result, in the General or Advanced customization view, click Preview and navigate to
and click any access policy page.
Figure 17: Logon page with custom image after the form
BIG-IP Access Policy Manager: Customization
35

Coding Tips and Examples
36

Advanced Customization Using Templates
About advanced customization templates
Access Policy Manager
®
advanced customization templates provide code and images for creating
customized pages. With the templates and the instructions provided for them, you can walk through step-
by-step instructions and produce pages with a look-and-feel and with features that are frequently
requested .
Templates and instructions are available for download from the BIG-IP
®
Access Policy Manager
®
page
on DevCentral
®
at https://devcentral.f5.com/wiki/APM.APM-Advanced-Customization-
Templates.ashx.
Advanced Customization Using Templates
38

The Customization Tool
About the Customization tool
The Customization tool is an application that you start from the BIG-IP
®
admin console. With the
Customization tool, you can personalize screen messages and prompts, change screen layouts, colors, and
images, and customize error and other messages to specific languages for policies and profiles used on
BIG-IP Access Policy Manager
®
.
Starting the Customization tool
Start the Customization tool to personalize and localize page layout, colors, images, and messages for the
BIG-IP
®
Edge Client
®
, browser pages, and mobile device screens.
On the Main tab, click Access > Profiles / Policies > Customization.
The Customization tool appears, in Basic Customization view.
You can use the Customization tool inside the BIG-IP admin console, or click Popout to open it in a
separate browser window.
After you personalize settings, remember to click the Save icon to apply your changes.
About customization views and form factors
The Customization tool provides three views.
Basic Customization (Quick Start)
This is the default customization view. Use this to configure basic look and feel for pages, and
common text labels and captions for resources on the webtop.
General Customization
This view provides a tree structure for configuration elements, and more detailed methods to
configure and customize objects.
Advanced Customization
This view provides direct access to PHP, CSS, JavaScript, and HTML files that you can edit to
control the display and function of web and client pages in Access Policy Manager
®
.
The General and Advanced Customization views provide two form factors, that you can use to customize
different access policy features.
Full/Mobile browser
Use this mode to configure pages that are viewed in a web browser or on a mobile device.
BIG-IP Edge Client
Use this mode to configure the appearance and messages that appear in the BIG-IP
®
Edge Client
®
for
a platform or device.
In the General Customization view, for each form factor you can also choose to customize Branding or
Text by selecting the tab at the top of the Form Factor column.
Branding
Customization controls the look of the user interface, such as fonts, images, colors, and general
layout.
Text
Customization provides personalization for the text and messages that appear for each language
specified in an access profile.
The Customization Tool
40

Configuring Settings in Basic Customization View
About Basic Customization view
You can use the Basic Customization view to configure common settings for access profile web pages,
and the webtop captions, descriptions, and images for any item that appears on a full webtop. In addition,
you can customize webtop font size and link colors.
With this view, you can customize all of these items:
Common Page Styles
Specifies settings for the logon form display, header image, and alignment of items.
Webtop items
Specifies settings for the display of resources (app tunnels, remote desktops, network access tunnels,
webtop links, and portal access resources) on the full webtop.
Common webtop settings
Specifies display settings that apply to all resources on the full webtop.
Webtop links
Specifies display settings that apply to all resources on the full webtop.
Customizing Basic settings
Start Basic customization to configure custom settings for access profiles and items that appear on the
full webtop. Basic customization provides a starting point that you can later refine through the Advanced
Customization view.
1. On the Main tab, click Access > Profiles / Policies > Customization > Quick Start/Basic.
The Basic Customization view opens.
2. In the left column of the page, select the category of items to customize.
For example, select Network Access to customize the appearance of a network access resource item
on the full webtop.
3. On the right side of the page, from the list, select the specific item for which you want to customize
settings.
The customizable settings for the item are displayed.
4. Configure settings for the resource item or access profile.
When configuring Common Page Styles, click Preview at the bottom of the screen to display changes
without first saving them.
After you customize settings, click Save to save the new customization settings. To return to the original
settings and discard your changes, click Revert.
Common page style settings
The Basic Customization view provides settings for customizing an access profile.
Setting Value Description
Access Profile An access profile already
defined on the system.
The access profile for which you want to change
basic settings.

Setting Value Description
Language A language already
specified in the access
profile on the system.
This specifies the language for which you are
changing customization settings. Select All
languages to apply the same customization changes
to all languages in the access profile.
Page Alignment Left, center, or right. Sets the alignment of the page within the web
browser screen.
Page Width Pixel or percentage value
(for example 90%).
The width of any access policy web pages inside the
web browser frame.
Header Logo An image. The header logo appears, by default, at the upper-
left corner of the defined HTML page. Typically
this is a square, transparent image file. Acceptable
formats for transparency are GIF and PNG. The
page header area expands to the height of this
image.
Page Background
Color
A color, selected from a
color chooser.
Indicates the color behind pages.
Header
Background
Color
A color, selected from a
color chooser.
Indicates the color of the header on a page.
Table
Background
Color
A color, selected from a
color chooser.
Indicates the color behind a table on a page.
Form Left
Margin
A numeric pixel value, or a
percentage (for example,
10px or 5%).
The margin between the left edge of the form and
the left edge of the browser window, on form-based
pages.
Form Top Margin A numeric pixel value or a
percentage, (for example,
10px).
The margin between the top edge of the form and
the bottom edge of the header image, on form-based
pages.
Form Height A numeric pixel value or a
percentage, (for example,
500px or 50%).
The height of the form, on form-based pages. Any
value less than the full height of the browser
increases the space at the bottom of the form, as the
top margin is set by the Form Top Margin value.
Form
Background
Color
A color, selected from a
color chooser.
Indicates the color behind form-based pages.
Footer Text A text string. Specifies the footer message that appears at the
bottom of access policy web pages.
Footer Font Size Font size in pixels (for
example 10px).
Indicates the size for the footer message at the
bottom of access policy web pages.
App tunnel basic settings
The Basic Customization view provides settings for customizing an app tunnel on the full webtop.
Setting Value Description
App Tunnel An app tunnel already
defined on the system
The app tunnel for which you want to change basic settings.
Configuring Settings in Basic Customization View
42
Setting Value Description
Language A language already
specified on the system
This specifies the language for which you are changing
customization settings. Select All languages to apply the same
customization changes to all languages in the access profile.
Caption A text string The text under the icon for the app tunnel, on a full webtop.
Description A text string The description text for the app tunnel, on a full webtop.
Image An image or icon The image acts as an icon on the full webtop to represent the
app tunnel. Select an image from the list, or click Upload New
Image to add a new image.
Network access basic settings
The Basic Customization view provides settings for customizing a network access resource on the full
webtop.
Setting Value Description
Network
Access
A network access
resource already
defined on the system
The network access resource for which you want to change
basic settings.
Language A language already
specified on the
system
This specifies the language for which you are changing
customization settings. Select All languages to apply the
same customization changes to all languages in the access
profile.
Caption A text string The text under the icon for the network access resource, on a
full webtop.
Description A text string The description text for the network access resource, on a
full webtop.
Image An image or icon The image acts as an icon on the full webtop to represent the
network access resource. Select an image from the list, or
click Upload New Image to add a new image.
Remote desktop basic settings
The Basic Customization view provides settings for customizing a remote desktop on the full webtop.
Setting Value Description
Remote
desktop
A remote desktop
already defined on the
system
The remote desktop for which you want to change basic
settings.
Language A language already
specified on the
system
This specifies the language for which you are changing
customization settings. Select All languages to apply the
same customization changes to all languages in the access
profile.
Caption A text string The text under the icon for the remote desktop, on a full
webtop.
Description A text string The description text for the remote desktop, on a full
webtop.
BIG-IP Access Policy Manager: Customization
43

Setting Value Description
Image An image or icon The image acts as an icon on the full webtop to represent the
remote desktop. Select an image from the list, or click
Upload New Image to add a new image.
Common webtop settings
The Basic Customization view provides these shared settings for customizing full webtops.
Setting Value Description
Webtop A webtop already
defined on the system
The webtop for which you want to change basic settings.
Language A language already
specified on the system
This specifies the language for which you are changing
customization settings. Select All languages to apply the
same customization changes to all languages in the
access profile.
Font size A pixel value, (for
example 14px)
The font size used for text on the full webtop.
Link color A color, selected from a
color chooser
Indicates the color for links on the webtop.
Image An image or icon The image appears on the full webtop. Select an image
from the list, or click Upload New Image to add a new
image.
Show Statistics
While
Connected
on or off Show or hide statistics in the remote connection popup
screen for the application tunnel or the network access
tunnel.
Webtop link basic settings
The Basic Customization viewprovides settings for customizing a webtop link on the full webtop.
Setting Value Description
Webtop link A webtop link already
defined on the system
The webtop link for which you want to change basic settings.
Language A language already
specified on the system
This specifies the language for which you are changing
customization settings. Select All languages to apply the same
customization changes to all languages in the access profile.
Caption A text string The text under the icon for the webtop link, on a full webtop.
Description A text string The description text for the webtop link, on a full webtop.
Image An image or icon The image acts as an icon on the full webtop to represent the
webtop link. Select an image from the list, or click Upload
New Image to add a new image.
Portal access resource basic settings
The Basic Customization view provides settings for customizing a portal access resource on the full
webtop.
Configuring Settings in Basic Customization View
44

Setting Value Description
Portal Access A portal access
resource already
defined on the system
The portal access resource for which you want to change basic
settings.
Language A language already
specified on the
system
This specifies the language for which you are changing
customization settings. Select All languages to apply the same
customization changes to all languages in the access profile.
Caption A text string The text under the icon for the portal access resource, on a full
webtop.
Description A text string The description text for the portal access resource, on a full
webtop.
Image An image or icon The image acts as an icon on the full webtop to represent the
portal access resource. Select an image from the list, or click
Upload New Image to add a new image.
BIG-IP Access Policy Manager: Customization
45
Configuring Settings in Basic Customization View
46

Personalizing Client Appearance in General View
What is client personalization?
To personalize client pages, you use BIG-IP
®
Edge Client
®
customization. You can change the branding
and localization of the BIG-IP Edge Client on client PCs and devices.
Uploading images for use in customization
You can add images for Access Policy Manager
®
customization with the image browser. You can then
select and use these images by means of settings within the Customization tool.
1. On the Main tab, click Access > Profiles / Policies > Customization > General.
The Customization tool appears in General Customization view, displaying Form Factor: Full/
Mobile Browser settings.
2. On the menu bar, click Image Browser.
The image browser opens in a new screen.
3. Select the image filter method from the Filter Messages list.
• Select Default Images to view the included default Access Policy Manager images.
• Select User Uploaded Images to view the custom uploaded images.
4. Add and remove images.
• To add an image, click Add Image, select the image, and click Open.
• To remove an image, select the image in the image browser, and click Delete Image.
Personalizing client colors, logos, and icons
In a connectivity profile, you can customize the appearance of the BIG-IP
®
Edge Client
®
and the web
client. The settings you specify are saved with the connectivity profile, and applied when users download
the client package.
1. On the Main tab, click Access > Profiles / Policies > Customization > General.
The Customization tool appears in General Customization view, displaying Form Factor: Full/
Mobile Browser settings.
2. From the Form Factor list at the top of the Customization tool, select BIG-IP Edge Client.
3. To select the BIG-IP Edge Client, in the left pane, expand the folders and navigate to Customization
Settings > Connectivity Profiles > name_of_connectivity_profile, and click BIG-IP Edge
Client.
4. Customize the settings for BIG-IP Edge Client branding.
5. After you customize settings, click the Save icon at the top of the Customization tool.
Previewing customization changes
You must have customized an element with the Customization tool to see a preview of your changes.

After you customize and save an element with the Customization tool, you can preview the changes you
have made in the Preview window. The Preview window opens a separate browser window, and shows a
live update of changes as you save them.
1. On the Main tab, click Access > Profiles / Policies > Customization > General.
The Customization tool appears in General Customization view, displaying Form Factor: Full/
Mobile Browser settings.
2. On the menu bar, at right, click the Preview button.
3. Navigate to a page to view customizations.
For example, to navigate to a logon page and view the results of access profile branding
customization, in the Preview window expand Customization Settings > Access Profiles >
access_profile_name > Access Policy > Logon Pages, then click logon_page_name.
The Preview window shows the results of any customization changes.
Appearance properties for BIG-IP Edge Client
You can customize the following appearance settings for BIG-IP
®
Edge Client
®
with the Customization
tool.
Name Value Description
Banner
Color
A hex color code, for example, #123ABC.
When you click the color value, two color
choosers appear. One allows you to select a
color from 40 common color blocks, and
the other allows you to select any HTML
color from a more sophisticated color
wheel. You can also type the color value in
as text.
Indicates the color that the banner for the
BIG-IP Edge Client uses. Note that the
Banner Text Color should be legible over this
color.
Banner
Text
Color
A hex color code, for example, #123ABC.
When you click the color value, two color
choosers appear. One allows you to select a
color from 40 common color blocks, and
the other allows you to select any HTML
color from a more sophisticated color
wheel. You can also type the color value in
as text.
Indicates the color in which the banner text
appears. This color appears over the Banner
Color and should be readable on it.
Logo A 48 x 48 PNG, JPG, or GIF icon. This logo appears in the BIG-IP Edge Client
as the company logo. The generic logo is an
F5 logo. To change the logo, click the logo
popout button, then click Replace. Select an
image file to replace the logo file. Note that
you can add files to the Customization tool in
the image browser.
Tray Icon
Set
The F5 tray logo set or the generic icon set. Select the setting that will appear in the
system tray to show connection activity and
status. You can choose the F5 icon set (red
ball), or a Generic icon set.
Personalizing Client Appearance in General View
48

Localizing screen appearance for BIG-IP Edge Client
Configure localization for BIG-IP
®
Edge Client
®
to change the messages and text in the BIG-IP Edge
Client application.
1. On the Main tab, click Access > Profiles / Policies > Customization > General.
The Customization tool appears in General Customization view, displaying Form Factor: Full/
Mobile Browser settings.
2. From the Form Factor list at the top of the Customization tool, select BIG-IP Edge Client.
3. In the left pane, select the Text tab.
A navigation tree displays in the left pane.
4. To select the BIG-IP Edge Client, in the left pane, expand the folders and navigate to Customization
Settings > Connectivity Profiles > name_of_connectivity_profile, and click BIG-IP Edge
Client.
5. At the top right of the Customization settings pane, select the Language for which to customize
localization messages for the BIG-IP Edge Client.
6. Customize the settings for BIG-IP Edge Client localization.
7. After you customize settings, click the Save icon at the top of the Customization tool.
Previewing customization changes
You must have customized an element with the Customization tool to see a preview of your changes.
After you customize and save an element with the Customization tool, you can preview the changes you
have made in the Preview window. The Preview window opens a separate browser window, and shows a
live update of changes as you save them.
1. On the Main tab, click Access > Profiles / Policies > Customization > General.
The Customization tool appears in General Customization view, displaying Form Factor: Full/
Mobile Browser settings.
2. On the menu bar, at right, click the Preview button.
3. Navigate to a page to view customizations.
For example, to navigate to a logon page and view the results of access profile branding
customization, in the Preview window expand Customization Settings > Access Profiles >
access_profile_name > Access Policy > Logon Pages, then click logon_page_name.
The Preview window shows the results of any customization changes.
Text properties for BIG-IP Edge Client
You can customize the following settings for BIG-IP
®
Edge Client
®
customization with the
Customization tool.
Name Value Description
About link A URL The text that appears as a link in the About area of the BIG-IP Edge
Client.
About text Text Text, typically copyright info or some other identifying information, that
appears in the About area of the BIG-IP Edge Client.
Application Name Text The application name, which appears in the status bar of the application.
BIG-IP Access Policy Manager: Customization
49
Personalizing Client Appearance in General View
50

Personalizing Access Profile Appearance Settings
What is access profile personalization?
With full and mobile browser customization, you can change the appearance, text, and messages of all
pages that a browser views, either from the BIG-IP
®
Edge Client
®
by directly logging in through a web
browser, or on a mobile device. Some settings that are specific to the BIG-IP Edge Client software are
customized separately in the BIG-IP Edge Client customization view.
Personalizing page appearance for common access profile settings
Personalize access profile login pages to change the front image and advanced customization images for
the login page in a specific access policy.
1. On the Main tab, click Access > Profiles / Policies > Customization > General.
The Customization tool appears in General Customization view, displaying Form Factor: Full/
Mobile Browser settings.
2. To configure common settings, click Customization Settings > Access Profiles >
access_profile_name > Common.
3. Customize the settings for each individual element by clicking the element and changing the
displayed settings.
4. After you customize settings, click the Save icon at the top of the Customization tool.
The access policy login page reflects your changes.
Previewing customization changes
You must have customized an element with the Customization tool to see a preview of your changes.
After you customize and save an element with the Customization tool, you can preview the changes you
have made in the Preview window. The Preview window opens a separate browser window, and shows a
live update of changes as you save them.
1. On the Main tab, click Access > Profiles / Policies > Customization > General.
The Customization tool appears in General Customization view, displaying Form Factor: Full/
Mobile Browser settings.
2. On the menu bar, at right, click the Preview button.
3. Navigate to a page to view customizations.
For example, to navigate to a logon page and view the results of access profile branding
customization, in the Preview window expand Customization Settings > Access Profiles >
access_profile_name > Access Policy > Logon Pages, then click logon_page_name.
The Preview window shows the results of any customization changes.
General page style settings for access profiles
You can customize the following settings for general page style with the Customization tool.

Name Value Description
Page alignment Left, Center, or Right. Indicates the general HTML page
alignment for all pages displayed by
the access profile.
Page
background
color
A hex color code, for example, #123ABC.
When you click the color value, two color
choosers appear. One allows you to select a
color from 40 common color blocks, and
the other allows you to select any HTML
color from a more sophisticated color
wheel. You can also type the color value in
as text.
Indicates the color for the general
page background for all pages
displayed by the access profile.
Page width (px
or %)
A specific pixel value, for example 800px,
or a percentage, for example 80%.
Specifies the width of the content on
all HTML pages displayed by the
access profile, as an absolute pixel
value or as a percentage of the entire
browser screen.
Font settings for access profiles
You can customize the following settings for general page style with the Customization tool.
Setting Value Description
Font family
(comma-separated)
Font names or font-family names,
space-separated, for example
Calibri, Tahoma, Verdana,
Arial, Helvetica, Sans-
Serif.
Specifies the base font used by pages
displayed by the access profile.
Headline font size
(px)
A pixel value, for example 18px. Indicates the pixel size for heading items
on pages displayed by the access profile.
Text font size (px) A pixel value, for example 14px. Indicates the pixel size for text items on
pages displayed by the access profile.
Page header settings for access profiles
You can customize the following settings for the page header style with the Customization tool.
Setting Value Description
Disconnect icon An image icon 48 x 48 pixels or smaller. Specifies the icon image displayed in
the browser when the page is
disconnected.
Header
background
color
A hex color code, for example, #123ABC.
When you click the color value, two color
choosers appear. One allows you to select
a color from 40 common color blocks, and
the other allows you to select any HTML
color from a more sophisticated color
wheel. You can also type the color value
in as text.
Indicates the background color for
HTML header elements for the web
pages served to web and mobile
clients.
Personalizing Access Profile Appearance Settings
52

Setting Value Description
Header left
image (Full Size)
An image name. This is a larger image up
to 80 x 80 pixels, for display on web
pages.
The header image for web pages. To
replace this image, type the relative
path, or click the preview icon to the
right of the filename, and click
Replace.
Header left
image (Mobile
Devices Size)
An image name. This is a smaller image
up to 32 x 32 pixels, for display on mobile
devices.
The header image for mobile device
pages. To replace this image, type the
relative path, or click the preview icon
to the right of the filename, and click
Replace.
Page footer settings for access profiles
You can customize the following settings for the page footer style with the Customization tool.
Name Value Description
Footer font size (px) A font size, in pixels, for example
12px.
Specifies the font size for text in web page
footers.
Layout settings for access profiles
You can customize the following settings for page layouts with the Customization tool.
Name Value Description
Form cell width
(px or %)
Width, in pixels or percentage, of the main
login page form, for example 240px, or 50%.
Specifies the width of the login
page form in pixels or as a
percentage of the frame.
Image cell width
(px or %)
Width, in pixels or percentage, of the main
login page image cell width, for example
240px, or 50%.
Specifies the width of the login
page image area in pixels or as a
percentage of the frame.
Main table
background color
A hex color code, for example, #123ABC.
When you click the color value, two color
choosers appear. One allows you to select a
color from 40 common color blocks, and the
other allows you to select any HTML color
from a more sophisticated color wheel. You
can also type the color value in as text.
Indicates the background color
for the login page main frame.
Page layout Form left, form center, or form right. Indicates the placement of the
login page form on the main
access policy page.
Image settings for access profiles
You can customize the following settings for the main page image with the Customization tool.
Name Value Description
Default image Width, in pixels or percentage, of the
main login page form, for example
240px, or 50%.
Specifies the width of the login page
form in pixels or as a percentage of
the frame.
BIG-IP Access Policy Manager: Customization
53

Name Value Description
Image left margin
(px)
Left side margin, in pixels, of the main
login page image, for example 24px.
Specifies the left margin of the login
page image.
Image right
margin (px)
Right side margin, in pixels, of the main
login page image, for example 24px.
Specifies the right margin of the login
page image.
Image top margin
(px)
Top-edge margin, in pixels, of the main
login page image, for example 24px.
Specifies the top margin of the login
page image.
Side image
alignment
Center, left, or right. Specifies the alignment of the image
within the side frame.
Form settings for access profiles
You can customize the following settings for the login form with the Customization tool.
Setting Value Description
Form alignment Center, Left, or Right. Specifies the alignment of the
form within the form frame.
Form background
color
A hex color code, for example, #123ABC. When
you click the color value, two color choosers
appear. One allows you to select a color from 40
common color blocks, and the other allows you
to select any HTML color from a more
sophisticated color wheel. You can also type the
color value in as text.
Indicates the background
color for the login page form.
Form height (px,
%, or auto)
Height value in pixels, as a percentage of the
frame, or auto, for example 240px, 40%, or
auto.
Specifies the height of the
login form in the login frame.
Form left margin
(px)
Left margin, in pixels, of the main login page
form, for example 24px.
Specifies the left margin of
the login form.
Form right margin
(px)
Right margin, in pixels, of the main login page
form, for example 24px.
Specifies the right margin of
the login form.
Form top margin
(px)
Top margin, in pixels, of the main login page
form, for example 24px.
Specifies the top margin of
the login form.
Form width (px or
%)
Form width in pixels or as a percentage of the
form frame, for example 250px or 50%.
Specifies the login form
width within the login frame.
Form element settings for access profiles
You can customize the following settings for the appearance of elements in the login form with the
Customization tool.
Name Value Description
Field alignment Center, Left, or Right. Specifies how fields align in the login form.
Field width (%) A percentage value, for
example 67%.
Specifies the width of fields in the login form, as a
percentage of the total size of the login form.
Header alignment Left, center, or right. Specifies the alignment of header elements in the
login form.
Personalizing Access Profile Appearance Settings
54

Name Value Description
Label alignment Left, center, or right. Specifies the alignment of form field labels in the
login form.
Label position Left or above. Specifies whether login form field labels are above or
to the left of their respective fields.
Label width (%) A percentage value, for
example 67%.
Specifies the width of field labels in the login form.
Advanced customization image settings
You set advanced customization images to make images you add through the image browser available to
your advanced customization pages.
The Advanced Customization Images properties pages allow you to set advanced customization images
from the image browser to associate with advanced customization image names. You can then use the
image name to add an image to an advanced customization page.
To select an image from the image browser to associate with an image for advanced customization, click
the button next to the current (or default) image name, and select Replace.
Personalizing page appearance for access profile logout settings
Personalize access profile logout settings to add advanced customization image support to logout pages
in the access profile.
1. On the Main tab, click Access > Profiles / Policies > Customization > Advanced.
The Customization tool appears in Advanced Customization view, displaying the Form Factor: Full/
Mobile Browser settings in the left pane.
2. To configure logout settings, in the left pane, expand the folders and navigate to Customization
Settings > Access Profiles > access_profile_name > Logout.
3. Customize the settings for advanced customization images.
4. After you customize settings, click the Save icon at the top of the Customization tool.
The access policy advanced customization page reflects your changes.
Advanced customization image settings
You set advanced customization images to make images you add through the image browser available to
your advanced customization pages.
The Advanced Customization Images properties pages allow you to set advanced customization images
from the image browser to associate with advanced customization image names. You can then use the
image name to add an image to an advanced customization page.
To select an image from the image browser to associate with an image for advanced customization, click
the button next to the current (or default) image name, and select Replace.
Personalizing page appearance for access policy pages
Personalize access policy pages to change advanced customization images for the login page in a specific
access policy, and to add advanced customization images for other access policy pages.
BIG-IP Access Policy Manager: Customization
55

1. On the Main tab, click Access > Profiles / Policies > Customization > Advanced.
The Customization tool appears in Advanced Customization view, displaying the Form Factor: Full/
Mobile Browser settings in the left pane.
2. On the Branding tab, click Customization Settings > Access Profiles > access_profile_name >
Access Policy, and select the folder for the item to customize.
3. Customize the settings for each individual element by clicking the element and changing the
displayed settings.
4. After you customize settings, click the Save icon at the top of the Customization tool.
The access policy pages reflect your changes.
Customization settings for access policy items
You can personalize the following settings for pages exposed to the user in an access policy.
Setting Value Description
General > Front
image
Image The image that appears in the image frame of the login page for an
access policy.
Advanced
Customization
Images
Images Each Advanced Customization Images properties page allows you to set
advanced customization images from the image browser to associate
with advanced customization image names. Each access policy item has
a page for advanced customization images. You can use these image
names to add an image to a page using advanced customization. To
select an image from the image browser to associate with an image for
advanced customization, click the button next to the current (or default)
image name, and select Replace.
Localizing messages for BIG-IP Edge Client
Configure localization for BIG-IP
®
Edge Client
®
to change the messages and text in the BIG-IP Edge
Client application.
1. On the Main tab, click Access > Profiles / Policies > Customization > General.
The Customization tool appears in General Customization view, displaying Form Factor: Full/
Mobile Browser settings.
2. From the Form Factor list at the top of the Customization tool, select BIG-IP Edge Client.
3. To select the BIG-IP Edge Client, in the left pane, expand the folders and navigate to Customization
Settings > Connectivity Profiles > name_of_connectivity_profile, and click BIG-IP Edge
Client.
4. At the top right of the Customization settings pane, select the Language for which to customize
localization messages for the BIG-IP Edge Client.
5. Customize the settings for BIG-IP Edge Client localization.
6. After you customize settings, click the Save icon at the top of the Customization tool.
Previewing customization changes
You must have customized an element with the Customization tool to see a preview of your changes.
After you customize and save an element with the Customization tool, you can preview the changes you
have made in the Preview window. The Preview window opens a separate browser window, and shows a
live update of changes as you save them.
Personalizing Access Profile Appearance Settings
56

1. On the Main tab, click Access > Profiles / Policies > Customization > General.
The Customization tool appears in General Customization view, displaying Form Factor: Full/
Mobile Browser settings.
2. On the menu bar, at right, click the Preview button.
3. Navigate to a page to view customizations.
For example, to navigate to a logon page and view the results of access profile branding
customization, in the Preview window expand Customization Settings > Access Profiles >
access_profile_name > Access Policy > Logon Pages, then click logon_page_name.
The Preview window shows the results of any customization changes.
Customization settings for BIG-IP Edge Client localization
You can customize the following settings for BIG-IP
®
Edge Client
®
customization with the
Customization tool.
Setting Value Description
About link A URL The text that appears as a link in the about area of the BIG-IP Edge
Client.
About text Text Text, typically copyright info or some other identifying information, that
appears in the about area of the BIG-IP Edge Client.
Application Name Text The application name, which appears in the status bar of the application.
BIG-IP Access Policy Manager: Customization
57
Personalizing Access Profile Appearance Settings
58

Personalizing Webtop Appearance Settings in General
View
What is webtop appearance personalization?
You can customize the appearance of a webtop, including the layout of the webtop screen, images, and
colors associated with the webtop.
Personalizing page appearance for webtops
Personalize webtop appearance settings to change the appearance and layout of specific webtops.
1. On the Main tab, click Access > Profiles / Policies > Customization > General.
The Customization tool appears in General Customization view, displaying Form Factor: Full/
Mobile Browser settings.
2. In the left pane, expand the folders and navigate to Customization Settings > Webtops >
webtop_name.
3. Customize the settings for each individual element by clicking the element and changing the
displayed settings.
4. After you customize settings, click the Save icon at the top of the Customization tool.
The webtop pages display your changes.
Webtop network connectivity status icons settings
You can customize the following icons for connectivity status on the webtop.
Name Value Description
Connected icon 16x16px image Specifies the image for the connected status light on the webtop.
Disconnected icon 16x16px image Specifies the image for the disconnected status light on the
webtop.
Waiting icon 32x32px image Specifies the image that displays while the client is connecting.
CSS sprite image setting
You can specify the portal access connection CSS sprites image with this setting.
Name Value Description
CSS Sprites image An image file Specifies the image to use for sprites to construct the webtop
windows.
Web Applications Session Timeout settings
Portal access timeouts cause special behavior on the portal access webtop screen. When the session
reaches the session timeout guard time, BIG-IP
®
Access Policy Manager
®
displays a session timeout
warning, and dims the screen behind the warning. Depending on the type of timeout, the user sees
different choices. You can use the following options to customize and configure session timeout options.
Name Value Description
'Inactivity Timeout'
background color
A hex color code, for example,
#123ABC. When you click the
color value, two color choosers
appear. One allows you to select a
color from 40 common color
blocks, and the other allows you to
select any HTML color from a
more sophisticated color wheel.
You can also type the color value in
as text.
Specifies the color of the background
that appears behind the session timeout
warning pop-up screen, when the
timeout occurs because the session is
inactive.
'Maximum Session
Timeout' background
color
A hex color code, for example,
#123ABC. When you click the
color value, two color choosers
appear. One allows you to select a
color from 40 common color
blocks, and the other allows you to
select any HTML color from a
more sophisticated color wheel.
You can also type the color value in
as text.
Specifies the color of the background
that appears behind the session timeout
warning pop-up screen, when the
timeout occurs because the session has
reached the maximum timeout.
Dialog background
color
A hex color code, for example,
#123ABC. When you click the
color value, two color choosers
appear. One allows you to select a
color from 40 common color
blocks, and the other allows you to
select any HTML color from a
more sophisticated color wheel.
You can also type the color value in
as text.
Indicates the page background color for
the timeout dialog box presented by
session inactivity timeouts or maximum
session timeouts.
Dialog x-size in pixels Number (px) Specifies the width, in pixels, of the
timeout dialog.
Dialog y-size in pixels Number (px) Specifies the height, in pixels, of the
timeout dialog.
Dimmed opacity
percentage
Number (1-100) Specifies the opacity of the background
that appears behind the session timeout
warning pop-up screen.
Guard time Number (seconds) Specifies the number of seconds before
timeout that the session timeout warning
pop-up screen appears.
Position of buttons
Background image
(hover) in CSS Sprites
image
Coordinates in px (-left, -top) Specifies the offset from the left and top
margin of the CSS Sprites image for the
button background image that appears
when the mouse hover.
Position of buttons
Background image in
CSS Sprites image
Coordinates in px (-left, -top) Specifies the offset from the left and top
margin of the CSS Sprites image for the
button background image.
Personalizing Webtop Appearance Settings in General View
60

Name Value Description
Position of header
Background image in
CSS Sprites image
Coordinates in px (-left, -top) Specifies the offset from the left and top
margin of the CSS Sprites image for the
background hover image.
Position of Left
Sidepart image
(hover) in CSS Sprites
image
Coordinates in px (-left, -top) Specifies the offset from the left and top
margin of the CSS Sprites image for the
left-side mouse hover image.
Position of Left
Sidepart image in CSS
Sprites image
Coordinates in px (-left, -top) Specifies the offset from the left and top
margin of the CSS Sprites image for the
left-side image.
Position of Logout
image in CSS Sprites
image
Coordinates in px (-left, -top) Specifies the offset from the left and top
margin of the CSS Sprites image for the
logout image.
Position of Right
Sidepart image
(hover) in CSS Sprites
image
Coordinates in px (-left, -top) Specifies the offset from the left and top
margin of the CSS Sprites image for the
right-side hover image.
Position of Right
Sidepart image in CSS
Sprites image
Coordinates in px (-left, -top) Specifies the offset from the left and top
margin of the CSS Sprites image for the
right-side image.
Position of Warning
image in CSS Sprites
image
Coordinates in px (-left, -top) Specifies the offset from the left and top
margin of the CSS Sprites image for the
warning image.
Web Applications Hometab settings
Portal access connections include an optional hometab, which provides buttons and links for working
with portal access and a URL bar. You can customize and configure the hometab with the following
options.
Name Value Description
Data entry
background color
A hex color code, for
example, #123ABC.
When you click the color
value, two color choosers
appear. One allows you
to select a color from 40
common color blocks,
and the other allows you
to select any HTML
color from a more
sophisticated color
wheel. You can also type
the color value in as text.
Specifies the color of the background that appears
behind the data entry fields on the hometab.
Data entry left
and right border
color
A hex color code, for
example, #123ABC.
When you click the color
value, two color choosers
appear. One allows you
Specifies the color of the borders for the data entry
area.
BIG-IP Access Policy Manager: Customization
61

Name Value Description
to select a color from 40
common color blocks,
and the other allows you
to select any HTML
color from a more
sophisticated color
wheel. You can also type
the color value in as text.
Data entry text
color
A hex color code, for
example, #123ABC.
When you click the color
value, two color choosers
appear. One allows you
to select a color from 40
common color blocks,
and the other allows you
to select any HTML
color from a more
sophisticated color
wheel. You can also type
the color value in as text.
Specifies the text color for data entry fields.
Font size (px) pixel value (for example,
14px)
Specifies the font size on the hometab.
Link color A hex color code, for
example, #123ABC.
When you click the color
value, two color choosers
appear. One allows you
to select a color from 40
common color blocks,
and the other allows you
to select any HTML
color from a more
sophisticated color
wheel. You can also type
the color value in as text.
Specifies the link text color on the hometab.
Link color
(hover)
A hex color code, for
example, #123ABC.
When you click the color
value, two color choosers
appear. One allows you
to select a color from 40
common color blocks,
and the other allows you
to select any HTML
color from a more
sophisticated color
wheel. You can also type
the color value in as text.
Specifies the color for links when the mouse hovers
over them.
Personalizing Webtop Appearance Settings in General View
62

Name Value Description
Position of
Background
image (hover) in
CSS Sprites
image
coordinates in px (-left, -
top)
Specifies the offset from the left and top margin of the
CSS Sprites image for the background image that
appears when the mouse hovers.
Position of
Background
image in CSS
Sprites image
coordinates in px (-left, -
top)
Specifies the offset from the left and top margin of the
CSS Sprites image for the background image.
Position of
divider image in
CSS Sprites
image
coordinates in px (-left, -
top)
Specifies the offset from the left and top margin of the
CSS Sprites image for the divider image.
Position of home
image in CSS
Sprites image
coordinates in px (-left, -
top)
Specifies the offset from the left and top margin of the
CSS Sprites image for the Home image.
Position of Left
Sidepart image in
CSS Sprites
image
coordinates in px (-left, -
top)
Specifies the offset from the left and top margin of the
CSS Sprites image for the left side image.
Position of
Logout image in
CSS Sprites
image
coordinates in px (-left, -
top)
Specifies the offset from the left and top margin of the
CSS Sprites image for the logout image.
Position of Open-
In-New-Window
image (hover) in
CSS Sprites
image
coordinates in px (-left, -
top)
Specifies the offset from the left and top margin of the
CSS Sprites image for the "open in new window"
image, when the mouse hovers over it.
Position of Open-
In-New-Window
image in CSS
Sprites image
coordinates in px (-left, -
top)
Specifies the offset from the left and top margin of the
CSS Sprites image for the "open in new window"
image.
Position of
Reduced toolbar
image (hover) in
CSS Sprites
image
coordinates in px (-left, -
top)
Specifies the offset from the left and top margin of the
CSS Sprites image for the minimized toolbar image,
when the mouse hovers over it.
Position of
Reduced toolbar
image in CSS
Sprites image
coordinates in px (-left, -
top)
Specifies the offset from the left and top margin of the
CSS Sprites image for the minimized toolbar image.
Position of Right
Sidepart image in
CSS Sprites
image
coordinates in px (-left, -
top)
Specifies the offset from the left and top margin of the
CSS Sprites image for the right side image.
BIG-IP Access Policy Manager: Customization
63

Name Value Description
Position of
Shrink image
(hover) in CSS
Sprites image
coordinates in px (-left, -
top)
Specifies the offset from the left and top margin of the
CSS Sprites image for the shrink image, when the
mouse hovers over it.
Position of
Shrink image in
CSS Sprites
image
coordinates in px (-left, -
top)
Specifies the offset from the left and top margin of the
CSS Sprites image for the shrink image.
Position of
Transparent
background
image in CSS
Sprites image
coordinates in px (-left, -
top)
Specifies the offset from the left and top margin of the
CSS Sprites image for the warning image.
Position of
Transparent
sidepart image in
CSS Sprites
image
coordinates in px (-left, -
top)
Specifies the offset from the left and top margin of the
CSS Sprites image for the transparent side image.
Set of elements to
be displayed
comma-separated list This is a comma-separated list of all the elements
displayed on the hometab. The hometab is arranged in
the order in which you specify these elements.
Elements can be used more than once. The default
specification is
shrink,divider,home,url,logout.
You can specify the following elements for the home
tab:
shrink
Specifies the hometab shrink element.
divider
Specifies a hometab field separator element.
url
Specifies the hometab URL box element.
home
Specifies the home link and text element.
logout
Specifies the logout link and image element.
Full webtop settings
You can configure the appearance of the full webtop with these settings.
Name Value Description
Header
message icon
Image Specifies the image for the header message icon on the full webtop. To change
the image, click the image popout button at the right of the field, then click
Replace. Select an image file to replace the image file. Note that you can add
files to the Customization tool in the image browser.
Personalizing Webtop Appearance Settings in General View
64
Name Value Description
Help
window logo
Image Specifies the image that a webtop user can click to open the webtop online help.
To change the image, click the image popout button at the right of the field, then
click Replace. Select an image file to replace the image file. Note that you can
add files to the Customization tool in the image browser.
Toolbar - go
icon
Image Specifies the image that a user clicks to go to a site from the webtop toolbar. To
change the image, click the image popout button at the right of the field, then
click Replace. Select an image file to replace the image file. Note that you can
add files to the Customization tool in the image browser.
Toolbar -
help icon
Image Specifies the image that a user clicks to open the help from the webtop toolbar.
To change the image, click the image popout button at the right of the field, then
click Replace. Select an image file to replace the image file. Note that you can
add files to the Customization tool in the image browser.
Full webtop popup window setting
You can add the company logo to the full webtop with this setting.
Name Value Description
Company logo Image Specifies the image for the company logo on the full webtop. To
change the image, click the image popout button at the right of the
field, then click Replace. Select an image file to replace the image
file. Note that you can add files to the Customization tool in the
image browser.
Show Statistics
Table
on or off Specifies whether to display make a table with connection
statistics available for display on the full webtop.
Tray Icon Set null, F5, or
Generic
Specifies the icon to display in the tray.
Advanced customization image settings
You set advanced customization images to make images you add through the image browser available to
your advanced customization pages.
The Advanced Customization Images properties pages allow you to set advanced customization images
from the image browser to associate with advanced customization image names. You can then use the
image name to add an image to an advanced customization page.
To select an image from the image browser to associate with an image for advanced customization, click
the button next to the current (or default) image name, and select Replace.
BIG-IP Access Policy Manager: Customization
65
Personalizing Webtop Appearance Settings in General View
66

Personalizing Images for Resources in Advanced View
What is resource image personalization?
With image personalization, you can change the image displayed for a resource on the webtop.
Personalizing resource images
Personalize webtop resource images to provide customized icons on the full webtop for resources.
1. On the Main tab, click Access > Profiles / Policies > Customization > General.
The Customization tool appears in General Customization view, displaying Form Factor: Full/
Mobile Browser settings.
2. In the left pane on the Branding tab, select the resource type folder for App Tunnels, Network
Access, Remote Desktops, Portal Access, or Webtop Links.
3. Select the resource name.
4. At the top right of the Customization settings pane, select the Language for which to customize the
caption and description for full and mobile browsers.
5. In the Image area, click the icon at the right of the field to show the current icon, then click Replace
and select a new image.
6. After you customize settings, click the Save icon at the top of the Customization tool.
Personalizing Images for Resources in Advanced View
68

Localizing Messages and Images in General View
What is full and mobile browser localization?
With localization, you can change the text and messages for web browsers and mobile clients for any
language defined in an access profile. The Customization tool provides a tree view that you can use to
navigate through the hierarchy of access profile items, in order to localize messages.
Localizing messages for common access profile settings
Localize common access profile pages to configure headers, footers, and standard warnings and text
messages for a specific language.
1. On the Main tab, click Access > Profiles / Policies > Customization > General.
The Customization tool appears in General Customization view, displaying Form Factor: Full/
Mobile Browser settings.
2. In the left pane, select the Text tab.
A navigation tree displays in the left pane.
3. In the left pane, expand the folders and navigate to Customization Settings > Access Profiles >
name_of_access_profile > Common.
4. At the top right of the Customization settings pane, select the Language for which to customize
localization messages for full and mobile browsers.
5. Click Page Header Settings to provide a customized disconnection message.
6. Click Page Footer Settings to provide a customized footer for access profile pages.
7. Click Other Settings to configure the following settings.
Option Description
JavaScript disabled warning Specifies the warning when JavaScript is not enabled in the browser.
New session link Specifies the link text to start a new session.
New session text Specifies the text that appears before the new session link.
8. After you customize settings, click the Save icon at the top of the Customization tool.
Localizing layout and content of the logon page
Customize the layout and content of components that appear on the logon page when the access policy is
starting by customizing the framework pages.
Note: Use an HTML editor to edit the HTML code for the framework installation. The code appears
unformatted and without line breaks in the Customization tool.
1. On the Main tab, click Access > Profiles / Policies > Customization > General.
The Customization tool appears in General Customization view, displaying Form Factor: Full/
Mobile Browser settings.
2. In the left pane, select the Text tab.
A navigation tree displays in the left pane.

3. In the left pane, expand the folders and navigate to Customization Settings > Access Profiles >
name_of_access_profile and click Framework Installation.
4. At the top right of the Customization settings pane, select the Language for which to customize
localization messages for full and mobile browsers.
5. Customize the settings for the logon page elements.
6. After you customize settings, click the Save icon at the top of the Customization tool.
Framework installation settings
You can customize the following settings for general page style with the Customization tool.
Name Value Description
ActiveX install
options screen
Formatted
HTML text
Specifies the page text and links that prompt a user to install a new
ActiveX
®
browser component. This screen appears for Windows
®
Internet Explorer
®
users only.
Allow browser
plugin install
screen
Formatted
HTML text
Specifies the page text and links displayed when the user's browser
does not currently allow software installation. This page contains
information about how to enable software installation, and links to
continue to install plug-ins or to continue without installing the
browser plug-ins.
Allow browser
plugin install
screen (Linux)
Formatted
HTML text
Specifies the page text and links displayed when the user's browser
does not currently allow software installation. This page contains
information about how to enable software installation, and links for
continuing to install plug-ins or to continue without installing the
browser plug-ins. This screen appears for Linux
®
operating systems
and browsers.
Browser plugin
install with
manual install
options screen
Formatted
HTML text
Specifies the page text and links that prompt a user to install a new
browser plug-in component. This screen provides manual download
and installation options. This screen appears for most operating
systems and browsers.
Browser plug-in
install with
manual install
options screen
(Linux)
Formatted
HTML text
Specifies the page text and links that prompt a user to install a new
browser plug-in component. This screen provides manual download
and installation options. This screen appears for Linux operating
systems and browsers.
Java applet
install failure
screen
Formatted
HTML text
Specifies the page text and links that appear when the installation of
software with a Java
™
applet fails. This page allows the user
options to restart the session, download and manually install the
software, or continue without installing software. This page appears
only on non-Windows systems.
Java applet
install screen
Formatted
HTML text
Specifies the text that appears on a page with a Java applet to install
a new browser plugin. This page appears only on non-Windows
systems. Java applet install started screen on Safari
®
browser
specifies the page text and links that appear when the Java applet is
installing software. This page appears only on Macintosh
®
systems
with the Safari web browser.
Java applet
install started
screen
Formatted
HTML text
Specifies the page text and links that appear when the Java applet is
installing software. This page appears only on non-Windows
systems.
Localizing Messages and Images in General View
70
Endpoint security settings
You can customize the following settings for endpoint security messages that appear in web browsers and
on mobile devices with the Customization tool.
Name Value Description
Antivirus check message Text Specifies the message displayed while the antivirus check action
is checking the system.
Cache and session control
ActiveX loading message
Text Specifies the message displayed when the cache and session
control ActiveX
®
control is loading and the user may be prompted
to allow cache and session control installation.
Cache and session control
ActiveX missing message
Text Specifies the text displayed when the client requires ActiveX to
start the cache and session control plug-in, and ActiveX is not
available or enabled.
Cache and session control
continue link
Text Specifies the link text that the user clicks to continue when the
cache and session control plug-in cannot load.
Cache and session control
blocked popup message
Text Specifies the message displayed when a popup blocker is enabled.
The message includes information on how to allow popups from
the BIG-IP
®
device. Note: We recommend that you use an HTML
editor to edit the HTML code for this box. The code appears
unformatted and without line breaks in the box.
Cache and session control
failure message
Text Specifies the message displayed when the cache and session
control plug-in fails to start. The message includes information on
possible causes. Note: We recommend that you use an HTML
editor to edit the HTML code for this box. The code appears
unformatted and without line breaks in the box.
Cache and session control
loading message
Text Specifies the text displayed while the cache and session control
plug-in starts. Note: We recommend that you use an HTML editor
to edit the HTML code for this box. The code appears
unformatted and without line breaks in the box.
Checking client message Text Specifies the message displayed when the system is checking the
client for an unspecified action.
Continue link Text Specifies the link text that the user clicks to continue after
opening a new browser window.
Continue without
endpoint inspection
message
Text Specifies the messages displayed when client-side security checks
fail. You can specify link text to cancel and link text to continue.
The continue link allows the client to continue on the fallback
branch.
Downloading message
(appended to other
messages)
Text Specifies the message displayed while the client is downloading
software components.
File check message Text Specifies the message displayed while the file check action is
checking the system.
Firewall check message Text Specifies the message displayed while the firewall check action is
checking the system.
BIG-IP Access Policy Manager: Customization
71

Name Value Description
Installing message
(appended to other
messages)
Text Specifies the message displayed while the client is installing
software.
Machine check info
message
Text Specifies the message displayed when the client is collecting
machine info for the machine info check.
New browser window
required message
Text Specifies the message displayed when browser settings have
changed, and the user must open a new browser window to
continue.
Process check message Text Specifies the message displayed while the process check action is
checking the system.
Virtual keyboard hide
keyboard link
Text Specifies the link text that the user clicks to hide the virtual
keyboard.
Virtual keyboard label Text Specifies the label for the virtual keyboard.
Windows Group Policy
action message
Text Specifies the message displayed while the Windows
®
group
policy action is configuring the system.
Windows Info check
message
Text Specifies the message displayed while the Windows information
check action is checking the system.
Windows machine
certificate check message
Text Specifies the message displayed while the Windows machine
certificate check action is checking the system.
Windows Protected
Workspace action message
Text Specifies the message displayed while the Protected Workspace
action is starting the protected workspace.
Windows Protected
Workspace continue link
Text Specifies the link text specified that the user can click to continue
without starting protected workspace.
Windows Protected
Workspace continuing:
extended message
Text Specifies the message displayed when the protected workspace
starts, and the system requires some time to display the protected
workspace.
Windows Protected
Workspace logon: short
message
Text Specifies the message displayed on the client when protected
workspace resumes the logon procedure after starting.
Windows Protected
Workspace started: close
browser message
Text Specifies the message displayed when protected workspace has
successfully started,
Windows Registry check
message
Text Specifies the message displayed while the registry check action is
checking the system.
Localizing layout and content of logout pages
Customize the layout and content of components that appear on logout pages when the access policy or
user ends a session.
1. On the Main tab, click Access > Profiles / Policies > Customization > General.
The Customization tool appears in General Customization view, displaying Form Factor: Full/
Mobile Browser settings.
2. In the left pane, select the Text tab.
A navigation tree displays in the left pane.
Localizing Messages and Images in General View
72

3. In the left pane, expand the folders and navigate to Customization Settings > Access Profiles >
name_of_access_profile > Logout and click General.
4. At the top right of the Customization settings pane, select the Language for which to customize
localization messages for full and mobile browsers.
5. Customize the settings for the logout elements.
6. After you customize settings, click the Save icon at the top of the Customization tool.
Logout component settings
You can customize the following settings for logout messages that appear in web browsers and on mobile
devices with the Customization tool.
Name Value Description
Access not found page
reject message
Text Specifies the message displayed when the access policy cannot be
completed correctly.
Access not found page
title
Text Specifies the title for the page displayed when the access policy
cannot be completed correctly.
ACL denied page
reject message
Text Specifies the message displayed when the user attempts to access a
page to which access is specifically denied by an access control list.
ACL denied page
return link message
Text Specifies the link text on the ACL Denied page that the user can click
to return to the previous page.
ACL denied page title Text Specifies the title text on the ACL Denied page.
Error message Text Provides a more specific error message that follows the error title,
which indicates that a problem may have occurred during access
policy evaluation.
Error title Text Specifies text that indicates that the session could not start.
New session link Text Specifies the text label for the hypertext link to start a new session,
such as click here. This link follows the New session text.
New session text Text Specifies text that precedes the link a user clicks to start a new
session.
Session expired
message
Text Specifies the message that appears when the user session expires due
to inactivity.
Session ID title Text Specifies the text that precedes the session number when an error
occurs.
Success message Text Specifies the text displayed when the user logs out successfully.
Success title Text Specifies the text displayed when a session is finished.
Thank you message Text Specifies a thank you message displayed for network access users
after logout.
Localizing error messages
Customize the error messages that appear when the client or browser encounters errors while processing
the login page or running access policy sessions.
1. On the Main tab, click Access > Profiles / Policies > Customization > General.
BIG-IP Access Policy Manager: Customization
73

The Customization tool appears in General Customization view, displaying Form Factor: Full/
Mobile Browser settings.
2. In the left pane, select the Text tab.
A navigation tree displays in the left pane.
3. In the left pane, expand the folders and navigate to Customization Settings > Access Profiles >
name_of_access_profile > Error Messages > error_message_category.
4. At the top right of the Customization settings pane, select the Language for which to customize error
messages for full and mobile browsers.
5. Customize the settings for the error messages.
6. After you customize settings, click the Save icon at the top of the Customization tool.
General error settings
You can customize the following settings for general error messages that appear in web browsers and on
mobile devices with the Customization tool.
Name Value Description
Access denied by ACL Text Specifies the error displayed when an ACL entry denies access.
Client IP address
changed
Text Specifies the error displayed if the client IP address changes while
the session is in progress.
Invalid Network Access
resource
Text Specifies the error displayed when the access profile cannot find a
valid Network Access resource.
Invalid Session ID Text Specifies the error displayed when the Session ID is not correct.
This may occur because the session has timed out.
Request error Text Specifies the error displayed when there is a malformed request or
there is another problem with a request.
Server in maintenance
mode
Text Specifies the error displayed when a session cannot start because
the server is performing maintenance.
Session ID is not found Text Specifies the error displayed when cookies are disabled, and this
causes the session ID to be unavailable in the request.
Stateful failover couldn’t
be supported
Text Specifies the error displayed when the access policy has changed
and due to failover issues, the admin must log in again.
System is not licensed Text Specifies the error displayed when a session cannot start because
the system is not licensed.
Terminated Session Text Specifies the error displayed when the session is terminated by the
server.
Unsupported User-Agent Text Specifies the error displayed when the browser user agent is not
supported in the policy.
User limit reached Text Specifies the error displayed when the resource cannot be assigned
because the limit on the number of sessions has been reached.
AAA error settings
You can customize the following settings for AAA error messages that appear in web browsers and on
mobile devices with the Customization tool.
Localizing Messages and Images in General View
74

Name Value Description
AD domain password change
failure
Text Specifies the text displayed when the attempt to change the
Active Directory password failed.
AD domain password change
failure with extended error
Text Specifies the text displayed when the attempt to change the
Active Directory password failed, and includes the error
message from the Active Directory component.
AD domain password expired Text Specifies the text displayed when the Active Directory
domain password has expired.
AD domain password expired
with extended error
Text Specifies the text displayed when the Active Directory
password has expired, and includes the error message from
the Active Directory component.
Incorrect AD username or
password with extended error
Text Specifies the text displayed when the Active Directory user
name or password is incorrect, and includes the error message
from the Active Directory component.
Incorrect LDAP username or
password with extended error
Text Specifies the text displayed when the LDAP user name or
password is incorrect, and includes the error message from the
LDAP component.
Incorrect OAM username or
password with extended error
Text Specifies the text displayed when the OAM user name or
password is incorrect, and includes the error message from the
OAM component.
Incorrect RADIUS username
or password with extended
error
Text Specifies the text displayed when the RADIUS user name or
password is incorrect, and includes the error message from the
RADIUS component.
Incorrect username or
password
Text Specifies the text displayed when the user name or password
is incorrect.
OAM authentication error Text Specifies the text displayed when there is an OAM
authentication error.
OAM authorization error Text Specifies the text displayed when there is an OAM
authorization error.
OAM internal error Text Specifies the text displayed when there is an invalid setup for
the OAM server.
OAM SDK initialization error Text Specifies the text displayed when there is an OAM error
related to the F5 webgate and OAM SDK.
RADIUS challenge failure Text Specifies the text displayed when a RADIUS challenge fails.
RADIUS challenge failure
with extended error
Text Specifies the text displayed when a RADIUS challenge fails,
and includes the error message from the RADIUS component.
SecurID logon failure with
retry
Text Specifies the text displayed when the RSA SecurID logon or
password is incorrect.
SecurID logon failure with
retry with extended error
Text Specifies the text displayed when the RSA SecurID logon or
password is incorrect, and includes the error message from the
SecurID component.
Installation error settings
You can customize the following settings for installation error messages that appear in web browsers and
on mobile devices with the Customization tool.
BIG-IP Access Policy Manager: Customization
75

Name Value Description
ActiveX is not allowed or
unsupported
Text Specifies the error displayed when the access policy attempts to
load an ActiveX
®
control in Microsoft
®
Internet Explorer
®
and
ActiveX is not enabled.
Installation failure Text Specifies the error displayed when installation of a browser
component fails.
Resource error settings
You can customize the following settings for resource error messages that appear in web browsers and on
mobile devices with the Customization tool.
Name Value Description
ACL does not exist Text Specifies the error text displayed when the assigned ACL does not
exist.
Inconsistent host
replacement string
Text Specifies the error text displayed when portal access resources
configured in Minimal Patching mode contain inconsistent host
replace strings.
Incorrect resource
assigned (Network
Access)
Text Specifies the error text displayed when a resource assign action is
configured to assign a portal access webtop with a network access
resource. Webtop and resource types must match.
Incorrect resource
assigned (Portal Access)
Text Specifies the error text displayed when a resource assign action is
configured to assign a network access webtop with a portal access
resource.
Invalid Dynamic ACL
Assignment
Text Specifies the error text displayed when the dynamic ACL is
incorrectly assigned or configured.
Invalid host for App
Tunnel resource
Text Specifies the error text displayed when a host that the app tunnel
attempts to start a connection to does not respond correctly.
Invalid host for Remote
Desktop resource
Text Specifies the error text displayed when the host that a remote
desktop resource attempts to start a connection to does not
respond correctly.
Invalid Portal Access
start URI
Text Specifies the error text displayed when the portal access webtop
has an invalid start URI.
Invalid Static ACL
assignment
Text Specifies the error text displayed when a static ACL is not
configured correctly.
Missing Network Access
resource
Text Specifies the error text displayed when a network access webtop is
configured with no network access resource. Webtop and resource
types must match.
More than one Network
Access resource
Text Specifies the error text displayed when more than one network
access resource is assigned to an access policy branch.
Network Access and
Portal Access resources
assigned
Text Specifies the error text displayed when both network access and
portal accesss resources are assigned to an access policy branch.
Portal Access resources
have inconsistent
patching methods
Text Specifies the error text displayed when multiple portal accesss are
assigned to an access policy branch, with different patching
methods. All portal access resources assigned to an access policy
branch must use the same patching method.
Localizing Messages and Images in General View
76

Name Value Description
Resource does not exist Text Specifies the error text displayed when the assigned resource does
not exist.
Webtop does not exist Text Specifies the error text displayed when the assigned webtop does
not exist.
Webtop required Text Specifies the error text displayed when a webtop is required, but
not assigned.
Dynamic configuration error settings
You can customize the following settings for dynamic configuration error messages that appear in web
browsers and on mobile devices with the Customization tool.
Name Value Description
Invalid Dynamic ACL entries Text Specifies the text displayed when a dynamic ACL contains
invalid entries.
Other configuration error settings
You can customize the following settings for other errors that appear in web browsers and on mobile
devices with the Customization tool.
Name Value Description
Unknown error Text Specifies the text displayed when an unknown error occurs.
Localizing logon pages
Customize the messages that appear for a specific logon page or HTTP 401 response page in an access
policy.
1. On the Main tab, click Access > Profiles / Policies > Customization > General.
The Customization tool appears in General Customization view, displaying Form Factor: Full/
Mobile Browser settings.
2. In the left pane, select the Text tab.
A navigation tree displays in the left pane.
3. To locate a logon page, in the left pane, expand the folders and navigate to Customization Settings >
Access Profiles > name_of_access_profile > Access Policy > Logon Pages.
4. Select the folder for the logon page or HTTP 401 response action.
5. Select the General settings.
6. At the top right of the Customization settings pane, select the Language for which to customize logon
pages.
7. Customize the settings for the logon pages.
8. After you customize settings, click the Save icon at the top of the Customization tool.
Logon page settings
You can customize the following settings for logon pages that appear in web browsers and on mobile
devices with the Customization tool.
BIG-IP Access Policy Manager: Customization
77

Name Value Description
Form Header Text Text Specifies the text that appears at the top of the logon screen.
HTTP 401 Response Text Specifies the text displayed when an HTTP 401 authentication error
occurs.
Logon Button Text Specifies the text that appears on the logon button, which a user
clicks to post the defined logon agents.
Logon Page Input
Field # (1-5)
Text These fields specify the text that is displayed on the logon page for
each of the logon page agents, defined in the Logon Page Agent
screen area.
New Password Prompt Text Specifies the prompt displayed when a new Active Directory
password is requested.
Password and
Password Verification
do not Match
Text Specifies the prompt displayed to confirm the new password when a
new Active Directory password is requested.
Save Password
Checkbox
Text Specifies the text that appears adjacent to the check box that allows
users to save their passwords in the logon form. This field is used
only in the secure access client, and not in the web client.
Verify Password
Prompt
Text Specifies the prompt displayed to confirm the new password when a
new Active Directory password is requested.
Localizing decision pages
Customize the messages that appear for decision pages.
1. On the Main tab, click Access > Profiles / Policies > Customization > General.
The Customization tool appears in General Customization view, displaying Form Factor: Full/
Mobile Browser settings.
2. In the left pane, select the Text tab.
A navigation tree displays in the left pane.
3. To locate decision pages, in the left pane, expand the folders and navigate to Customization
Settings > Access Profiles > name_of_access_profile > Access Policy > Decision Pages.
4. Select the folder for the decision box page.
5. Click the General or Advanced Customization Images setting.
6. At the top right of the Customization settings pane, select the Language for which to customize
decision pages.
7. Customize the settings for the decision pages.
8. After you customize settings, click the Save icon at the top of the Customization tool.
General decision page settings
You can customize the following settings for decision pages that appear in web browsers and on mobile
devices with the Customization tool.
Name Value Description
Field 1 Image Image Specifies the image that appears in the first option field on the decision page.
Click the icon at the right of the field to view the image. Click Replace to
change the image.
Localizing Messages and Images in General View
78
Name Value Description
Field 2 Image Image Specifies the image that appears in the second option field on the decision page.
Click the icon at the right of the field to view the image. Click Replace to
change the image.
Advanced customization image settings
You set advanced customization images to make images you add through the image browser available to
your advanced customization pages.
The Advanced Customization Images properties pages allow you to set advanced customization images
from the image browser to associate with advanced customization image names. You can then use the
image name to add an image to an advanced customization page.
To select an image from the image browser to associate with an image for advanced customization, click
the button next to the current (or default) image name, and select Replace.
Localizing message box pages
Customize the message boxes that appear for message box pages.
1. On the Main tab, click Access > Profiles / Policies > Customization > General.
The Customization tool appears in General Customization view, displaying Form Factor: Full/
Mobile Browser settings.
2. In the left pane, select the Text tab.
A navigation tree displays in the left pane.
3. To locate message box pages, in the left pane, expand the folders and navigate to Customization
Settings > Access Profiles > name_of_access_profile > Access Policy > Message Pages.
4. Select the folder for the message box page.
5. Click Advanced Customization Images.
6. At the top right of the Customization settings pane, select the Language for which to customize
message pages.
7. Customize the settings for the message box pages.
8. After you customize settings, click the Save icon at the top of the Customization tool.
Advanced customization image settings
You set advanced customization images to make images you add through the image browser available to
your advanced customization pages.
The Advanced Customization Images properties pages allow you to set advanced customization images
from the image browser to associate with advanced customization image names. You can then use the
image name to add an image to an advanced customization page.
To select an image from the image browser to associate with an image for advanced customization, click
the button next to the current (or default) image name, and select Replace.
Localizing ending pages
Customize the ending pages that appear in access policies.
1. On the Main tab, click Access > Profiles / Policies > Customization > General.
BIG-IP Access Policy Manager: Customization
79
The Customization tool appears in General Customization view, displaying Form Factor: Full/
Mobile Browser settings.
2. In the left pane, select the Text tab.
A navigation tree displays in the left pane.
3. To locate ending pages, in the left pane, expand the folders and navigate to Customization Settings >
Access Profiles > name_of_access_profile > Access Policy > Ending Pages.
4. Select the folder for the message box page.
5. Click Advanced Customization Images.
6. At the top right of the Customization settings pane, select the Language for which to customize
ending pages.
7. Customize the settings for the ending pages.
8. After you customize settings, click the Save icon at the top of the Customization tool.
Advanced customization image settings
You set advanced customization images to make images you add through the image browser available to
your advanced customization pages.
The Advanced Customization Images properties pages allow you to set advanced customization images
from the image browser to associate with advanced customization image names. You can then use the
image name to add an image to an advanced customization page.
To select an image from the image browser to associate with an image for advanced customization, click
the button next to the current (or default) image name, and select Replace.
Localizing Messages and Images in General View
80
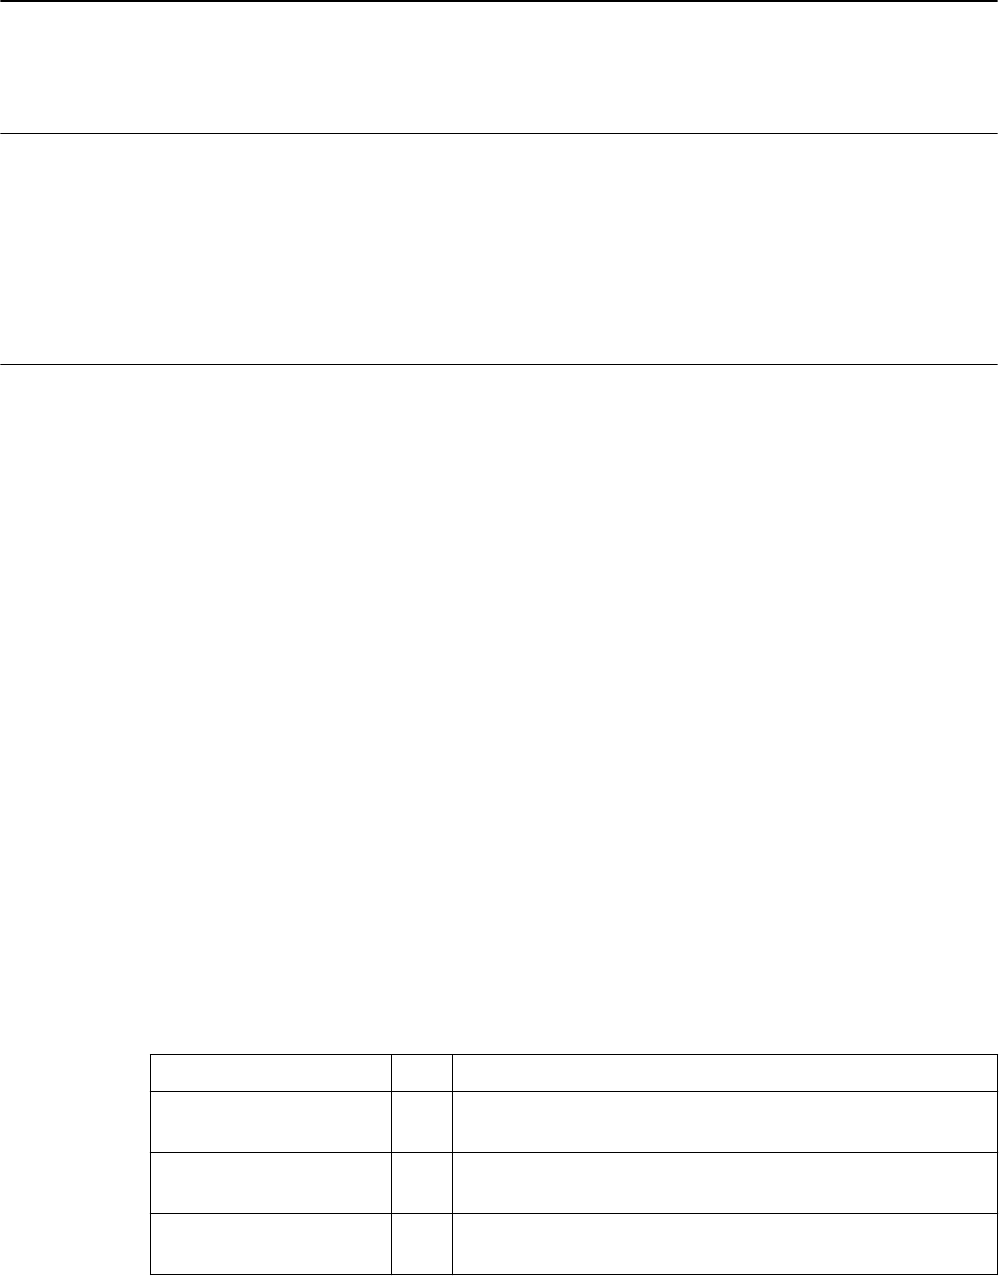
Localizing Webtops in General View
What is webtop localization?
You can customize webtop settings, including the messages displayed when starting and closing the
connection, and any error messages, for any language supported on the server. A webtop must be
assigned to an access profile to see and customize the webtop for the languages assigned to the access
profile. If you customize a webtop that is not assigned to any access profile, you can customize the
default set of languages only.
Localizing webtops
Localize webtops to configure images, text, and layout for a webtop in a specific language.
1. On the Main tab, click Access > Profiles / Policies > Customization > General.
The Customization tool appears in General Customization view, displaying Form Factor: Full/
Mobile Browser settings.
2. In the left pane, select the Text tab.
A navigation tree displays in the left pane.
3. In the left pane, expand the folders and navigate to Customization Settings > Access Profiles >
name_of_access_profile > Common.
4. At the top right of the Customization settings pane, select the Language for which to customize
localization messages for full and mobile browsers.
5. Click Page Header Settings to provide a customized disconnection message.
6. Click Page Footer Settings to provide a customized footer for access profile pages.
7. Click Other Settings to configure the following settings.
Option Description
JavaScript disabled warning Specifies the warning when JavaScript is not enabled in the browser.
New session link Specifies the link text to start a new session.
New session text Specifies the text that appears before the new session link.
8. After you customize settings, click the Save icon at the top of the Customization tool.
Webtop form and message settings
You can customize the following settings for form and message settings that appear on webtops, in web
browsers and on mobile devices, with the Customization tool.
Name Value Description
App Tunnels conflict with
Network Access message
Text Specifies the message that appears when an application tunnel is
open and the user attempts to start a network access tunnel.
Connected message Text Specifies the message displayed on the login screen when the
client is connected.
Connecting message Text Specifies the message displayed on the login screen when the
client is connecting.

Name Value Description
Connection already
established error message
Text Specifies the message displayed when a connection is already
established.
Connection closed by
server error message
Text Specifies the error message displayed when an error occurs on the
server, and causes the session to fail. Check the log files for more
specific information.
Connection dropped error
message
Text Specifies the message displayed when an error occurs, and the
connection is dropped. Check the log files for more specific
information.
Connection failed to start
error message
Text Specifies the message displayed when the connection cannot start.
Check the log files for more specific information.
Connection to server
could not start error
message
Text Specifies the error message displayed when the client cannot
make a connection to the server. Check the log files for more
specific information.
Disconnected due to
configuration error
message
Text Specifies the error displayed when a configuration error causes
the session to stop and the client to be disconnected.
Disconnected message Text Specifies the message displayed on the login screen when the
client is disconnected.
Downloading progress bar
(caption)
Text Specifies the caption displayed above the progress bar when client
components are downloading.
F5 plug-in not installed or
incompatible plug-in error
message
Text Specifies the error message displayed when the F5 plug-in is not
installed or is incompatible with the current server. This error
occurs on Macintosh
®
and Linux clients only.
Failed message Text Specifies the message displayed on the login screen when the
connection fails.
Initialization message Text Specifies the message displayed on the login screen when the
login sequence is initializing.
Installation error pppd
daemon not found in /usr/
sbin directory (mac/linux)
Text Specifies the error message displayed when the pppd daemon
cannot start. This error occurs on Macintosh and Linux clients
only.
Installation message Text Specifies the message displayed on the login screen when the
login sequence is installing software.
Loading message Text Specifies the message displayed on the login screen when the
login sequence is starting installed software.
Network Access client
internal error message
Text Specifies the message displayed when an internal client error
occurs and causes the network access session to fail. Check the
log files for more specific information.
Network Access conflict
with App Tunnels message
Text Specifies the message that appears when a network access tunnel
is open and the user attempts to start an app tunnel.
Plugin installation
incomplete error message
Text Specifies the message displayed when the F5 plugin is not
installed correctly. This error occurs on Linux clients only.
pppd daemon did not
start error message (mac/
linux)
Text Specifies the error message displayed when the pppd daemon
cannot start. This error occurs on Macintosh and Linux clients
only.
Localizing Webtops in General View
82

Name Value Description
Queued message Text Specifies the message displayed on the login screen when the
client is queued to make a connection.
Reconnecting message Text Specifies the message displayed on the login screen when the
client is reconnecting.
Request local credentials
during linux installation
Text Specifies the code that creates a local credentials request screen.
This is required for Linux systems only. We recommend that you
edit this code in an HTML editor to make the layout easier to
view.
Note: Do not add manual line breaks to the webtop form; this
causes errors. Use the <br> tag to add a line break to the code.
Routing table change
caused disconnect error
message
Text Specifies the error displayed when a change to the client routing
table causes the session to stop and the client to be disconnected.
Secure connection stopped
message
Text Specifies the message displayed when the secure connection is
stopped by the client. Check the log files for more specific
information.
Toolbar text Text Specifies the text that appears in the webtop toolbar.
BIG-IP Edge Client webtop settings
You can customize the following settings for the BIG-IP
®
Edge Client
®
webtop, in web browsers and on
mobile devices, with the Customization tool.
Name Value Description
Connection Established
notification
Text Specifies the message that appears in the BIG-IP Edge Client
when a connection is established.
Disconnected due to
configuration error
notification
Text Specifies the message displayed in the BIG-IP Edge Client
when the connection is closed due to a configuration error.
New BIG-IP Edge Client
available message
Text Specifies the message displayed during connection, when a
newer version of the BIG-IP Edge Client is available from the
server.
Routing table change causes
disconnect notification
Text Specifies the message displayed when a change in the routing
table on the client machine causes the client to disconnect.
Settings for showing and hiding information on webtops
You can customize the following show and hide settings for the webtop, in web browsers and on mobile
devices, with the Customization tool.
Name Value Description
Disable logging link Text Specifies the link text to disable logging.
Enable logging link Text Specifies the link text to enable logging.
Hide label in table caption
link
Text Specifies the text on the webtop screen that the user clicks to
hide a table caption.
BIG-IP Access Policy Manager: Customization
83

Name Value Description
Show IP address
configuration link
Text Specifies the text on the webtop screen that the user clicks to
show the IP address configuration.
Show label in table caption
link
Text Specifies the text on the webtop screen that the user clicks to
show a table caption.
Show log file link Text Specifies the text on the secure access screen that the user
clicks to show the log file.
Show routing table link Text Specifies the text on the webtop screen that the user clicks to
show the routing table.
Status element Text Specifies the text on the webtop screen that heads the status
section.
Webtop logout and relaunch settings
You can customize the following settings for logout and relaunch messages that appear on webtops, in
web browsers and on mobile devices, with the Customization tool.
Name Value Description
Logout link Text Specifies the link text on the webtop screen that the user clicks to log
out.
Relaunch
applications link
Text Specifies the link text on the webtop screen that the user clicks to
restart the applications that are defined in the network access launch
applications section.
Webtop activity section setting
You can customize the following setting for the activity section.
Name Value Description
Activity section caption Text Specifies the caption for the section that shows client and server
activity.
Webtop new session settings
You can customize the following settings for new sessions on the webtop.
Name Value Description
New session link Text Specifies the link text on the webtop screen that the user clicks to start a new
session.
New session text Text Specifies the text that precedes the new session link.
Webtop web applications session timeout settings
You can localize the timeout settings for portal access applications that are displayed on the webtop.
Name Value Description
Header message (idle timeout) Text Specifies the message displayed when the idle timeout is
reached for a portal access session.
Localizing Webtops in General View
84

Name Value Description
Header message (maximum
timeout)
Text Specifies the message displayed when the maximum session
time timeout is reached for a portal access session.
Postfix text for 'remaining
time' message (idle timeout)
Text Specifies the text after the seconds display in the remaining
time warning for a portal access idle timeout.
Postfix text for 'remaining
time' message (maximum
timeout)
Text Specifies the text after the seconds display in the remaining
time warning for a portal access maximum session time
timeout.
Postfix text for seconds in
'remaining time' message (idle
timeout)
Text Specifies the text after the number of seconds remaining
when an idle timeout is reached.
Postfix text for seconds in
'remaining time' message
(maximum timeout)
Text Specifies the text after the number of seconds remaining
when a maximum session time timeout is reached.
Prefix text for 'remaining
time' message (idle timeout)
Text Specifies the message displayed before the seconds and
postfix message display in the remaining time warning for a
portal access idle timeout.
Prefix text for 'remaining
time' message (maximum
timeout)
Text Specifies the text before the seconds and postfix message
display in the remaining time warning for a portal access
maximum session time timeout.
Prefix text for seconds in
'remaining time' message (idle
timeout)
Text Specifies the text displayed before the number of seconds
remaining when an idle timeout is reached.
Prefix text for seconds in
'remaining time' message
(maximum timeout)
Text Specifies the text displayed before the number of seconds
remaining when a maximum session time timeout is reached.
Text for 'disconnect' button Text Specifies the text on the button that the user clicks to
disconnect the session.
Text for 'disconnect' button
tooltip
Text Specifies the tooltip text for the button that the user clicks to
disconnect the session.
Text for 'stay connected'
button (idle timeout)
Text Specifies the text on the button that the user clicks to stay
connected to the session in the event of an idle timeout.
Text for 'stay connected'
button (maximum timeout)
Text Specifies the text on the button that the user clicks to stay
connected to the session in the event of a maximum session
time timeout.
Text for 'stay connected'
button tooltip (idle timeout)
Text Specifies the tooltip text for the button that the user clicks to
stay connected to the session in the event of an idle timeout.
Text for 'stay connected'
button tooltip (maximum
timeout)
Text Specifies the tooltip text for the button that the user clicks to
stay connected to the session in the event of a maximum
session time timeout.
Webtop hometab settings
You can localize the timeout settings for portal access applications that are displayed on the webtop.
BIG-IP Access Policy Manager: Customization
85

Name Value Description
Home image text Text Specifies the text for the home image on the hometab.
Home link text Text Specifies the text for the home link.
Postfix text for 'remaining
time' message (idle timeout)
Text Specifies the text after the seconds display in the remaining
time warning for a portal access idle timeout.
Postfix text for 'remaining
time' message (maximum
timeout)
Text Specifies the text after the seconds display in the remaining
time warning for a portal access maximum session time
timeout.
Postfix text for seconds in
'remaining time' message (idle
timeout)
Text Specifies the text after the number of seconds remaining
when an idle timeout is reached.
Postfix text for seconds in
'remaining time' message
(maximum timeout)
Text Specifies the text after the number of seconds remaining
when a maximum session time timeout is reached.
Prefix text for 'remaining time'
message (idle timeout)
Text Specifies the message displayed before the seconds and
postfix message display in the remaining time warning for a
portal access idle timeout.
Prefix text for 'remaining time'
message (maximum timeout)
Text Specifies the text before the seconds and postfix message
display in the remaining time warning for a portal access
maximum session time timeout.
Prefix text for seconds in
'remaining time' message (idle
timeout)
Text Specifies the text displayed before the number of seconds
remaining when an idle timeout is reached.
Prefix text for seconds in
'remaining time' message
(maximum timeout)
Text Specifies the text displayed before the number of seconds
remaining when a maximum session time timeout is reached.
Text for 'disconnect' button Text Specifies the text on the button that the user clicks to
disconnect the session.
Text for 'disconnect' button
tooltip
Text Specifies the tooltip text for the button that the user clicks to
disconnect the session.
Text for 'stay connected'
button (idle timeout)
Text Specifies the text on the button that the user clicks to stay
connected to the session in the event of an idle timeout.
Text for 'stay connected'
button (maximum timeout)
Text Specifies the text on the button that the user clicks to stay
connected to the session in the event of a maximum session
time timeout.
Text for 'stay connected'
button tooltip (idle timeout)
Text Specifies the tooltip text for the button that the user clicks to
stay connected to the session in the event of an idle timeout.
Text for 'stay connected'
button tooltip (maximum
timeout)
Text Specifies the tooltip text for the button that the user clicks to
stay connected to the session in the event of a maximum
session time timeout.
Full webtop settings
You can localize particular messages and links for full webtops.
Localizing Webtops in General View
86

Name Value Description
Applications and links Text Specifies the header text for the applications and links
section on the full webtop.
Empty URL input
message
Text Specifies the text in the empty URL field on the full
webtop.
Header message Text Specifies the header message for the full webtop.
Help window contents Text/HTML Specifies the help text in the help window. Click the edit
button to the right of this field to see the full text.
Help window contents
header
Text Specifies the header for the Help window.
Network access Text Specifies the text for the network access section.
Toolbar - help Text Specifies the help link text on the toolbar.
Full webtop popup window settings
You can localize particular messages and links for full webtops.
Name Value Description
Action label Text Specifies the label for the action section on the webtop popup.
Application Name label Text Specifies the label for the application name section on the
webtop popup.
Application Tunnels label Text Specifies the label for the application tunnels section on the
webtop popup.
Connected to message Text Specifies the text for the tunnel or resource the user is connected
to, on the webtop popup.
Logged in as message Text Specifies the label for the user name that the user is logged in as
on the webtop popup.
Network access label Text Specifies the label for the network access section.
Optimized Applications
label
Text Specifies the label for the optimized applications section.
Page title Text Specifies the page title for the popup window.
Status label Text Specifies the text for the status label on the popup window.
Summary label Text Specifies the text for the label for the summary section on the
popup window.
Terminate All Tunnels
button
Text Specifies the text for the button to stop all tunnel connections.
Terminate button Text Specifies the text for the Terminate button for a specific
connection.
Terminate NA Tunnels
button
Text Specifies the text for the button to stop the network access
connection.
Total Traffic label Text Specifies the label for the total traffic display.
Traffic compression label Text Specifies the label for the traffic compression display.
Traffic label Text Specifies the label for the traffic display.
BIG-IP Access Policy Manager: Customization
87

Name Value Description
Traffic Received label Text Specifies the label for received traffic section.
Traffic Received label Text Specifies the label for received traffic section.
Traffic Sent label Text Specifies the label for sent traffic section.
Traffic Type label Text Specifies the label for the traffic type section.
View label Text Specifies the label for the view section.
Warning before closing
popup
Text Specifies the warning that appears before closing the popup
window and closing all connections.
Warning when user
navigated from Webtop
Text Specifies the warning that appears when the user attempts to
navigate away from the webtop and close connections.
Warning when Webtop
closed
Text Specifies the warning when the webtop popup is closed and
connections are to be closed.
Full webtop Citrix logon form settings
You can localize settings for the Citrix logon form on the webtop.
Name Value Description
Cancel button text Text Specifies the text for the cancel button on the Citrix logon
form.
Domain label Text Specifies the label for the domain field on the Citrix logon
form.
Logon button text Text Specifies the text on the logon button on the Citrix logon
form.
Logon form caption Text Specifies the text for the Citrix logon form caption.
Logon form caption when
logon fails
Text Specifies the text to display when Citrix logon fails.
Message to show to the user
when connection to Citrix
server fails
Text Specifies the text to display when the Citrix connection fails,
and a retry or cancel option is presented.
Message to show to the user
when logon to Citrix server
fails
Text Specifies the text to display when the logon to the Citrix
server fails, and a retry or cancel option is presented.
Password label Text Specifies the label for the password field.
Try again button text Text Specifies the text for the retry button when the Citrix logon or
connection fails.
Username label Text Specifies the text for the label for the username field.
Full webtop Citrix installer settings
You can localize settings for the Citrix installer on the webtop.
Localizing Webtops in General View
88

Name Value Description
Citrix client not detected
caption
Text Specifies the caption when the Citrix client is not detected by
the installer.
Citrix client not detected
message
Text Specifies the message when the Citrix client is not detected
by the installer, and provide instructions to download the
installer.
Citrix client not up-to-date
caption
Text Specifies the text when a newer Citrix client is available for
download.
Citrix client not up-to-date
message
Text Specifies the message when a newer Citrix client is available
for download, and provides instructions to download an
updated client.
Download button text Text Specifies the label on the download button.
Skip installation button text Text Specifies the label on the button to skip installation.
Full webtop Citrix browser setting
You can localize settings for the Citrix browser on the webtop.
Name Value Description
Close browser Text Specifies the text to close the Citrix browser.
Localizing captions for webtop sections
Localize webtop sections to configure captions and descriptions for them on a full webtop in a specific
language.
1. On the Main tab, click Access > Profiles / Policies > Customization > General.
The Customization tool appears in General Customization view, displaying Form Factor: Full/
Mobile Browser settings.
2. In the left pane, select the Text tab.
A navigation tree displays in the left pane.
3. Expand the Webtop Sections folder.
4. Select the webtop section name.
Settings display in the right pane.
5. At the top right of the Customization settings pane, select the Language for which to customize the
caption and description for full and mobile browsers.
6. Type a Caption to provide a label for the webtop section on the full webtop.
7. Type a Detailed Description to provide a detailed description for the webtop section in the full
webtop.
8. After you customize settings, click the Save icon at the top of the Customization tool.
BIG-IP Access Policy Manager: Customization
89
Localizing Webtops in General View
90

Localizing Captions for Resources in General View
What is resource caption localization?
With caption localization, you can change the caption and description for resources on the webtop.
Localizing captions
Localize webtops to configure captions and descriptions for resources on a full webtop in a specific
language.
1. On the Main tab, click Access > Profiles / Policies > Customization > General.
The Customization tool appears in General Customization view, displaying Form Factor: Full/
Mobile Browser settings.
2. In the left pane, select the Text tab.
A navigation tree displays in the left pane.
3. Select the resource type folder for App Tunnels, Network Access, Remote Desktops, Portal
Access, or Webtop Links.
4. Select the resource name.
5. At the top right of the Customization settings pane, select the Language for which to customize the
caption and description for full and mobile browsers.
6. Type a Caption to provide a label for the resource on the full webtop.
7. Type a Detailed Description to provide a detailed description for the resource in the full webtop.
8. After you customize settings, click the Save icon at the top of the Customization tool.
Localizing Captions for Resources in General View
92

Changing Customized Properties in Advanced View
About Advanced Customization view
Through the Advanced Customization view, you can directly edit PHP, CSS, JavaScript, and HTML to
control the display and function of web and client pages in Access Policy Manager
®
. You can use the
built-in editor to edit files, or you can copy and paste with an editing application of your choice.
Editing files in Advanced View
Edit files in Advanced View to configure settings not easily set in General View.
1. On the Main tab, click Access > Profiles / Policies > Customization > Advanced.
The Customization tool appears in Advanced Customization view, displaying the Form Factor: Full/
Mobile Browser settings in the left pane.
2. Select the resource type folder for Access Profiles or Webtops.
3. Navigate through the folder hierarchy to find the file you want to edit, and click it.
The file appears in the built-in editor pane, with simple syntax highlighting.
4. Make the changes you require to the file. You can make changes in the editor screen, or you can edit
in an external editor using copy and paste commands for your operating system.
• To save a draft of your changes without applying them, click the Save Draft button.
• To discard any changes saved with the Save Draft button, click Revert, and follow the
instructions on the confirmation dialog box.
5. After you customize settings, click the Save icon at the top of the Customization tool.
Properties for access profiles in Advanced View
You can customize the following files for access profiles in Advanced View.
Files Location Description
apm_edge.css Customization Settings > Access
Profiles > access_profile >
Common
The CSS that controls the look and feel
for BIG-IP
®
Edge Client
®
pages.
header.inc Customization Settings > Access
Profiles > access_profile >
Common
Specifies the page header content for
access profile pages on all devices.
apm_mobile_ppc.css Customization Settings > Access
Profiles > access_profile >
Common
The CSS that controls the look and feel
for pages on a PocketPC device.
javascript_disabled.inc Customization Settings > Access
Profiles > access_profile >
Common
The layout for the page that appears
when JavaScript is disabled on the client.
apm_mobile.css Customization Settings > Access
Profiles > access_profile >
Common
The layout properties for access policy
pages on any mobile device that is not a
PocketPC.

Files Location Description
apm_full.css Customization Settings > Access
Profiles > access_profile >
Common
The CSS and PHP code that controls the
look and feel for pages on a web
browser.
footer.inc Customization Settings > Access
Profiles > access_profile >
Common
The include that specifies the footer text
line.
apm.css Customization Settings > Access
Profiles > access_profile >
Common
The PHP code that determines the CSS
file that is used with a particular browser
or device.
access_notfound.inc Customization Settings > Access
Profiles > access_profile >
Logout
The HTML, JavaScript, and PHP code
that presents a page when access is not
granted.
logout.inc Customization Settings > Access
Profiles > access_profile >
Logout
The HTML, JavaScript, and PHP code
that presents a page when the user logs
out. The file includes several options for
different logout reasons.
my.acl.inc Customization Settings > Access
Profiles > access_profile >
Logout
The HTML, JavaScript, and PHP code
that presents a page when the access to a
page is denied for one of several reasons,
including by an ACL.
http_401.inc Customization Settings > Access
Profiles > access_profile >
Access Policy > Logon Pages >
logon_page
The page that appears when and HTTP
401 error (unauthorized) occurs.
logon.inc Customization Settings > Access
Profiles > access_profile >
Access Policy > Logon Pages >
logon_page
A PHP file that specifies the layout and
items that appear on the logon page.
decision_box.inc Customization Settings > Access
Profiles > access_profile >
Access Policy > Decision Pages >
decision_box
Specifies the layout for the HTML that
appears in a decision box.
message_box.inc Customization Settings > Access
Profiles > access_profile >
Access Policy > Message Pages >
message_box
Specifies the layout for the HTML that
appears in a message box.
access_notfound.inc Customization Settings > Access
Profiles > access_profile >
Access Policy > Ending Pages >
ending
The HTML page that appears when
access cannot be established.
logout.inc Customization Settings > Access
Profiles > access_profile >
Access Policy > Ending Pages >
ending
The HTML page that appears when
session logout occurs for one of several
reasons.
my.acl.inc Customization Settings > Access
Profiles > access_profile >
The HTML page that appears when
access is denied because of a login
failure or ACL issue.
Changing Customized Properties in Advanced View
94
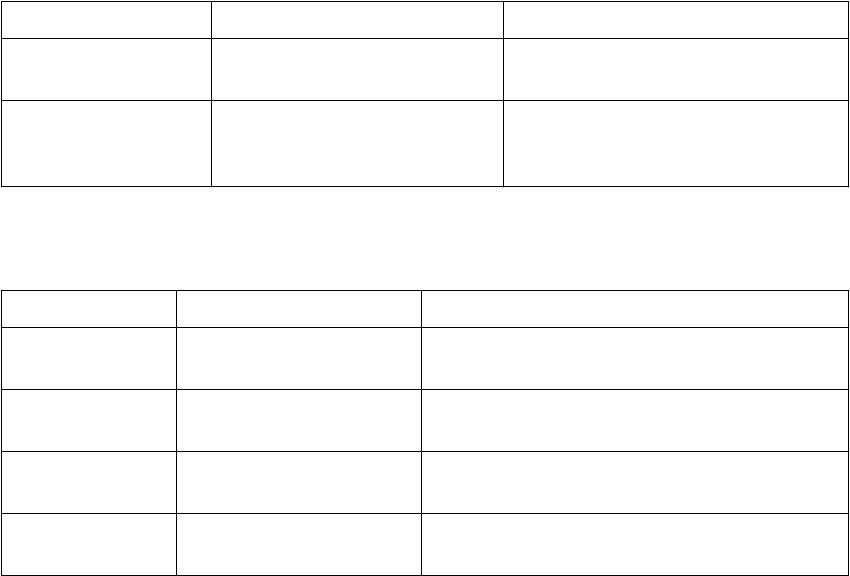
Files Location Description
Access Policy > Ending Pages >
ending
Macro pages Customization Settings > Access
Profiles > access_profile >
Macros > macro
Macros can include any of the logon
page, decision page, and message page
customization files as listed here.
Properties for webtops in Advanced View
You can customize the following files for webtops in Advanced View.
Files Location Description
webtop_popup.css Customization Settings >
Webtops > webtop
The CSS that controls the look and feel for the
webtop popup screen.
desktopClass.js.inc Customization Settings >
Webtops > webtop
The JavaScript code that specifies how the webtop
page is dynamically created.
webtop_help.inc Customization Settings >
Webtops > webtop
The HTML code on the webtop page that provides
the link to the webtop help page.
hometab.inc Customization Settings >
Webtops > webtop
The JavaScript code that controls the look and feel
for the Home tab.
BIG-IP Access Policy Manager: Customization
95
Changing Customized Properties in Advanced View
96

Customizing the APM logon page
Overview: Customizing the logon page
Using the Customization tool, you can personalize your logon page with your organization's brand
images and colors, and change the layout of the logon page screen. In this implementation, you change a
header logo image on the logon page.
Customizing a logo on the logon screen
Customization is a trial-and-error process. For practice, you should create a new virtual server and policy
in Access Policy Manager
®
(APM
®
) before you start customizing your logon page.
With the customization tool, you can personalize and localize page layout, colors, images, and messages
for the BIG-IP
®
APM browser pages.
1. In your web browser address bar, type the IP address of the BIG-IP system with which you are
working.
The BIG-IP system logon page opens.
2. Right-click the logon page.
The browser shortcut menu opens.
3. Click Inspect Element.
The Inspect Element option might appear as a different name in different browsers (such as, View
Source).
A screen displaying the HTML code of the web page opens.
4. Hover your cursor over a line of HTML code.
You can see the exact HTML code that matches the icons, text, entry fields, and buttons that appear
on the GUI. The tag ID displays the type of the object on the GUI, such as a header or a banner.
5. On the logon page, in the Username and Password fields, type your user name and password, and
click Log in.
6. On the Main tab, click Access > Profiles / Policies > Customization > General.
The Customization tool appears in General Customization view, displaying Form Factor: Full/
Mobile Browser settings.
7. In the left pane, expand the folders and navigate to Profiles > Common > access_profile_name >
Common, then click Page Header Settings.
The profile for your configuration is unique. You can select the profile that is relevant to the BIG-IP
system. For other items in the Configuration utility besides the page header, use the HTML code to
determine the correct tab and the policy in the Customization screen.
The Page Header Settings display.
8. For the Header left image (Full Size) setting, click the file path of the image in the Value column,
and in the resulting field, type the file path of the new image that you want to add.
9. Click the Save button.
10. On the Main tab, click Access > Profiles / Policies.
The Profiles List screen opens.
11. Select the check box for the policy that you customized.
12. Click Apply Policy.
13. Click Log Out.
The logon page opens.
The header logo is now the new image that you uploaded in the Customization screen.
Customizing the APM logon page
98

Resources and Documentation
Additional resources and documentation for BIG-IP Access Policy
Manager
You can access all of the following BIG-IP
®
system documentation from the AskF5
™
Knowledge Base
located at http://support.f5.com/.
Document
Description
BIG-IP
®
Access Policy
Manager
®
: Application Access
This guide contains information for an administrator to configure
application tunnels for secure, application-level TCP/IP connections
from the client to the network.
BIG-IP
®
Access Policy
Manager
®
: Authentication and
Single-Sign On
This guide contains information to help an administrator configure
APM for single sign-on and for various types of authentication, such
as AAA server, SAML, certificate inspection, local user database,
and so on.
BIG-IP
®
Access Policy
Manager
®
: Customization
This guide provides information about using the APM customization
tool to provide users with a personalized experience for access
policy screens, and errors. An administrator can apply your
organization's brand images and colors, change messages and errors
for local languages, and change the layout of user pages and screens.
BIG-IP
®
Access Policy
Manager
®
: Edge Client and
Application Configuration
This guide contains information for an administrator to configure the
BIG-IP
®
system for browser-based access with the web client as
well as for access using BIG-IP Edge Client
®
and BIG-IP Edge
Apps. It also includes information about how to configure or obtain
client packages and install them for BIG-IP Edge Client for
Windows, Mac, and Linux, and Edge Client command-line interface
for Linux.
BIG-IP
®
Access Policy
Manager
®
: Implementations
This guide contains implementations for synchronizing access
policies across BIG-IP systems, hosting content on a BIG-IP system,
maintaining OPSWAT libraries, configuring dynamic ACLs, web
access management, and configuring an access policy for routing.
BIG-IP
®
Access Policy
Manager
®
: Network Access
This guide contains information for an administrator to configure
APM Network Access to provide secure access to corporate
applications and data using a standard web browser.
BIG-IP
®
Access Policy
Manager
®
: Portal Access
This guide contains information about how to configure APM Portal
Access. In Portal Access, APM communicates with back-end
servers, rewrites links in application web pages, and directs
additional requests from clients back to APM.
BIG-IP
®
Access Policy
Manager
®
: Secure Web Gateway
This guide contains information to help an administrator configure
Secure Web Gateway (SWG) explicit or transparent forward proxy
and apply URL categorization and filtering to Internet traffic from
your enterprise.
BIG-IP
®
Access Policy
Manager
®
: Third-Party
Integration
This guide contains information about integrating third-party
products with Access Policy Manager (APM
®
). It includes

Document Description
implementations for integration with VMware Horizon View, Oracle
Access Manager, Citrix Web Interface site, and so on.
BIG-IP
®
Access Policy
Manager
®
: Visual Policy Editor
This guide contains information about how to use the visual policy
editor to configure access policies.
Release notes Release notes contain information about the current software
release, including a list of associated documentation, a summary of
new features, enhancements, fixes, known issues, and available
workarounds.
Solutions and Tech Notes Solutions are responses and resolutions to known issues. Tech Notes
provide additional configuration instructions and how-to
information.
Resources and Documentation
100

Legal Notices
Legal notices
Publication Date
This document was published on February 13, 2017.
Publication Number
MAN-0387-05
Copyright
Copyright
©
2017, F5 Networks, Inc. All rights reserved.
F5 Networks, Inc. (F5) believes the information it furnishes to be accurate and reliable. However, F5
assumes no responsibility for the use of this information, nor any infringement of patents or other rights
of third parties which may result from its use. No license is granted by implication or otherwise under
any patent, copyright, or other intellectual property right of F5 except as specifically described by
applicable user licenses. F5 reserves the right to change specifications at any time without notice.
Trademarks
For a current list of F5 trademarks and service marks, see http://www.f5.com/about/guidelines-policies/
trademarks.
All other product and company names herein may be trademarks of their respective owners.
Patents
This product may be protected by one or more patents indicated at: https://f5.com/about-us/policies/
patents.
Export Regulation Notice
This product may include cryptographic software. Under the Export Administration Act, the United
States government may consider it a criminal offense to export this product from the United States.
RF Interference Warning
This is a Class A product. In a domestic environment this product may cause radio interference, in which
case the user may be required to take adequate measures.
FCC Compliance
This equipment has been tested and found to comply with the limits for a Class A digital device pursuant
to Part 15 of FCC rules. These limits are designed to provide reasonable protection against harmful
interference when the equipment is operated in a commercial environment. This unit generates, uses, and
can radiate radio frequency energy and, if not installed and used in accordance with the instruction
manual, may cause harmful interference to radio communications. Operation of this equipment in a
residential area is likely to cause harmful interference, in which case the user, at his own expense, will be
required to take whatever measures may be required to correct the interference.
Any modifications to this device, unless expressly approved by the manufacturer, can void the user's
authority to operate this equipment under part 15 of the FCC rules.
Canadian Regulatory Compliance
This Class A digital apparatus complies with Canadian ICES-003.
Standards Compliance
This product conforms to the IEC, European Union, ANSI/UL and Canadian CSA standards applicable to
Information Technology products at the time of manufacture.
Legal Notices
102
Index
A
access policy
customizing page appearance 55
decision page settings 78
logon page settings 20, 77
personalizing 55
access policy items
settings 56
access policy pages
properties 56
access profile
AAA error settings 74
basic settings 41
branding settings for fonts 12, 52
branding settings for form 15, 54
branding settings for form elements 16, 54
branding settings for general page style 11, 51
branding settings for image 15, 53
branding settings for layout 13, 53
branding settings for page footers 15, 53
branding settings for page headers 14, 52
browser framework settings 70
customizing appearance 51
dynamic configuration error settings 77
enpoint security settings 71
general error settings 74
installation error settings 75
logout page settings 73
personalizing 51
resource error settings 76
settings for advanced customization images 18, 55, 65,
79, 80
unknown error settings 77
access profile pages
customizing appearance 51
activity section
webtop setting 84
advanced customization
configuring a UI template 9
Advanced Customization
editing CSS 93
editing JavaScript 93
editing PHP 93
advanced customization images
setting for pages 18, 55, 65, 79, 80
Advanced Customization Images
storage options 27
usage 26, 27
advanced customization view
files for access profiles 25, 26
Advanced Customization view
editing CSS 23
editing JavaScript 23
editing PHP 23
advanced view
editing files 93
Advanced View
Advanced View (continued)
files for access profiles 93
files for webtops 95
app tunnel
basic settings 42
B
basic customization
access profile 41
app tunnel 42
network access 43
portal access 44
remote desktop 43
webtop link 44
webtop settings 44
Basic customization
starting 41
Basic Customization view 41
BIG-IP Edge Client
branding 47, 48
localization 49, 56, 57
localizing webtop settings 83
webtop settings 83
branding
customizing access profiles 51
customizing for BIG-IP Edge Client 47
customizing for logout pages 55
customizing for webtops 59
customizing front login page image 55
for BIG-IP Edge Client 48
settings for advanced customization images 18, 55, 65,
79, 80
settings for appearance 11, 51
settings for fonts 12, 52
settings for form 15, 54
settings for form elements 16, 54
settings for image 15, 53
settings for layout 13, 53
settings for page footers 15, 53
settings for page headers 14, 52
C
Citrix
browser setting for full webtop 89
installer settings for full webtop 88
settings for full webtop 88
common page styles
customizing settings 41
common pages
localizing 69
connectivity status
setting icons 59
contents area
settings that affect 11
CSS files
for access profiles 24–26, 93
Index
103
CSS files (continued)
for webtops 95
CSS sprites image
setting 59
customization
editing in Advanced Customization view 93
editing in the Advanced Customization view 23
for BIG-IP Edge Client 47
for full and mobile browsers 51
for logon page 18, 21
for webtops 59
form factors 7–10, 39
of logon page 97
overview 7, 97
Customization
tool 18, 39
customization templates
downloading 37
Customization tool
starting 39
customized pages
preview 47, 49, 51, 56
customizing
basic settings 41
by editing files 93
customizing decision box pages 55
customizing ending pages 55
customizing message box pages 55
D
decision box pages
customizing appearance 55
localizing 78
decision pages
localizing 78
localizing in access policy 78
settings in access policy 78
documentation, finding 99
E
Edge Client
localizing webtop settings 83
webtop settings 83
ending pages
customizing appearance 55
localizing 79
endpoint security
localizing messages 71
settings 71
error messages
AAA settings 74
dynamic configuration settings 77
general settings 74
installation settings 75
localizing 73
localizing AAA error messages 74
localizing dynamic configuration error messages 77
localizing general errors 74
localizing in access profiles 73
localizing installation error messages 75
error messages (continued)
localizing other error messages 77
localizing resource error messages 76
other error settings 77
resource settings 76
F
fonts
settings for access profiles 12, 52
form
settings for access profiles 15, 54
form and message settings
localizing for webtops 81
form appearance
settings for access profiles 16, 54
form cell
illustration 13
form element settings
illustration 17
form factors
for customization 7–10, 39
form settings
illustration 16
framework
localizing 69, 72
settings 70
full and mobile browser
branding for access policy items 56
full webtop
appearance settings 64
Citrix browser setting 89
Citrix installer settings 88
Citrix logon settings 88
company logo 65
localize settings 86
popup window settings 87
full webtops
localizing images 67
localizing resource captions 91
localizing webtop section captions 89
G
general page style
illustration 11
guides, finding 99
H
hide
localizing webtop settings 83
webtop settings 83
hometab
configuration settings 61
I
image
adding a company logo 65
adding to access policy page 28
Index
104
image (continued)
adding to page 32
adding to profile 32
settings for access profiles 15, 53
image browser
adding images 29, 30, 32–34, 47
image cell
illustration 13
image00
about 26
images
adding with the image browser 29, 30, 32–34, 47
localizing for webtops 81
J
JavaScript files
for access profiles 24–26, 93
for webtops 95
L
language
access profile localization 7
for access profile objects 7
for resource objects 7
resource object localization 7
selected for display 7
layout
settings for access profiles 13, 53
localization
about 7
customizing for BIG-IP Edge Client 49, 56
for access policy items 56
for BIG-IP Edge Client 49, 57
for common pages 69
for resource captions 91
for webtop section captions 89
for webtops 81
language choices 7
of decision pages 78
of ending pages 79
of error messages 73
of logon page 69
of logon pages 77
of loout page 72
of message box pages 79
localizing images
for webtops 81, 91
localizing messages
for full and mobile browsers 69
for webtops 81, 91
login form
personalizing 15, 54
login form appearance
personalizing 16, 54
login pages
customizing appearance 55
logo
customizing 97
logon page
customizing 97
logon page (continued)
customizing logo 97
localizing in access policy 20, 77
localizing layout and content 69
overview 97
personalizing 18
settings in access policy 20, 77
logon pages
localizing 77
logout
customizing 55
webtop settings 84
logout page
localizing layout and content 72
logout pages
localizing messages 73
settings 73
M
manuals, finding 99
message box pages
customizing appearance 55
localizing 79
messages
localizing 56
localizing for common pages 69
mobile browser
personalizing 21
N
network access
basic settings 43
new sessions
webtop settings 84
P
page alignment
illustrated 11
page footers
settings for access profiles 15, 53
page headers
settings for access profiles 14, 52
page layout
illustration 13
page width
illustrated 11
pages
localizing in access profiles 69, 72
personalization
for resource images 67
personalizing
images for resources 67
personalizing images
for webtops 67
PHP files
for access profiles 24–26, 93
for webtops 95
portal access
basic settings 44
Index
105
portal access (continued)
timeout settings 84, 85
portal access hometab
configuration settings 61
portal access timeout
configuration settings 59
preview customization changes 47, 49, 51, 56
Q
quick start
access profile customization settings 41
app tunnel customization settings 42
network access customization settings 43
portal access customization settings 44
remote desktop customization settings 43
using for customization 41
webtop common customization settings 44
webtop link customization settings 44
R
relaunch
webtop settings 84
release notes, finding 99
remote desktop
basic settings 43
resource objects 7
S
show
localizing webtop settings 83
webtop settings 83
starting the Customization tool 39
T
the advanced customization view
files for access profiles 24
the Advanced Customization view
editing CSS 23
editing JavaScript 23
editing PHP 23
timeout
webtop settings 84, 85
timeout window
configuration settings 59
tool
for customization 18, 39
U
UI template
role of advanced customization 9
V
views
Basic 41
for customization 7–10, 39
W
web applications
timeout settings 84, 85
web browsers
customizing access profile logout 55
webtop
activity setting 84
appearance settings 64
basic settings 44
connectivity status icons 59
CSS sprites image 59
form settings 81
full webtop Citrix browser setting 89
full webtop Citrix installer settings 88
full webtop Citrix settings 88
full webtop popup settings 87
full webtop settings 86
logout settings 84
message settings 81
new session settings 84
portal access hometab settings 61
portal access session timeout settings 84, 85
portal access timeout settings 59
relaunch settings 84
settings for BIG-IP Edge Client 83
showing information settings 83
webtop customization 67
webtop cuztomization 81, 91
webtop link
basic settings 44
webtops
customizing appearance 59
localizing 81
personalizing 59
Index
106
