
Experience Cloud Developer
Guide
Version 61.0, Summer ’24
Last updated: July 5, 2024
©
Copyright 2000–2024 Salesforce, Inc. All rights reserved. Salesforce is a registered trademark of Salesforce, Inc., as are other
names and marks. Other marks appearing herein may be trademarks of their respective owners.

CONTENTS
Chapter 1: Get Up to Speed with Experience Builder Sites . . . . . . . . . . . . . . . . . . . . . . . 1
Before You Begin . . . . . . . . . . . . . . . . . . . . . . . . . . . . . . . . . . . . . . . . . . . . . . . . . . . . . . 2
What Is Salesforce Lightning? . . . . . . . . . . . . . . . . . . . . . . . . . . . . . . . . . . . . . . . . . . . . . . 3
Which Experience Builder Template Do I Use? . . . . . . . . . . . . . . . . . . . . . . . . . . . . . . . . . . 3
Release Notes . . . . . . . . . . . . . . . . . . . . . . . . . . . . . . . . . . . . . . . . . . . . . . . . . . . . . . . . 4
Chapter 2: Develop Experience Builder Sites: The Basics . . . . . . . . . . . . . . . . . . . . . . . 5
Using the Developer Console . . . . . . . . . . . . . . . . . . . . . . . . . . . . . . . . . . . . . . . . . . . . . . 6
Configure Drag-and-Drop Aura Components for Experience Builder . . . . . . . . . . . . . . . . . . . 7
Expose Component Attributes in Experience Builder . . . . . . . . . . . . . . . . . . . . . . . . . . . . . . 9
Tips and Considerations for Configuring Aura Components for Experience Builder . . . . . . . . . 10
Supported Aura Components, Interfaces, and Events . . . . . . . . . . . . . . . . . . . . . . . . . . . . . 11
Personalization Target Developer and Group Names . . . . . . . . . . . . . . . . . . . . . . . . . . . . . 12
Comply with a User’s Personal Information Visibility Settings . . . . . . . . . . . . . . . . . . . . . . . . 20
Chapter 3: Brand Your Aura Site . . . . . . . . . . . . . . . . . . . . . . . . . . . . . . . . . . . . . . . . 23
Update a Template with the Theme Panel . . . . . . . . . . . . . . . . . . . . . . . . . . . . . . . . . . . . 24
Use the CSS Editor for Custom CSS . . . . . . . . . . . . . . . . . . . . . . . . . . . . . . . . . . . . . . . . . 24
Migrate CSS Overrides . . . . . . . . . . . . . . . . . . . . . . . . . . . . . . . . . . . . . . . . . . . . . . 26
Use Custom Fonts in Your Experience Builder Site . . . . . . . . . . . . . . . . . . . . . . . . . . . . . . . 42
Customize the Theme Layout of Your Template . . . . . . . . . . . . . . . . . . . . . . . . . . . . . . . . . 43
How Do Custom Theme Layouts Work? . . . . . . . . . . . . . . . . . . . . . . . . . . . . . . . . . . 43
Configure a Custom Theme Layout Component . . . . . . . . . . . . . . . . . . . . . . . . . . . . . 45
Use Expressions to Add Dynamic Data to Aura Sites . . . . . . . . . . . . . . . . . . . . . . . . . . . . . 48
Create Custom Content Layout Components for Experience Builder . . . . . . . . . . . . . . . . . . . 49
Configure Swappable Search and Profile Menu Components . . . . . . . . . . . . . . . . . . . . . . . 50
Ensure Custom Components in Orgs with Experience Cloud Sites Are Secure . . . . . . . . . . . . . 52
Chapter 4: Develop Secure Sites: Authenticated and Guest Users . . . . . . . . . . . . . . . 53
Limit Declarative Access . . . . . . . . . . . . . . . . . . . . . . . . . . . . . . . . . . . . . . . . . . . . . . . . 54
Determine a Security Model . . . . . . . . . . . . . . . . . . . . . . . . . . . . . . . . . . . . . . . . . . . . . . 54
Unauthenticated Guest User Guidelines . . . . . . . . . . . . . . . . . . . . . . . . . . . . . . . . . . 55
Declarative Access Control Model Examples . . . . . . . . . . . . . . . . . . . . . . . . . . . . . . . 59
Custom Access Control Model Examples . . . . . . . . . . . . . . . . . . . . . . . . . . . . . . . . . 63
Limit Access to Apex Classes . . . . . . . . . . . . . . . . . . . . . . . . . . . . . . . . . . . . . . . . . . . . . 77
Flow Security . . . . . . . . . . . . . . . . . . . . . . . . . . . . . . . . . . . . . . . . . . . . . . . . . . . . . . . . 77
SOQL Injection . . . . . . . . . . . . . . . . . . . . . . . . . . . . . . . . . . . . . . . . . . . . . . . . . . . . . . . 78
Chapter 5: Develop Secure Sites: CSP, LWS, and Lightning Locker . . . . . . . . . . . . . . . 80
Resolve Lightning Locker Conflicts in Aura Sites . . . . . . . . . . . . . . . . . . . . . . . . . . . . . . . . . 82
Enable Third-Party Components to Run When Lightning Locker Is Off . . . . . . . . . . . . . . . . . . 83
Example: Adobe Analytics and Lightning Locker in Aura Sites . . . . . . . . . . . . . . . . . . . . . . . 84
Chapter 6: Analyze and Improve Experience Builder Site Performance . . . . . . . . . . . . 86
Chapter 7: Add Pardot Tracking to Your Experience Builder Site . . . . . . . . . . . . . . . . . 93
Chapter 8: Use a CMS with Your Experience Builder Site . . . . . . . . . . . . . . . . . . . . . . 95
Chapter 9: Report on Deflections: The Deflection Signals Framework . . . . . . . . . . . . . 96
Case Create Deflection Signal . . . . . . . . . . . . . . . . . . . . . . . . . . . . . . . . . . . . . . . . . . . . 97
Chapter 10: Deploy an Experience Cloud Site from Sandbox to Production . . . . . . . . 101
Deploy Your Experience Cloud Site with Change Sets . . . . . . . . . . . . . . . . . . . . . . . . . . . . 103
Deploy A Full Experience Cloud Site with Change Sets . . . . . . . . . . . . . . . . . . . . . . . . 103
Deploy Partial Experience Cloud Site Content with Change Sets . . . . . . . . . . . . . . . . . . 104
Considerations for Deploying Experience Cloud Sites with Change Sets . . . . . . . . . . . . 106
Deploy Your Experience Cloud Site with the Metadata API . . . . . . . . . . . . . . . . . . . . . . . . . 107
ExperienceBundle for Experience Builder Sites . . . . . . . . . . . . . . . . . . . . . . . . . . . . . . . . . 112
Avoid Deployment Issues When Moving to Enhanced LWR Sites . . . . . . . . . . . . . . . . . . . . . 115
Considerations for Deploying Authenticated LWR Sites . . . . . . . . . . . . . . . . . . . . . . . . . . . . 117
INDEX . . . . . . . . . . . . . . . . . . . . . . . . . . . . . . . . . . . . . . . . . . . . . . . . . . . . . . . . . . . 118
Contents

CHAPTER 1 Get Up to Speed with Experience Builder Sites
Experience Builder templates let you create branded sites where your employees, customers, and partners
can connect. Built on the Lightning Component framework, Experience Builder templates include many
ready-to-use features and Lightning components. But the real power of the Lightning Component
framework is that you can develop custom Lightning components and features to meet your unique
business needs and completely transform the look and feel of your site.
In this chapter ...
• Before You Begin
• What Is Salesforce
Lightning?
As of Spring ’19 (API version 45.0), you can build Lightning components using two programming models:
the Lightning Web Components model, and the original Aura Components model. Lightning web
components are custom HTML elements built using HTML and modern JavaScript.
• Which Experience
Builder Template Do
I Use?
• Experience Cloud
Developer Release
Notes
Tip: The rename to Experience Cloud in Spring ’21 (API version 50.0) introduced some new
terminology, and it can be tricky to know what’s what. Here’s the rundown.
Experience Builder sites (formerly called Lightning communities) are template-based sites that you
customize in Experience Builder. And with the launch of the Lightning Web Runtime (LWR), we
added two new terms for even greater clarity.
•
LWR sites are built with the latest LWR-based templates, such as the Build Your Own (LWR)
template. LWR sites can only be used with Lightning web components, not Aura components.
See LWR Sites for Experience Cloud.
•
Aura sites are built with our original templates, such as Customer Service, Partner Central, and
Customer Account Portal, which run on Aura. For Aura sites, Lightning web components and
Aura components can coexist and interoperate on a page.
You can configure both Lightning web components and Aura components as drag-and-drop components
for Experience Builder. Admins and end users don’t know which programming model was used to
develop the components—to them, they’re simply Lightning components.
Whether you’re a developer, partner, or ISV, this guide describes how to create custom Aura sites and
components, theme layout components, and Lightning Bolt Solutions.
1

Before You Begin
Before you begin developing custom Experience Builder sites, ensure that you’re familiar with developing in Lightning.
You can create Experience Builder sites and Lightning components in Enterprise, Performance, Unlimited, and Developer Editions,
or a sandbox.
To use this guide successfully, it helps to have:
•
An org with Digital Experiences enabled
•
A new or existing site that’s based on an Experience Builder template or a Lightning Bolt Solution
•
Familiarity using Experience Builder
•
Experience developing Lightning components and using CSS
Resources for Lightning Development
Unfamiliar with Lightning development? Then check out these resources.
Lightning Aura Components Developer Guide
The go-to guide for all things Aura. The foundational concepts and approaches the guide documents form the bedrock of this guide.
Think of the Experience Cloud Developer Guide as Part 2 in the development series; it’s no use to you until you familiarized yourself
with Part 1.
Lightning Web Components Developer Guide
Learn how to develop Lightning web components, custom HTML elements built using HTML and modern JavaScript.
LWR Sites for Experience Cloud Developer Guide
Develop sites that load quickly and scale well using the Build Your Own (LWR) template for Experience Cloud. This template is based
on the latest Lightning Web Runtime (LWR) and the Lightning Web Components (LWC) programming model.
Build Lightning Web Components (Trailhead Trail)
Develop reusable Lightning web components using JavaScript and HTML.
Quick Start: Aura Components (Trailhead Project)
Create your first component that renders a list of contacts from your org.
Build a Custom Theme Layout Component for Experience Builder Sites (Trailhead Project)
Customize your Experience Builder site with a theme layout component.
Lightning Components Performance Best Practices (Blog Post)
Learn about Lightning characteristics that impact component performance, and get best practices to optimize your components.
Resources for Experience Cloud
Unfamiliar with Experience Cloud? Then check out these resources.
Set Up and Manage Experience Cloud Sites (Help)
Create branded sites using templates to interact directly with your customers and partners online.
Expand Your Reach with Experience Cloud (Trailhead Trail)
Learn the tools you need to get started with Salesforce Experience Cloud.
Experience Cloud Overview (Help)
Stay up to date on other Experience Cloud resources.
2
Before You BeginGet Up to Speed with Experience Builder Sites

What Is Salesforce Lightning?
Salesforce Lightning makes it easier to build responsive applications for any device, and encompasses the Lightning Component
framework and helpful tools for developers.
Lightning includes these technologies.
•
Lightning components accelerate development and app performance. Develop custom components that other developers and
admins can use as reusable building blocks to customize Experience Builder sites, the Salesforce mobile app, and Lightning Experience.
•
Lightning App Builder empowers admins to build Lightning pages visually, without code, using off-the-shelf and custom-built
Lightning components. Make your Lightning components available in the Lightning App Builder so administrators can build custom
user interfaces without code.
•
Experience Builder empowers admins to build sites visually using templates and components. Make your Lightning components
available in Experience Builder so administrators can build site pages without code.
Some Salesforce products built with the Lightning framework include:
•
Experience Builder templates
•
Lightning Bolt Solutions
•
Lightning Experience
•
Salesforce mobile app
Note: You don’t need to enable Lightning Experience to use Experience Builder templates or develop Lightning components.
Experience Builder sites use the same underlying technology as Lightning Experience, but they’re independent of each other.
SEE ALSO:
Salesforce Help: How Experience Cloud Uses Lightning
Lightning Aura Components Developer Guide
Which Experience Builder Template Do I Use?
Depending on which Experience Builder template that you use, you can build Experience Builder sites using two programming models:
the Lightning Web Components model, and the original Aura Components model. The Build Your Own (LWR) template is based on the
new Lightning Web Runtime (LWR) and can only be used with Lightning web components, not Aura components. Other templates are
based on the Aura Components model and can use both Lightning web components and Aura components.
Build Your Own
Provides the basic pages that every Experience Builder site needs: Home, Create Record, Error, Record Detail, Record List, Related
Record List, Search, Check Password, Forgot Password, Login, Login Error, and Register. Add more pages and components as needed
for the experience you’re building. To refine the look of your site, customize your branding and themes.
Build Your Own (LWR)
Powered by the new Lightning Web Runtime (LWR) platform, this customizable template delivers unparalleled page performance
and improves developer productivity. Quickly build pixel-perfect pages and develop Lightning web components and themes to
match your unique brand.
Suitable for developers, consulting partners, and ISVs who are familiar with developing custom Lightning web components, and
working with Salesforce DX, User Interface API, and Apex.
See the LWR Sites for Experience Cloud guide.
3
What Is Salesforce Lightning?Get Up to Speed with Experience Builder Sites

Customer Account Portal
A private and secure place for customers to access and update their account information. Improve customer relationships and
decrease service costs by letting customers work in the portal. Customers can see and pay invoices, update their account information,
and search your knowledge base for answers to their most frequent questions.
Customer Service
A powerful, responsive self-service template with multiple prebuilt theme options. The Customer Service template lets users post
questions to the community, search for and view articles, collaborate, and contact support agents by creating cases. Supports
Knowledge, Chatter Questions, and cases.
Partner Central
A flexible, responsive template designed for channel sales workflows. Recruit, build, and grow your partner network to drive channel
sales and marketing together in a branded online space. Easily configure lead distribution, deal registration, and marketing campaigns.
Share training materials and sales collateral in a central space, and use reports to track your pipeline.
Help Center
A public-access, self-service community that exposes the articles that you make available from your knowledge base. You reduce
the load on your customer support team, and your users get the satisfaction of finding their own solutions.
SEE ALSO:
Salesforce Help: Which Experience Cloud Template Should I Use
Experience Cloud Developer Release Notes
Use the Salesforce Release Notes to learn about the most recent updates and changes to the Experience Cloud developer experience.
For new and changed features, see Developer Productivity in the Experience Cloud section of the Salesforce Release Notes. You can also
look for Experience Cloud in New and Changed Items for Developers in the Salesforce Release Notes.
4
Experience Cloud Developer Release NotesGet Up to Speed with Experience Builder Sites

CHAPTER 2 Develop Experience Builder Sites: The Basics
Learn about the Developer Console development tool, how to create a basic drag-and-drop Aura
component, and tips to consider along the way.
In this chapter ...
• Using the Developer
Console
• Configure
Drag-and-Drop Aura
Components for
Experience Builder
• Expose Component
Attributes in
Experience Builder
• Tips and
Considerations for
Configuring Aura
Components for
Experience Builder
• Supported Aura
Components,
Interfaces, and
Events
• Personalization
Target Developer
and Group Names
• Comply with a User’s
Personal Information
Visibility Settings
5

Using the Developer Console
The Developer Console provides tools for developing your Aura components and applications.
You can use the Developer Console in the same supported browsers as Lightning Experience and Salesforce Classic.
The Developer Console enables you to perform these functions.
•
Use the menu bar (1) to create or open these Lightning resources.
–
Application
–
Component
–
Interface
–
Event
–
Tokens
•
Use the workspace (2) to work on your Lightning resources.
•
Use the sidebar (3) to create or open client-side resources that are part of a specific component bundle.
–
Controller
–
Helper
–
Style
–
Documentation
–
Renderer
–
Design
–
SVG
While the Developer Console provides an easy way to work with Aura components, it doesn’t include many developer tools and features.
To enable source-drive development with editor features like code completion and linting, consider these alternatives:
•
Code Builder—A web-based IDE that has all the power and flexibility of VS Code, Salesforce Extensions for VS Code, and Salesforce
CLI in your web browser. You can install Code Builder as a managed package in a supported Salesforce org edition.
6
Using the Developer ConsoleDevelop Experience Builder Sites: The Basics

•
Salesforce DX Tools—Use the Salesforce CLI and VS Code with the Salesforce Extension Pack to deploy code to an org.
SEE ALSO:
Salesforce Help: Open the Developer Console
Lightning Aura Components Developer Guide: Create Aura Components in the Developer Console
Lightning Aura Components Developer Guide: Component Bundles
Configure Drag-and-Drop Aura Components for Experience Builder
Before you can use a custom Aura component in Experience Builder, there a few configuration steps to take.
1. Add an Interface to Your Component
To appear as a drag-and-drop component in Experience Builder, a component must implement the
forceCommunity:availableForAllPageTypes interface.
After you create the Aura component, it appears in the Components panel of all Aura sites in your org.
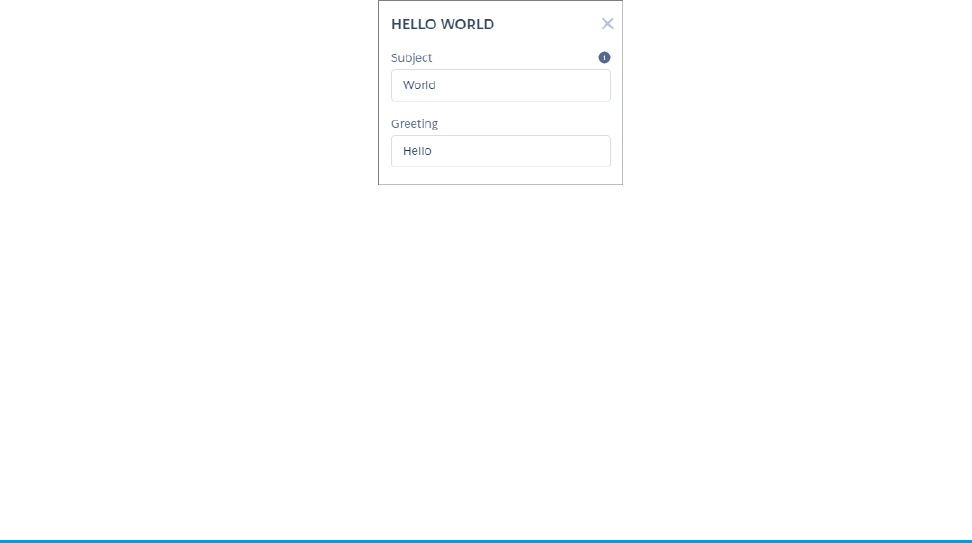
Here’s the sample code for a simple “Hello World” component. A component must be named componentName.cmp.
Note: To make a resource, such as a component, usable outside of your own org, mark it with access="global". For
example, use access="global" if you want a component to be usable in an installed package or by a Experience Builder
user in another org.
<aura:component implements="forceCommunity:availableForAllPageTypes" access="global">
<aura:attribute name="greeting" type="String" default="Hello" access="global" />
<aura:attribute name="subject" type="String" default="World" access="global" />
<div>{!v.greeting}, {!v.subject}!</div>
</aura:component>
Warning: When you add custom components to your site, they can bypass the object- and field-level security (FLS) you set for
the guest user profile. Lightning components don’t automatically enforce CRUD and FLS when referencing objects or retrieving
the objects from an Apex controller. This means that the framework continues to display records and fields for which users don’t
have CRUD permissions and FLS visibility. You must manually enforce CRUD and FLS in your Apex controllers.
7
Configure Drag-and-Drop Aura Components for Experience
Builder
Develop Experience Builder Sites: The Basics

2. Add a Design Resource to Your Component Bundle
A design resource controls which component attributes are exposed in Experience Builder. The design resource lives in the same folder
as your .cmp resource, and describes the design-time behavior of the Aura component—information that visual tools need to display
the component in a page or app.
For example, to set a default value for an attribute, or make a Aura component attribute available for administrators to edit in Experience
Builder, your component bundle needs a design resource.
Here’s the design resource that goes in the bundle with the “Hello World” component. A design resource must be named
componentName.design.
<design:component label="Hello World">
<design:attribute name="greeting" label="Greeting" />
<design:attribute name="subject" label="Subject" description="Name of the person you
want to greet" />
</design:component>
Optional. Add an SVG Resource to Your Component Bundle
To define a custom icon for your component, add an SVG resource to the component bundle. The icon appears next to the component
in the Experience Builder Components panel.
If you don’t include an SVG resource, the system uses a default icon ( ).
Here’s a simple red circle SVG resource to go with the “Hello World” component. An SVG resource must be named
componentName.svg.
<?xml version="1.0"?>
<!DOCTYPE svg PUBLIC "-//W3C//DTD SVG 1.1//EN"
"http://www.w3.org/Graphics/SVG/1.1/DTD/svg11.dtd">
<svg xmlns="http://www.w3.org/2000/svg"
width="400" height="400">
<circle cx="100" cy="100" r="50" stroke="black"
stroke-width="5" fill="red" />
</svg>
Optional. Add a CSS Resource to Your Component Bundle
To style your custom component, add a CSS resource to the component bundle.
Here’s the CSS for a simple class to go with the “Hello World” component. A CSS resource must be named componentName.css.
.THIS .greeting {
color: #ffe4e1;
font-size: 20px;
}
After you create the class, apply it to your component.
<aura:component implements="forceCommunity:availableForAllPageTypes" access="global">
<aura:attribute name="greeting" type="String" default="Hello" access="global" />
<aura:attribute name="subject" type="String" default="World" access="global" />
8
Configure Drag-and-Drop Aura Components for Experience
Builder
Develop Experience Builder Sites: The Basics

<div class="greeting">{!v.greeting}, {!v.subject}!</div>
</aura:component>
SEE ALSO:
Lightning Aura Components Developer Guide: Browser Support for Aura Components
Expose Component Attributes in Experience Builder
You use a design resource to control which attributes are exposed in Experience Builder. A design resource lives in the same folder as
your component. It describes the design-time behavior of the Aura component—information that visual tools need to display the
component in a page or app.
To make an Aura component attribute available for administrators to edit in Experience Builder, add a design:attribute node
for the attribute in the design resource. When you mark an attribute as required, it automatically appears in Experience Builder, unless
it has a default value assigned to it.
You must specify required attributes with default values and attributes not marked as required in the component definition in the design
resource to make them appear for users. A design resource supports attributes only of type int, string, or boolean.
For drag-and-drop components, exposed attributes appear in the component’s properties panel.
For theme layout components, exposed attributes appear when the theme layout is selected in the Settings > Theme area.
9
Expose Component Attributes in Experience BuilderDevelop Experience Builder Sites: The Basics

SEE ALSO:
Lightning Aura Components Developer Guide: Aura Component Bundle Design Resources
Tips and Considerations for Configuring Aura Components for
Experience Builder
Keep these guidelines in mind when creating Aura components and component bundles for Aura sites.
Components
•
Give the component a friendly name using the label attribute in the design file element, such as <design:component
label="foo">.
•
Design your components to fill 100% of the width, including margins, of the region that they display in.
•
Make sure that the component provides an appropriate placeholder behavior in declarative tools if it requires interaction.
•
Never let a component display a blank box. Think of how other sites work. For example, Facebook displays an outline of the feed
before the feed items come back from the server, which improves the user’s perception of UI responsiveness.
•
If the component depends on a fired event, give it a default state that displays before the event fires.
•
Style components using standard design tokens to make them consistent with the Salesforce Lightning Design System. (SLDS)
•
Keep in mind that Lightning Locker is enforced for all Aura components created in Summer ’17 (API version 40.0) and later when
Lightning Locker is enabled in the org and the site. At the org level, Lightning Locker is in use if Lightning Web Security hasn’t been
enabled. See Develop Secure Sites: CSP, LWS, and Lightning Locker.
•
For a custom component, when you make a new property available for edit in Experience Builder, keep this consideration in mind
for site translations: If the component is in use on a page in Experience Builder, delete the component from the page and replace it
with the updated version. Otherwise, when you export the site content for translation, the property that you added is omitted for
that component instance in the exported file. If the component contains content that’s already translated, export the site content
first to preserve the existing translation. Then replace the component with the updated version.
10
Tips and Considerations for Configuring Aura Components
for Experience Builder
Develop Experience Builder Sites: The Basics
Attributes
•
Use the design file to control which attributes are exposed to Experience Builder.
•
Make your attributes easy to use and understandable to an administrator. Don’t expose SOQL queries, JSON objects, or Apex class
names.
•
Give required attributes default values to avoid a poor user experience. When a component that has required attributes with no
default values is added to Experience Builder, it appears invalid.
•
Use basic supported types (string, integer, boolean) for exposed attributes.
•
Specify a min and max for integer attributes in the <design:attribute> element to control the range of accepted values.
•
Be aware that string attributes can provide a data source with a set of predefined values, allowing the attribute to expose its
configuration as a picklist.
•
Give attributes a label with a friendly display name.
•
Include a description to explain the expected data and provide guidelines, such as the data format or expected range of values.
Description text appears as a tooltip in the property panel.
•
To delete a design attribute for a component that implements the forceCommunity:availableForAllPageTypes
interface, first remove the interface from the component before deleting the design attribute. Then reimplement the interface. If
the component is referenced in a site page, you must remove the component from the page before you can change it.
SEE ALSO:
Lightning Aura Components Developer Guide: Using the Salesforce Lightning Design System in Apps
Lightning Aura Components Developer Guide: Styling with Design Tokens
Lightning Aura Components Developer Guide: Aura Component Bundle Design Resources
Supported Aura Components, Interfaces, and Events
Not all Aura components, interfaces, and events are supported for Aura-based Experience Builder sites. Some are available only for the
Salesforce mobile app or Lightning Experience. Check out what’s available before customizing your site.
Aura components, interfaces, and events are documented in the Component Library. Each component, interface, and event indicates
which experience it supports.
11
Supported Aura Components, Interfaces, and EventsDevelop Experience Builder Sites: The Basics

SEE ALSO:
Component Reference
Interface Reference
Event Reference
Personalization Target Developer and Group Names
Determine the developer name and group name for your experience variation targets when using Connect REST API or Metadata API
to personalize your Experience Builder site.
For the Target Input request body of Connect Rest API or the PersonalizationTargetInfo subtype of the Audience metadata type, you
must specify:
•
The target group name in the groupName property
•
The target developer name in the targetValue property
To determine these names, you have to copy property values from several JSON files in the site’s ExperienceBundle folders.
12
Personalization Target Developer and Group NamesDevelop Experience Builder Sites: The Basics

The way you determine these values varies depending on whether you’re targeting page variations, branding sets, component visibility,
or component attributes.
Page Variations
To determine the group name and developer name for a page variation, open the relevant route file and the corresponding view file.
For example, open the Home.json file in the routes folder and the Home.json file in the views folder.
Group Name
Format: route.id, where route.id is the id property of the route JSON file.
Example: 63d9b8fe-99fc-4f54-b784-5034e09a6670
Developer Name
Format: route.label_view.label_Page, where:
•
route.label is the label property of the route JSON file.
•
view.label is the label property of the view JSON file.
Example: Home_Gold_Home_Page
13
Personalization Target Developer and Group NamesDevelop Experience Builder Sites: The Basics

Branding Sets
To determine the group name and developer name for a branding set, open the relevant branding set file and the corresponding theme
file. For example, in a Customer Service site, open the customerService.json file in the themes folder and the
customerService.json file in the brandingSets folder.
Group Name
Format: theme.id$#$Branding, where theme.id is the id property of the theme JSON file.
Example: 70ebee67-0fca-421e-ac32-12879ee55936$#$Branding
Developer Name
Format: theme.developerName_brandingSet.label_Branding, where:
•
theme.developerName is the developerName property of the theme JSON file.
•
brandingSet.label is the label property of the branding set JSON file.
Example: service_Customer_Service_Branding
14
Personalization Target Developer and Group NamesDevelop Experience Builder Sites: The Basics

Component Visibility
To determine the group name and developer name for component visibility, open the view file that contains the component. For
example, open the Home.json file in the views folder.
Group Name
Format: view.id$#$component.id, where:
•
view.id is the id property of the view JSON file.
•
component.id is the id property of the component in the view JSON file.
Example: f8c9b721-0a1d-45bb-954f-3277a0501892$#$823cb1c0-697f-4b33-8fa4-a925aef98cf7
Developer Name
Format: view.label_componentName_Component, where:
•
view.label is the label property of the view JSON file.
•
componentName is the name of the component in Experience Builder (not in the JSON file).
Example: Home_Headline_Component
15
Personalization Target Developer and Group NamesDevelop Experience Builder Sites: The Basics

Note: If necessary, you can add a numeric value to the developer name to make it unique. For example,
Home_Page_Rich_Content_Editor_Component1.
Component Attributes
For component attributes, the group and developer names vary depending on whether the component is in the view body or in the
header or footer of a theme layout.
Components in the View Body
To determine the group and developer names for a component in the view body, open the view file that contains the component. For
example, open the Home.json file in the views folder.
Group Name
Format: view.id$#$component.id, where:
•
view.id is the id property of the view JSON file.
•
component.id is the id property of the component in the view JSON file.
Example: f8c9b721-0a1d-45bb-954f-3277a0501892$#$823cb1c0-697f-4b33-8fa4-a925aef98cf7
16
Personalization Target Developer and Group NamesDevelop Experience Builder Sites: The Basics

Developer Name
Format: view.label_componentName_Component_Properties, where:
•
view.label is the label property of the view JSON file.
•
componentName is the name of the component in Experience Builder (not in the JSON file).
Example: Home_Headline_Component_Properties
17
Personalization Target Developer and Group NamesDevelop Experience Builder Sites: The Basics

Note: If necessary, you can add a numeric value to the developer name to make it unique. For example,
Home_Page_Rich_Content_Editor_Component1.
Components in the Header or Footer
To determine the group and developer names for a component in the header or footer of a theme layout, open the theme file that
contains the component. For example, in a Customer Service site, open the customerService.json file in the themes folder.
Group Name
Format: themeLayout.id$#$component.id, where:
•
themeLayout.id is the id property of the layout that contains the component.
•
component.id is the id property of the component in the layout.
Example: 06ce2db9-2c79-4ccc-9ca8-94c7b50efb6b$#$c55d1908-fe6b-47e8-b41e-70ad05aeb490
18
Personalization Target Developer and Group NamesDevelop Experience Builder Sites: The Basics

Developer Name
Format: themeLayout.label_componentName_Component_Properties, where:
•
themeLayout.label is the label property of the layout that contains the component.
•
componentName is the name of the component in Experience Builder (not in the JSON file).
Example: Default_Navigation_Menu_Component_Properties
19
Personalization Target Developer and Group NamesDevelop Experience Builder Sites: The Basics

SEE ALSO:
Metadata API Developer Guide: Audience
Connect REST API Developer Guide: Target Input
Comply with a User’s Personal Information Visibility Settings
Orgs with portals and sites provide specific settings to hide a user’s personally identifiable and contact information from other users.
These settings aren’t enforced in Apex, even with Apex security features such as the WITH SECURITY_ENFORCED clause or the
stripInaccessible method. To hide specific fields from a guest or external authenticated users, follow the sample code outlined
below.
20
Comply with a User’s Personal Information Visibility SettingsDevelop Experience Builder Sites: The Basics

To hide a user’s personal information in the User object:
public User[] fetchUserDetail(Set userIds) {
// Query all the fields of user which we are expected in user record to show that on
UI or to
// perform some business logic.
User[] userRecords = [SELECT id, username, communitynickname, firstname, lastname,
title
FROM User WHERE id IN :userIds];
for (User userRecord : userRecords) {
// User is not fetching his own record and is not standard user.
if(userRecord.id != UserInfo.getUserId() && !Auth.CommunitiesUtil.isInternalUser())
{
// clear-out all PII fields form user record which we have queried above.
userRecord.username = '';
userRecord.title = '';
}
}
return userRecords;
}
To comply with a user’s contact information visibility settings within a community or portal, we check the preferences associated with
specific fields and show or hide the data accordingly. For a user’s contact visibility settings within an Experience Cloud site:
public User[] fetchUserRecordRespectingFLVPreferences(Set<Id> userIds) {
//Fetch users records along with fields specific user preferences.
User[] userRecords = [SELECT email, UserPreferencesShowEmailToExternalUsers,
UserPreferencesShowEmailToGuestUsers FROM User WHERE id IN :userIds];
// If context user is internal user then return result without any restriction.
if (Auth.CommunitiesUtil.isInternalUser()) {
return userRecords;
}
// If user is guest user then return result as per the user's UserPreference for the
fields related to the Guest user visibility.
if (Auth.CommunitiesUtil.isGuestUser()){
return fetchUserRecordForGuestUser(userRecords);
}
// Return result as per the user's UserPreference for the fields related to the External
user visibility
return fetchUserRecordForExternalUser(userRecords);
}
// Apply Field level visibilty logic by checking user's UserPreferences for the fields
related to the External user visibility.
public User[] fetchUserRecordForExternalUser(User[] userRecords) {
for(User userRecord : userRecords) {
//Clear field of user record when context user fetching other user's record and
21
Comply with a User’s Personal Information Visibility SettingsDevelop Experience Builder Sites: The Basics

Field Level Visibility for that field is set to Restricted.
if(userRecord.id != UserInfo.getUserId() &&
!userRecord.UserPreferencesShowEmailToExternalUsers)
{
userRecord.email = '';
}
}
return userRecords;
}
// Apply Field level visibilty logic by checking user's UserPreferences for the fields
related to the Guest user visibility.
public User[] fetchUserRecordForGuestUser(User[] userRecords) {
for(User userRecord : userRecords) {
//Clear field of user record when context user fetching other user's record and
user preference for that field is NOT set to public.
if(!userRecord.UserPreferencesShowEmailToGuestUsers)
{
userRecord.email = '';
}
}
return userRecords;
}
SEE ALSO:
Salesforce Help: Manage Personal User Information Visibility for External Users
Salesforce Help: Share Personal Contact Information Within Experience Cloud Sites
22
Comply with a User’s Personal Information Visibility SettingsDevelop Experience Builder Sites: The Basics

CHAPTER 3 Brand Your Aura Site
Customize the look and feel of your Aura site using the Theme panel in Experience Builder or develop
your own custom components to achieve a pixel-perfect design.
In this chapter ...
• Update a Template
with the Theme
Panel
Within Experience Builder, you can modify styles that are specific to the template and therefore can’t be
shared between sites. The options in Experience Builder are the simplest to use and don’t require
component development.
• Use the CSS Editor for
Custom CSS
•
The Theme panel updates the template with simple, point-and-click properties. This approach is
ideal for admins to use.
Individual component property panels, such as for headers or search, provide additional more specific
adjustments in look and feel.
• Use Custom Fonts in
Your Experience
Builder Site
• Customize the
Theme Layout of
Your Template
•
The CSS Editor lets you create custom CSS to style elements across your site. This option is suitable
if you’re familiar with CSS and want to make only minor modifications to some template components.
With theme swapping in Aura sites, custom CSS is tied directly to your active theme.
• Use Expressions to
Add Dynamic Data to
Aura Sites
To customize the appearance of your site completely, however, you need to develop your own custom
components. Aura sites support both Lightning web components and Aura components. Where possible,
we recommend developing Lightning web components we because they perform better and are easier
to develop.
• Create Custom
Content Layout
Components for
Experience Builder
•
Custom Lightning web components and Aura components encapsulate a CSS resource as part of
the component bundle, making the components reusable across sites.
• Configure
Swappable Search
•
Content layout components define the content regions of your page and contain components.
•
Theme layout components let you customize the structural layout of the template, such as the
header and footer, and override its default styles.
and Profile Menu
Components
• Ensure Custom
Components in Orgs
with Experience
Cloud Sites Are
Secure
23

Update a Template with the Theme Panel
Within Experience Builder, the simplest way to change the look of a template is with the Theme panel. Administrators can quickly style
an entire sites using the theme panels to apply colors, specify fonts, add a logo, or adjust general page structure and defaults.
The properties set in the Theme panel apply to the pages in a template and most off-the-shelf components. Use Branding Sets to quickly
apply bundles of colors, images, and fonts.
The Theme panel’s properties also apply to custom Aura components that use standard design tokens to control their appearance.
SEE ALSO:
Salesforce Help: Prebuilt Experience Builder Themes
Use the CSS Editor for Custom CSS
Use the CSS Editor in Experience Builder to create custom CSS to style elements across your Aura site. This option is suitable if you’re
familiar with CSS and want to make only minor modifications to some template components.
Warning: Use custom CSS sparingly and avoid targeting DOM elements in components that you don’t own. Doing so is brittle
because changes to the component’s internal DOM structure is likely to break hard-coded CSS selectors. Salesforce can change
the internal implementation of Salesforce components at any point . Additionally, Salesforce Customer Support can’t help resolve
any issues with custom CSS.
24
Update a Template with the Theme PanelBrand Your Aura Site

To make minor CSS modifications to a component, use Chrome DevTools to inspect the page and discover the item’s fully qualified
name and CSS class.
Tip: For substantial template customizations, instead of using custom CSS, use the CSS resource in custom Lightning web
components or Aura components and in custom theme layout components. If you use global overrides, always test your site in
sandbox when it’s updated each release.
You can link to a CSS style sheet as either a static or external resource in the head markup in Settings > Advanced. However, because
global value providers aren’t supported in the head markup or in CSS overrides, you can’t use $resource to reference static resources.
Instead, use a relative URL using the syntax /sfsites/c/resource/resource_name.
For example, if you upload an image as a static resource called Headline, reference it in the CSS Editor as follows:
.forceCommunityHeadline
{
background-image: url('/sfsites/c/resource/headline')
}
Head markup is also useful for adding favicon icons, SEO meta tags, and other items. However, be aware that using the default strict CSP
security level can affect your code.
Migrate CSS Overrides
Between Spring ’17 and Winter ’19, the CSS selectors of several Experience Builder components were updated. If you haven’t updated
your template since then, and your site uses custom CSS to override the default template and Theme panel styles, you must migrate
to the new selectors.
SEE ALSO:
Salesforce Help: Static Resources
Salesforce Help: Add Markup to the Page <head> to Customize Your Experience Builder Site
25
Use the CSS Editor for Custom CSSBrand Your Aura Site

Migrate CSS Overrides
Between Spring ’17 and Winter ’19, the CSS selectors of several Experience Builder components were updated. If you haven’t updated
your template since then, and your site uses custom CSS to override the default template and Theme panel styles, you must migrate to
the new selectors.
See Update Your Experience Builder Template in Salesforce Help.
Note:
•
Use custom CSS sparingly since template updates don’t always support customizations.
•
Custom CSS is now shared across all your site pages. If you used custom CSS for Login pages, copy it and close the CSS editor.
Then navigate to a non-Login page, reopen the editor, and add the custom CSS.
CSS Overrides Migration for the Navigation Menu
If you plan to continue using custom CSS overrides, migrate them forward after you update the template.
CSS Overrides Migration for the Panels Container
If you plan to continue using custom CSS overrides, migrate them forward after you update the template.
CSS Overrides Migration for the Record Banner Component
If you plan to continue using custom CSS overrides, migrate them forward after you update the template.
CSS Overrides Migration for the Record Detail Component
If you plan to continue using custom CSS overrides, migrate them forward after you update the template.
CSS Overrides Migration for the Record Layout Component
If you plan to continue using custom CSS overrides, migrate them forward after you update the template.
CSS Overrides Migration for the Record List Component
If you plan to continue using custom CSS overrides, migrate them forward after you update the template.
CSS Overrides Migration for the Record Related List Component
If you plan to continue using custom CSS overrides, migrate them forward after you update the template.
CSS Overrides Migration for the Related Articles Component
If you plan to continue using custom CSS overrides, migrate them forward after you update the template.
CSS Overrides Migration for the Reputation Leaderboard Component
If you plan to continue using custom CSS overrides, migrate them forward after you update the template.
CSS Overrides Migration for the Embedded Service Sidebar Header Component
If you plan to continue using custom CSS overrides, migrate them forward after you update the template.
CSS Overrides Migration for Trending Articles by Topic Component
If you plan to continue using custom CSS overrides, migrate them forward after you update the template.
SEE ALSO:
Use the CSS Editor for Custom CSS
CSS Overrides Migration for the Navigation Menu
If you plan to continue using custom CSS overrides, migrate them forward after you update the template.
This topic identifies selector changes for the Navigation Menu.
26
Migrate CSS OverridesBrand Your Aura Site

Note:
•
Use custom CSS sparingly since template updates don’t always support customizations.
•
Custom CSS is now shared across all your site pages. If you used custom CSS for Login pages, copy it and close the CSS editor.
Then navigate to a non-Login page, reopen the editor, and add the custom CSS.
Full Navigation Menu
New SelectorPrevious Selector
.comm-navigation
.forceCommunityNavigationMenu
.forceCommunityNavigationMenu
#navigationMenu
.forceCommunityNavigationMenu
.navigationMenu
.forceCommunityNavigationMenu
.navigationMenuWrapper
Mobile Menu Curtain
New SelectorPrevious Selector
.comm-navigation nav.slds-is-fixed.forceCommunityNavigationMenu
.navigationMenuWrapperCurtain
Home Menu Item
New SelectorPrevious Selector
.comm-navigation .slds-list__item
a[data-type="home"]
.forceCommunityNavigationMenu .homeLink
.forceCommunityNavigationMenu .homeButton
Home Menu Item Link
New SelectorPrevious Selectors
.comm-navigation .comm-navigation__item
a[data-type="home"]
.forceCommunityNavigationMenu
.homeLink.forceCommunityNavigationMenu
.homeButton.comm-navigation
.slds-list__item a[data-type="home"]
27
Migrate CSS OverridesBrand Your Aura Site

Mobile Menu Toggle Button
New SelectorPrevious Selector
.siteforceServiceBody .cHeaderPanel
.cAltToggleNav
.forceCommunityNavigationMenu .toggleNav
Top-Level Menu Items
Includes submenu triggers.
New SelectorPrevious Selector
.comm-navigation .comm-navigation__list >
.slds-list__item
.forceCommunityNavigationMenu .menuItem
.forceCommunityGlobalNavigation
.navigationMenuNode
.comm-navigation .comm-navigation__list >
.slds-list__item > .comm-navigation__item
.forceCommunityNavigationMenu .menuItem
.forceCommunityGlobalNavigation
.navigationMenuNode
.comm-navigation .comm-navigation__list >
.slds-list__item
Current Top-Level Menu Item
New SelectorPrevious Selector
.comm-navigation .comm-navigation__list >
.slds-list__item > .slds-is-active
.forceCommunityNavigationMenu .current
.forceCommunityGlobalNavigation
.menuItem.current
.comm-navigation .comm-navigation__list >
.slds-list__item> .comm-navigation__item
> .slds-is-active
.forceCommunityNavigationMenu .current
.forceCommunityGlobalNavigation
.menuItem.current
.comm-navigation .comm-navigation__list >
.slds-list__item > .slds-is-active
Top-Level Menu Item Links
New SelectorPrevious Selector
.comm-navigation .comm-navigation__list >
.slds-list__item > a
.forceCommunityNavigationMenu .menuItemLink
28
Migrate CSS OverridesBrand Your Aura Site

New SelectorPrevious Selector
.forceCommunityNavigationMenu
a.menuItemLink
.comm-navigation .comm-navigation__list >
.slds-list__item > button
.forceCommunityNavigationMenu .menuItem
.menuItemLink
.forceCommunityNavigationMenu .menuItem a
.forceCommunityNavigationMenu .menuItem
a.menuItemLink
.comm-navigation .comm-navigation__list >
.slds-list__item> .comm-navigation__item
> a
.forceCommunityNavigationMenu .menuItemLink
.forceCommunityNavigationMenu
a.menuItemLink
.comm-navigation .comm-navigation__list >
.slds-list__item> .comm-navigation__item
> button
.forceCommunityNavigationMenu .menuItem
.menuItemLink
.forceCommunityNavigationMenu .menuItem a
.forceCommunityNavigationMenu .menuItem
a.menuItemLink
.comm-navigation .comm-navigation__list >
.slds-list__item > a
.comm-navigation .comm-navigation__list >
.slds-list__item > button
Submenu Items
New SelectorPrevious Selector
.comm-navigation
.slds-list_vertical.slds-is-nested
.slds-list__item
.forceCommunityNavigationMenu .subMenuItem
.comm-navigation
.slds-list_vertical.slds-is-nested
.comm-navigation__item
.forceCommunityNavigationMenu .subMenuItem
.comm-navigation
.slds-list_vertical.slds-is-nested
.slds-list__item
Current/Active Submenu Item
New SelectorPrevious Selector
.comm-navigation
.slds-list_vertical.slds-is-nested
.slds-list__item .slds-is-active
.forceCommunityNavigationMenu
.subMenuItem.current
29
Migrate CSS OverridesBrand Your Aura Site

New SelectorPrevious Selector
.comm-navigation
.slds-list_vertical.slds-is-nested
.comm-navigation__item .slds-is-active
.forceCommunityNavigationMenu
.subMenuItem.current
.comm-navigation
.slds-list_vertical.slds-is-nested
.slds-list__item .slds-is-active
Submenu Trigger Link
New SelectorPrevious Selector
.comm-navigation .slds-list__item
button:enabled
.forceCommunityNavigationMenu .triggerLink
.forceCommunityNavigationMenu .triggerLabel
.comm-navigation .comm-navigation__item
button:enabled
.forceCommunityNavigationMenu .triggerLink
..forceCommunityNavigationMenu
.triggerLabel
.comm-navigation .slds-list__item
button:enabled
Submenu Trigger Link Icon
New SelectorPrevious Selector
.comm-navigation .slds-list__item
button:enabled .slds-icon_container
.forceCommunityNavigationMenu .triggerLink
.forceIcon
.comm-navigation .comm-navigation__item
button:enabled .slds-icon_container
.forceCommunityNavigationMenu .triggerLink
.forceIcon
.comm-navigation .slds-list__item
button:enabled .slds-icon_container
Menu Items
Includes top-level and submenu items.
New SelectorPrevious Selector
.comm-navigation .slds-list__item.forceCommunityNavigationMenu
.navigationMenu li
.comm-navigation .comm-navigation__item
.forceCommunityNavigationMenu
.navigationMenu li
30
Migrate CSS OverridesBrand Your Aura Site

New SelectorPrevious Selector
.comm-navigation .slds-list__item
Menu Item Links
Includes top-level and submenu items.
New SelectorPrevious Selector
.comm-navigation .slds-list__item a.forceCommunityNavigationMenu a
.comm-navigation .slds-list__item button.forceCommunityNavigationMenu
a.menuItemLink
.comm-navigation .comm-navigation__item
a.comm-navigation .comm-navigation__item
button
.forceCommunityNavigationMenu a
.forceCommunityNavigationMenu
a.menuItemLink
.comm-navigation .slds-list__item a
.comm-navigation .slds-list__item button
Submenus
New SelectorPrevious Selector
.comm-navigation
.slds-list_vertical.slds-is-nested
.forceCommunityNavigationMenu .subMenu
Submenu Items
New SelectorPrevious Selector
.comm-navigation
.slds-list_vertical.slds-is-nested
.slds-list__item
.forceCommunityNavigationMenu .subMenuItem
.comm-navigation
.slds-list_vertical.slds-is-nested
.comm-navigation__item
.forceCommunityNavigationMenu .subMenuItem
.comm-navigation
.slds-list_vertical.slds-is-nested
.slds-list__item
31
Migrate CSS OverridesBrand Your Aura Site

Submenu Item Links
New SelectorPrevious Selector
.comm-navigation
.slds-list_vertical.slds-is-nested
.slds-list__item a
.forceCommunityNavigationMenu .subMenuItem
a
.forceCommunityNavigationMenu .subMenu a
.comm-navigation
.slds-list_vertical.slds-is-nested
.comm-navigation__item a
.comm-navigation
.slds-list_vertical.slds-is-nested
.comm-navigation__item
CSS Overrides Migration for the Panels Container
If you plan to continue using custom CSS overrides, migrate them forward after you update the template.
This topic identifies selector changes.
Note:
•
Use custom CSS sparingly since template updates don’t always support customizations.
•
Custom CSS is now shared across all your site pages. If you used custom CSS for Login pages, copy it and close the CSS editor.
Then navigate to a non-Login page, reopen the editor, and add the custom CSS.
Panels Container
New SelectorPrevious Selector
.comm-panels-container
.uiPanelManager2
.onePanelManager
.siteforcePanelManager
CSS Overrides Migration for the Record Banner Component
If you plan to continue using custom CSS overrides, migrate them forward after you update the template.
This topic identifies selector changes.
Note:
•
Use custom CSS sparingly since template updates don’t always support customizations.
•
Custom CSS is now shared across all your site pages. If you used custom CSS for Login pages, copy it and close the CSS editor.
Then navigate to a non-Login page, reopen the editor, and add the custom CSS.
32
Migrate CSS OverridesBrand Your Aura Site

Detail Field Label
New SelectorPrevious Selector
.forceCommunityRecordHeadline
.slds-form-element__label
.forceCommunityRecordHeadline
.slds-text-heading-label-normal
Detail Field Value
New SelectorPrevious Selector
.forceCommunityRecordHeadline
.slds-form-element__static
.forceCommunityRecordHeadline
.slds-text-body--regular
CSS Overrides Migration for the Record Detail Component
If you plan to continue using custom CSS overrides, migrate them forward after you update the template.
This topic identifies selector changes.
Note:
•
Use custom CSS sparingly since template updates don’t always support customizations.
•
Custom CSS is now shared across all your site pages. If you used custom CSS for Login pages, copy it and close the CSS editor.
Then navigate to a non-Login page, reopen the editor, and add the custom CSS.
Form Element Separator
New SelectorPrevious Selector
.forceCommunityRecordDetail
.slds-form-element_separator
.forceCommunityRecordDetail
.slds-form-element__control
.slds-form-element_separator
CSS Overrides Migration for the Record Layout Component
If you plan to continue using custom CSS overrides, migrate them forward after you update the template.
This topic identifies selector changes.
Note:
•
Use custom CSS sparingly since template updates don’t always support customizations.
•
Custom CSS is now shared across all your site pages. If you used custom CSS for Login pages, copy it and close the CSS editor.
Then navigate to a non-Login page, reopen the editor, and add the custom CSS.
33
Migrate CSS OverridesBrand Your Aura Site

Full Record Layout
New SelectorPrevious Selector
force-record-layout2
force-record-layout-block
.forceRecordLayout
.forceRecordLayout.forcePageBlock
Section
New SelectorPrevious Selector
force-record-layout2
force-record-layout-section
.forceRecordLayout
.full.forcePageBlockSectionView
.forceRecordLayout
.full.forcePageBlockSection
.forceRecordLayout
.full.forcePageBlockSectionView.forcePageBlockSection
.forceRecordLayout
.forcePageBlockSectionView
.forceRecordLayout .forcePageBlockSection
.forceRecordLayout
.forcePageBlockSectionView.forcePageBlockSection
Section Title
New SelectorPrevious Selector
force-record-layout2
force-record-layout-section h3
.forceRecordLayout
.full.forcePageBlockSection h3
Section Row
New SelectorPrevious Selector
force-record-layout2
force-record-layout-row
.forceRecordLayout
.full.forcePageBlockSectionRow
.forceRecordLayout
.forcePageBlockSectionRow
34
Migrate CSS OverridesBrand Your Aura Site

Section Item
New SelectorPrevious Selector
force-record-layout2
force-record-layout-item
.forceRecordLayout
.full.forcePageBlockItem.forcePageBlockItemView
.forceRecordLayout .full.forcePageBlockItem
.forceRecordLayout
.full.forcePageBlockItemView
.forceRecordLayout .forcePageBlockItem
.forceRecordLayout .forcePageBlockItemView
.forceRecordLayout
.forcePageBlockItem.forcePageBlockItemView
Section Item Label
New SelectorPrevious Selector
force-record-layout2
.slds-form-element__label
.forceRecordLayout
.slds-form-element__label
Section Item Value
New SelectorPrevious Selector
force-record-layout2
.slds-form-element__static
.forceRecordLayout .itemBody
Section Item Value Link
New SelectorPrevious Selector
force-record-layout2 a.forceRecordLayout a
CSS Overrides Migration for the Record List Component
If you plan to continue using custom CSS overrides, migrate them forward after you update the template.
This topic identifies selector changes.
Note:
•
Use custom CSS sparingly since template updates don’t always support customizations.
•
Custom CSS is now shared across all your site pages. If you used custom CSS for Login pages, copy it and close the CSS editor.
Then navigate to a non-Login page, reopen the editor, and add the custom CSS.
35
Migrate CSS OverridesBrand Your Aura Site

List View Button Bar
New SelectorPrevious Selector
.forceListViewManagerHeader
force-list-view-manager-button-bar
.forceListViewManagerHeader
.forceListViewManagerButtonBar
List View Button Bar Buttons
New SelectorPrevious Selector
.forceListViewManagerHeader
force-list-view-manager-button-bar button
.forceListViewManagerHeader
.forceListViewManagerButtonBar button
List View Status Information
New SelectorPrevious Selector
.forceListViewManagerHeader
force-list-view-manager-status-info
.forceListViewManagerHeader
.test-listViewStatusInfo
Picker Trigger Link
New SelectorPrevious Selector
.forceListViewManagerHeader .triggerLink
.slds-button
.forceListViewManagerHeader .triggerLink
CSS Overrides Migration for the Record Related List Component
If you plan to continue using custom CSS overrides, migrate them forward after you update the template.
This topic identifies selector changes.
Note:
•
Use custom CSS sparingly since template updates don’t always support customizations.
•
Custom CSS is now shared across all your site pages. If you used custom CSS for Login pages, copy it and close the CSS editor.
Then navigate to a non-Login page, reopen the editor, and add the custom CSS.
Detail Field Label
New SelectorPrevious Selector
.forceCommunityRelatedRecords
.slds-card__header-title
.forceCommunityRelatedRecords
.slds-card__header-link
.slds-text-heading--small
36
Migrate CSS OverridesBrand Your Aura Site

CSS Overrides Migration for the Related Articles Component
If you plan to continue using custom CSS overrides, migrate them forward after you update the template.
This topic identifies selector changes.
Note:
•
Use custom CSS sparingly since template updates don’t always support customizations.
•
Custom CSS is now shared across all your site pages. If you used custom CSS for Login pages, copy it and close the CSS editor.
Then navigate to a non-Login page, reopen the editor, and add the custom CSS.
Full Related Articles
New SelectorPrevious Selector
.comm-related-articles
.selfServiceSimilarArticles
.base-items
.uiAbstractList
.selfServiceBaseSimpleItems
Component Title
New SelectorPrevious Selector
.comm-related-articles h2
.selfServiceSimilarArticles h2
.selfServiceSimilarArticles
.base-items-header
Article List
New SelectorPrevious Selector
.comm-related-articles ul
.selfServiceSimilarArticles ul
.selfServiceSimilarArticles .base-items
Article List Items
New SelectorPrevious Selector
.comm-related-articles li
.selfServiceSimilarArticles
.base-simple-item
.comm-related-articles
.comm-related-articles__item
.selfServiceSimilarArticles
.base-simple-item
37
Migrate CSS OverridesBrand Your Aura Site

New SelectorPrevious Selector
.comm-related-articles li
Article Links
New SelectorPrevious Selector
.comm-related-articles li a
.selfServiceSimilarArticles .item-title
.selfServiceSimilarArticles
.item-title-link
.comm-related-articles
.comm-related-articles__item a
.selfServiceSimilarArticles .item-title
.selfServiceSimilarArticles
.item-title-link
.comm-related-articles li a
CSS Overrides Migration for the Reputation Leaderboard Component
If you plan to continue using custom CSS overrides, migrate them forward after you update the template.
This topic identifies selector changes.
Note:
•
Use custom CSS sparingly since template updates don’t always support customizations.
•
Custom CSS is now shared across all your site pages. If you used custom CSS for Login pages, copy it and close the CSS editor.
Then navigate to a non-Login page, reopen the editor, and add the custom CSS.
Full Reputation Leaderboard
New SelectorPrevious Selector
.comm-leaderboard.forceCommunityReputationLeaderboard.leaderboard
Reputation Leaderboard Row
New SelectorPrevious Selector
.comm-leaderboard li.forceCommunityReputationLeaderboardRow
.comm-leaderboard .comm-leaderboard__item
.forceCommunityReputationLeaderboardRow
.comm-leaderboard li
38
Migrate CSS OverridesBrand Your Aura Site

User Info Column
New SelectorPrevious Selector
.comm-leaderboard .slds-media__body
.forceCommunityReputationLeaderboard
.pointsAndLevels
.forceCommunityReputationLeaderboard
.userInfoCol
Reputation Points Column
New SelectorPrevious Selector
.comm-leaderboard__points-column
.forceCommunityReputationLeaderboard
.reputationCol
Title
New SelectorPrevious Selector
.comm-leaderboard h2.forceCommunityReputationLeaderboard .title
User Level Name
New SelectorPrevious Selector
.comm-leaderboard__level-name
.forceCommunityReputationLeaderboard
.reputationLevelName
User Reputation Level Image
New SelectorPrevious Selector
.comm-leaderboard .slds-media__body
.slds-icon_small
.forceCommunityReputationLeaderboard
.reputationLevelImage
Username in User
New SelectorPrevious Selector
.comm-leaderboard__user-name
.forceCommunityReputationLeaderboard
.userName
39
Migrate CSS OverridesBrand Your Aura Site

User Photo in User
New SelectorPrevious Selector
.comm-leaderboard .slds-media__figure
.forceCommunityReputationLeaderboard
.userPhoto
User Points in Reputation Levels
New SelectorPrevious Selector
.comm-leaderboard__points
.forceCommunityReputationLeaderboard
reputationPointsNumber.
User Points Word in Reputation Levels
New SelectorPrevious Selector
.comm-leaderboard__points-word
.forceCommunityReputationLeaderboard
.reputationPointsWord.
CSS Overrides Migration for the Embedded Service Sidebar Header Component
If you plan to continue using custom CSS overrides, migrate them forward after you update the template.
This topic identifies selector changes.
Note:
•
Use custom CSS sparingly since template updates don’t always support customizations.
•
Custom CSS is now shared across all your site pages. If you used custom CSS for Login pages, copy it and close the CSS editor.
Then navigate to a non-Login page, reopen the editor, and add the custom CSS.
Header Background Color
New SelectorPrevious Selector
.embeddedServiceSidebar.sidebarHeader {
background-color:#aaa;
}
.sidebarHeader { background-color: #aaa;
}
CSS Overrides Migration for Trending Articles by Topic Component
If you plan to continue using custom CSS overrides, migrate them forward after you update the template.
This topic identifies selector changes.
40
Migrate CSS OverridesBrand Your Aura Site

Note:
•
Use custom CSS sparingly since template updates don’t always support customizations.
•
Custom CSS is now shared across all your site pages. If you used custom CSS for Login pages, copy it and close the CSS editor.
Then navigate to a non-Login page, reopen the editor, and add the custom CSS.
Full Trending Articles
New SelectorPrevious Selector
.comm-topic-trending-articles
.selfServiceTopicTrendingArticles
.base-items
.uiAbstractList
.selfServiceBaseSimpleItems
Component Title
New SelectorPrevious Selector
.comm-topic-trending-articles h2
.selfServiceTopicTrendingArticles h2
.selfServiceTopicTrendingArticles
.base-items-header
Article List
New SelectorPrevious Selector
.comm-topic-trending-articles ul
.selfServiceTopicTrendingArticles ul
.selfServiceTopicTrendingArticles
.base-items
Article List Items
New SelectorPrevious Selector
.comm-topic-trending-articles li
.selfServiceTopicTrendingArticles
.base-simple-item
.comm-topic-trending-articles
.comm-topic-trending-articles__item
.selfServiceTopicTrendingArticles
.base-simple-item
.comm-topic-trending-articles li
41
Migrate CSS OverridesBrand Your Aura Site

Article Links
New SelectorPrevious Selector
.comm-topic-trending-articles li a
.selfServiceTopicTrendingArticles
.item-title-link
.selfServiceTopicTrendingArticles a
.comm-topic-trending-articles
.comm-topic-trending-articles__item a
.selfServiceTopicTrendingArticles
.item-title-link
.selfServiceTopicTrendingArticles a
.comm-topic-trending-articles li a
Use Custom Fonts in Your Experience Builder Site
Upload custom fonts as static resources and use them for primary and header fonts throughout your site. If you’ve more than one font
file to upload, use a .zip file.
1. In Setup, enter Static Resources in the Quick Find box, and then select Static Resources.
2. Click New, upload the file, and give the static resource a name. Keep a note of the resource name.
If your site has public pages, select Public in the Cache Control setting. If you don’t make the font resource publicly available, the
page uses the browser’s default font instead.
3.
In Experience Builder, open the CSS editor by clicking Theme > > Edit CSS.
4. Use the @font-face CSS rule to reference the uploaded font.
For example:
@font-face {
font-family: 'myFirstFont';
src: url('/myPartnerSite/s/sfsites/c/resource/MyFonts/bold/myFirstFont.woff')
format('woff');
}
Note: format() is an optional hint that describes the format of the font referenced in the URL.
•
To reference a single font file, use the syntax /path_prefix/s/sfsites/c/resource/resource_name, where
path_prefix is the URL value that was added when you created the site, such as myPartnerSite.
For example, if you upload a file called myFirstFont.woff and name the resource MyFonts, the URL is
/myPartnerSite/s/sfsites/c/resource/MyFonts.
•
To reference a file in a .zip file, include the folder structure but omit the .zip file name. Use the syntax
/path_prefix/s/sfsites/c/resource/resource_name/font_folder/font_file.
So if you upload fonts.zip, which contains bold/myFirstFont.woff, and you name the resource MyFonts, the URL
is /myPartnerSite/s/sfsites/c/resource/MyFonts/bold/myFirstFont.woff.
5. In the Theme panel, select Fonts, select the Primary Font or Header Fonts dropdown list, and then click Use Custom Font.
42
Use Custom Fonts in Your Experience Builder SiteBrand Your Aura Site

6. Add the font family name that you entered in the CSS editor—for example, myFirstFont—and save your changes.
Customize the Theme Layout of Your Template
To put your own stamp on a template theme and transform its appearance, build a custom theme layout component. You can customize
the template’s structural layout, such as the header and footer, and override its default styles.
A theme layout component is the top-level layout for the template pages in your site. Theme layout components are organized and
applied to your pages through theme layouts. A theme layout component includes the common header and footer, and often includes
navigation, search, and the user profile menu. In contrast, the content layout defines the content regions of your pages. The next image
shows a two-column content layout.
SEE ALSO:
Trailhead: Build a Custom Theme Layout Component for Experience Builder Sites
How Do Custom Theme Layouts Work?
To understand how a theme layout works, let’s look at things from the Experience Builder perspective. In Experience Builder, theme
layouts combine with theme layout components to give you granular control of the appearance and structure of each page in your site.
You can customize the layout’s header and footer to match your company’s branding and style, configure theme properties, or use a
custom search bar and user profile menu. You then use theme layouts to apply a theme layout component to individual pages and
quickly change layouts from one central location.
A theme layout categorizes the pages in your site that share the same theme layout component. You can assign a theme layout component
to any existing theme layout. Then you apply the theme layout —and thereby the theme layout component—in the page’s properties.
43
Customize the Theme Layout of Your TemplateBrand Your Aura Site

For example, the Customer Service template includes the following theme layouts and components, but you can create custom
components or switch layouts as needed.
•
Default applies the Customer Service theme layout to all pages, except the login pages.
•
Login applies the Login Body Layout theme layout component to the login pages.
Example: Let’s say you create three pages for your upcoming Spring campaign. Using the forceCommunity:themeLayout
interface, you create a custom Large Header theme layout in the Developer Console. In the Settings > Theme area, you add a
custom theme layout called Spring to categorize the campaign pages and you assign the Large Header layout component to it.
Next, you apply the Spring theme layout in each page’s properties, which instantly applies the Large Header layout to each page.
Select Override the default theme layout for this page. (1) to display Theme Layout. Choose the new layout (2) from the
available choices.
Everything looks rosy until the VP of marketing decides that the header takes up too much room. That’s an easy fix, because you
don’t have to update the properties of each page to change the theme layout. Instead, with one click in the Theme area, you can
switch Spring to the Small Header layout and instantly update all three pages.
44
How Do Custom Theme Layouts Work?Brand Your Aura Site

Example: Now let’s say that the Small Header layout includes two custom properties—Blue Background and Small Logo. You
enabled and applied these properties to all your campaign pages. However, for one page, you want to apply only the Small Logo
property.
In this case, you could create a theme layout called Spring B, assign the Small Header layout component to it, and enable Small
Logo. Then, you apply the Spring B theme to the page.
Not sure which pages are associated with any of your theme layouts?
With a click and a glance, you can see how many and which pages are associated with any of your theme layouts. From Settings >
Theme, click the Pages Assigned total for any theme layout row (1). Clicking this value opens a list of the pages associated with that
theme layout (2).
Theme layouts make it easy to reuse the same theme layout component in different ways while maintaining as much granular control
as you need.
SEE ALSO:
Trailhead: Build a Custom Theme Layout Component for Experience Builder Sites
Configure a Custom Theme Layout Component
Let’s look at how to create a custom theme layout component in the Developer Console to transform the appearance and overall structure
of the pages in the Customer Service template.
1. Add an Interface to Your Theme Layout Component
A theme layout component must implement the forceCommunity:themeLayout interface to appear in Experience Builder in
the Settings > Theme area.
Explicitly declare {!v.body} in your code to ensure that your theme layout includes the content layout. Add {!v.body} wherever
you want the page’s contents to appear within the theme layout.
45
Configure a Custom Theme Layout ComponentBrand Your Aura Site

Add attributes declared as Aura.Component[] to include regions in the theme layout, which contain the page’s components. You
can add components to the regions in your markup or leave regions open for users to drag-and-drop components into. Attributes
declared as Aura.Component[] and included in your markup are rendered as open regions in the theme layout that users can
add components to. For example:
<aura:component implements="forceCommunity:themeLayout">
<aura:attribute name="myRegion" type="Aura.Component[]"/>
{!v.body}
</aura:component>
In Customer Service, the Template Header consists of these locked regions.
•
search, which contains the Search Publisher component
•
profileMenu, which contains the Profile Header component
•
navBar, which contains the Navigation Menu component
To create a custom theme layout that reuses the existing components in the Template Header region, declare search, profileMenu,
or navBar as the attribute name value, as appropriate. For example:
<aura:attribute name="navBar" type="Aura.Component[]" required="false" />
Tip: If you create a swappable custom profile menu or a search component, declaring the search or profileMenu attribute
name value also lets users select the custom component when using your theme layout in Experience Builder.
Add the regions to your markup to define where to display them in the theme layout’s body.
Here’s the sample code for a simple theme layout.
<aura:component implements="forceCommunity:themeLayout" access="global" description="Sample
Custom Theme Layout">
<aura:attribute name="search" type="Aura.Component[]" required="false"/>
<aura:attribute name="profileMenu" type="Aura.Component[]" required="false"/>
<aura:attribute name="navBar" type="Aura.Component[]" required="false"/>
<aura:attribute name="newHeader" type="Aura.Component[]" required="false"/>
<div>
<div class="searchRegion">
{!v.search}
</div>
<div class="profileMenuRegion">
{!v.profileMenu}
</div>
46
Configure a Custom Theme Layout ComponentBrand Your Aura Site
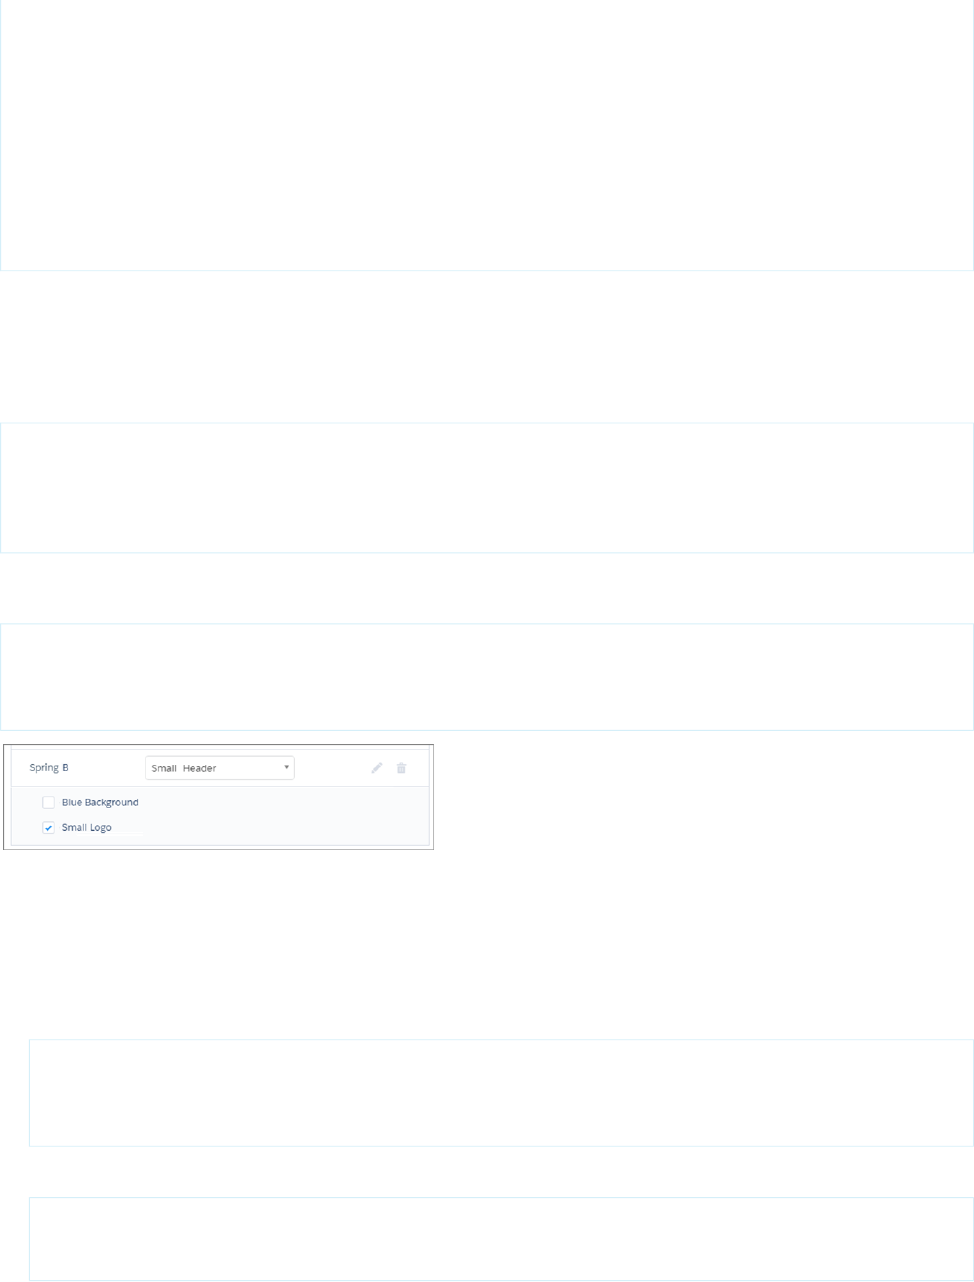
<div class="navigation">
{!v.navBar}
</div>
<div class="newHeader">
{!v.newHeader}
</div>
<div class="mainContentArea">
{!v.body}
</div>
</div>
</aura:component>
2. Add a Design Resource to Include Theme Properties
You can expose theme layout properties in Experience Builder by adding a design resource to your bundle.
First, implement the properties in the component.
<aura:component implements="forceCommunity:themeLayout" access="global" description="Small
Header">
<aura:attribute name="blueBackground" type="Boolean" default="false"/>
<aura:attribute name="smallLogo" type="Boolean" default="false" />
...
Define the theme properties in the design resource to expose the properties in the UI. This example adds a label for the Small Header
theme layout along with two checkboxes.
<design:component label="Small Header">
<design:attribute name="blueBackground" label="Blue Background"/>
<design:attribute name="smallLogo" label="Small Logo"/>
</design:component>
3. Add a CSS Resource to Avoid Overlapping Issues
Add a CSS resource to your bundle to style the theme layout as needed, ideally using standard design tokens.
To avoid overlapping issues with positioned elements, such as dialog boxes or hovers:
•
Apply CSS styles.
.THIS {
position: relative;
z-index: 1;
}
•
Wrap the elements in your custom theme layout in a div tag.
<div class="mainContentArea">
{!v.body}
</div>
47
Configure a Custom Theme Layout ComponentBrand Your Aura Site

Note: The theme layout controls the styling of anything within it, so it can add styles such as drop-shadows to regions or
components. For custom theme layouts, SLDS is loaded by default.
SEE ALSO:
Lightning Aura Components Developer Guide: Standard Design Tokens for Experience Builder Sites
Trailhead: Build a Custom Theme Layout Component for Experience Builder Sites
Use Expressions to Add Dynamic Data to Aura Sites
With expressions, you can access property values and other information to pass into a component's attributes.
An expression is any set of literal values, variables, subexpressions, or operators that can be resolved to a single value. Method calls aren’t
allowed in expressions.
The expression syntax is: {!expression} where expression is a placeholder for the expression.
Use these expressions to display the authenticated user’s information, images associated with data categories, or record information on
a site page.
DisplaysExpression
Combined first and last name of the user, as displayed on the user
detail page.
{!CurrentUser.name}
First name of the user, as displayed on the user edit page.{!CurrentUser.firstName}
Last name of the user, as displayed on the user edit page.{!CurrentUser.lastName}
Administrative field that defines the user’s login.{!CurrentUser.userName}
Salesforce ID of the user.{!CurrentUser.id}
Email address of the user.{!CurrentUser.email}
Name used to identify the user in a site.{!CurrentUser.communityNickname}
Account ID associated with the user. This expression displays a
valid account ID for partner and customer users. For all others, it
displays '000000000000000'.
{!CurrentUser.accountId}
Account ID associated with the effective account. This expression
displays a valid account ID for partner and customer users. For all
others, it displays '000000000000000'.
{!CurrentUser.effectiveAccountId}
Image associated with the data category in a search component.{!Global.PathPrefix}/{!DataCategory.Name}.jpg
Image associated with the data category in a subfolder in a search
component.
{!Global.PathPrefix}/<Name of the
Subfolder>/{!DataCategory.Name}.jpg
15-digit record ID on object pages.{!recordId}
48
Use Expressions to Add Dynamic Data to Aura SitesBrand Your Aura Site

DisplaysExpression
Expression that returns the HTML-encoded search term in the
Aura-based standard search page.
{!term}
SEE ALSO:
LWR Sites for Experience Cloud : Use Expressions in LWR Sites
Create Custom Content Layout Components for Experience Builder
Experience Builder includes several ready-to-use layouts that define the content regions of your page, such as a two-column layout with
a 2:1 ratio. However, if you need a layout that’s customized for your site, create a custom content layout component to use when building
new pages in Experience Builder. You can also update the content layout of the default pages that come with your site template.
When you create a custom content layout component in the Developer Console, it appears in Experience Builder in the New Page and
the Change Layout dialog boxes.
1. Add a New Interface to Your Content Layout Component
To appear in the New Page and the Change Layout dialog boxes in Experience Builder, a content layout component must implement
the forceCommunity:layout interface.
Here’s the sample code for a simple two-column content layout.
<aura:component implements="forceCommunity:layout" description=”Custom Content Layout”
access="global">
<aura:attribute name="column1" type="Aura.Component[]" required="false"></aura:attribute>
<aura:attribute name="column2" type="Aura.Component[]" required="false"></aura:attribute>
<div class="container">
<div class="contentPanel">
<div class="left">
{!v.column1}
</div>
<div class="right">
{!v.column2}
</div>
</div>
</div>
</aura:component>
Note: Mark your resources, such as a component, with access="global" to make the resource usable outside of your own
org. For example, if you want a component to be usable in an installed package or by a Lightning App Builder user or a Experience
Builder user in another org.
You can also create documentation for a component, event, or interface marked access="global". This documentation is
automatically displayed in the Component Library of an org that uses or installs your package.
49
Create Custom Content Layout Components for Experience
Builder
Brand Your Aura Site

2. Add a CSS Resource to Your Component Bundle
Next, add a CSS resource to style the content layout as needed.
Here’s the sample CSS for our simple two-column content layout.
.THIS .contentPanel:before,
.THIS .contentPanel:after {
content: " ";
display: table;
}
.THIS .contentPanel:after {
clear: both;
}
.THIS .left {
float: left;
width: 50%;
}
.THIS .right {
float: right;
width: 50%;
}
CSS resources must be named componentName.css.
3. Optional: Add an SVG Resource to Your Component Bundle
You can include an SVG resource in your component bundle to define a custom icon for the content layout component when it appears
in the Experience Builder.
The recommended image size for a content layout component in Experience Builder is 170px by 170px. However, if the image has
different dimensions, Experience Builder scales the image to fit.
SVG resources must be named componentName.svg.
SEE ALSO:
Salesforce Help: Change the Content Layout in Experience Builder
Configure Swappable Search and Profile Menu Components
Create custom components to replace the template’s standard Profile Header and Search & Post Publisher components in Experience
Builder.
In Customer Service, for example, the Template Header consists of these locked regions:
•
search, which contains the Search Publisher component
•
profileMenu, which contains the Profile Header component
•
navBar, which contains the Navigation Menu component
50
Configure Swappable Search and Profile Menu ComponentsBrand Your Aura Site

These designated region names let you easily:
•
Swap search and profile components in the default theme layout component or a custom theme layout component.
•
Swap theme layout components while persisting existing customizations, such as the selected search component.
When a component implements the correct interface—forceCommunity:searchInterface or
forceCommunity:profileMenuInterface, in this case—it’s identified as a candidate for these regions. They therefore
appear as swappable components in a theme layout component, such as the default Customer Service theme layout component, which
declares search or profileMenu as an attribute name value.
<aura:attribute name="search" type="Aura.Component[]" required="false" />
forceCommunity:profileMenuInterface
Add the forceCommunity:profileMenuInterface interface to an Aura component to allow it to be used as a custom
profile menu component for the template. After you create a custom profile menu component, admins can select it in Experience Builder
in Settings > Theme to replace the template’s standard Profile Header component.
This code is for a simple profile menu component.
<aura:component implements="forceCommunity:profileMenuInterface" access="global">
<aura:attribute name="options" type="String[]" default="Option 1, Option 2"/>
<ui:menu >
<ui:menuTriggerLink aura:id="trigger" label="Profile Menu"/>
<ui:menuList class="actionMenu" aura:id="actionMenu">
<aura:iteration items="{!v.options}" var="itemLabel">
<ui:actionMenuItem label="{!itemLabel}" click="{!c.handleClick}"/>
</aura:iteration>
</ui:menuList>
</ui:menu>
</aura:component>
forceCommunity:searchInterface
Add the forceCommunity:searchInterface interface to an Aura component to allow it to be used as a custom search
component for the template. After you create a custom search component, admins can select it in Experience Builder in Settings >
Theme to replace the template’s standard Search & Post Publisher component.
51
Configure Swappable Search and Profile Menu ComponentsBrand Your Aura Site

This code is for a simple search component.
<aura:component implements="forceCommunity:searchInterface" access="global">
<div class="search">
<div class="search-wrapper">
<form class="search-form">
<div class="search-input-wrapper">
<input class="search-input" type="text" placeholder="My Search"/>
</div>
<input type="hidden" name="language" value="en" />
</form>
</div>
</div>
</aura:component>
SEE ALSO:
Trailhead: Build a Custom Search Component
Ensure Custom Components in Orgs with Experience Cloud Sites Are
Secure
Developers can customize functionality and business logic in Experience Cloud sites by using custom components. As with any custom
solution, developers must be aware of potential security-related pitfalls. Bypassing built-in defenses can expose sites and orgs to security
risks.
For example, if a developer stores sensitive data as text in a custom component’s definition, the data can potentially be exposed. Such
an exposure can happen when Digital Experiences are enabled in the org, the org has custom components, and the custom component’s
developer name is known. Exposure can occur whether the site is public or private.
Data exposed can include:
•
Sensitive information stored as text in the component definition
•
The complete component definition of the component including HTML, JavaScript, and CSS files
•
Names of any other components included in the component definition
•
Any Apex controller and method names used in the component definition
Such data can be exposed for any custom component in the org, whether they’re used in the Salesforce org, on an Experience Cloud
site, or when unused.
Take the following steps to decrease risk of data exposure in custom components.
•
Review the component definitions in all your custom components in the org
•
Avoid storing any sensitive data in component definitions. Sensitive data can include personally identifiable information, company
confidential information, or any information deemed sensitive to your business and customers
•
Review all your custom controllers and ensure that only required user profiles have access to them
•
Ensure that only required methods are exposed using @AuraEnabled
•
Use a naming convention for custom components that is complex and unique to your org
52
Ensure Custom Components in Orgs with Experience Cloud
Sites Are Secure
Brand Your Aura Site

CHAPTER 4 Develop Secure Sites: Authenticated and Guest Users
When implementing an Experience Cloud site accessible by external and unauthenticated guest users,
keep these security considerations in mind. External users have login privileges to your Experience Cloud
site, but they can’t access your internal Salesforce org. A guest user is anyone on the internet who can
visit the publicly accessible pages and components of your Experience Cloud site.
In this chapter ...
• Limit Declarative
Access
• Determine a Security
Model
• Limit Access to Apex
Classes
• Flow Security
• SOQL Injection
53

Limit Declarative Access
Granting permission to view an object allows external users to view that object using standard controllers. Standard controllers are
available in Experience Builder sites and Salesforce Tabs + Visualforce sites that have Lightning features enabled. These controllers grant
access based solely on the platform declarative permissions.
Grant declarative access to create, view, modify, or delete only those objects for which external users are allowed to access without
mediation via your controller. The Salesforce platform includes standard controllers that can be used to create, read, update, or delete
data. Standard UI controllers enforce the declarative access policies encoded in the platform’s sharing rules, in the create, read, update,
and delete (CRUD) permissions, and in field-level security (FLS). If you grant permissions to an external user to view or update an object,
they’re able to perform the operation. Don’t grant excessive permissions to any object if you don’t want those permissions exercised.
Determine a Security Model
For every use case, determine whether to implement a custom access control model or to rely on the declarative platform access control
model. We recommend using the platform declarative access control model when possible. However, sometimes your requirements
call for a custom access control model.
If you require a custom access control model:
1. Remove declarative data permissions, including create, read, update, and delete (CRUD), field-level security (FLS), and sharing, to
the objects accessed by the controller from the appropriate user profile and permission set. Declare the controller without sharing.
2. Implement procedural access control in controllers without sharing. For each affected controller, implement procedural access
control logic as required by your security policy.
If you can use the platform’s declarative access control model:
1. Declare your controller with sharing, and configure the sharing, CRUD permissions for objects, and FLS appropriately for each profile
and permission set.
Choosing a Security Model for your Controller: An Example
Consider a controller that creates a lead. Examples of custom access control include:
•
Requiring a CAPTCHA before a lead is created.
•
Requiring a referral code before a lead is created.
•
Requiring the user to agree to a license agreement before a lead is created.
In each of these examples, the desired policy requires a procedural step that can’t be enforced by declarative sharing, CRUD permissions,
or FLS. In these cases, write custom logic in your apex controller to enforce the procedural rules. To ensure that users can access only
the underlying data by invoking your controller, you must remove declarative access, including CRUD, FLS, and sharing to the lead object.
However, if your security policy can be mapped to the platform’s CRUD permissions, FLS, and sharing logic, configure the appropriate
sharing settings and object CRUD permissions to implement that logic. And then declare your controller with sharing.
Be aware that removing declarative access and relying on without-sharing procedural logic rules comes with some risk.
•
Implement your organization’s security logic via procedural Apex code. Implementation errors, or failure to correctly implement the
appropriate profile, record, or stateful access checks, leads to unauthorized data access.
•
If your security policy requires stateful logic, implement custom session management logic to preserve state across requests.
•
Writing procedural access control logic is hard for org admins to maintain and modify quickly.
54
Limit Declarative AccessDevelop Secure Sites: Authenticated and Guest Users

Removing CRUD permissions and FLS access is the only way to ensure that users must use your controller and can’t use standard
controllers to access the underlying objects. Because the platform can’t distinguish between unauthenticated guest users, you often
must implement custom access control and deny declarative access to all objects for guest users.
Unauthenticated Guest User Guidelines
Consider these guidelines about record ID encryption and providing different levels of access to unauthenticated guest users before
you choose a declarative or custom access control model.
Declarative Access Control Model Examples
These code and flow examples use the declarative access control model to provide unauthenticated guest users access to read
records.
Custom Access Control Model Examples
These code and flow examples use a custom access control model to provide unauthenticated guest users access to create records.
Unauthenticated Guest User Guidelines
Consider these guidelines about record ID encryption and providing different levels of access to unauthenticated guest users before
you choose a declarative or custom access control model.
Encrypt Record IDs for Guest Users
For security reasons, don’t allow guest users to look up records by record ID unless you want the record to be public. When a guest
user creates a record and wants to access it later, create an encrypted string that uses a combination of the record ID, record creation
timestamp, and a current timestamp. The encrypted string acts as a unique identifier for the record that only the record creator has.
At a later date, the Apex code that handles the request requires the guest user to submit the encrypted string. That Apex code
decrypts the string to get the record ID and other record identifiers, and it retrieves or updates the requested record.
Give Guest Users Access to Read Records
When you allow guest users access to read record data, you expose your data to the public. Review our guidelines, and design your
implementation to allow the necessary access to guest users without compromising your data.
Give Guest Users Access to Create Records
So guest users can create object records, configure the guest user profile to include create access for the desired object.
Give Guest Users Access to Update Records
To allow guest users to update records, perform the action in the system context without sharing. Before you allow a user to update
a record, verify an encrypted token previously provided to the user as a best practice. To ensure that it’s the correct record, verify
information about the record, such as its creator.
Encrypt Record IDs for Guest Users
For security reasons, don’t allow guest users to look up records by record ID unless you want the record to be public. When a guest user
creates a record and wants to access it later, create an encrypted string that uses a combination of the record ID, record creation timestamp,
and a current timestamp. The encrypted string acts as a unique identifier for the record that only the record creator has. At a later date,
the Apex code that handles the request requires the guest user to submit the encrypted string. That Apex code decrypts the string to
get the record ID and other record identifiers, and it retrieves or updates the requested record.
Tip: The User Encryption Decryption AppExchange package provides the UserCryptoHelper class, which uses the
System.Crypto Apex library for the encryption and decryption, stores the related data for you, and provides two template
55
Unauthenticated Guest User GuidelinesDevelop Secure Sites: Authenticated and Guest Users

flows. Use the managed package to implement customized record ID encryption, or create a similar managed package of your
own.
SEE ALSO:
Sample Code Without Sharing: Give Guest Users Access to Create Records and Read Them Later
Sample Code Without Sharing: Give Guest Users Access to Create Records and Update Them Later
Apex Developer Guide
Apex Reference Guide: Crypto Class
Give Guest Users Access to Read Records
When you allow guest users access to read record data, you expose your data to the public. Review our guidelines, and design your
implementation to allow the necessary access to guest users without compromising your data.
Warning: The Summer ’20 release added new settings and updated guidelines for guest user record access. As of Winter ’21, the
guidelines introduced with the Summer ’20 update are enforced. After the Winter ’21 release, use one of the methods described
in this document because the previous methods no longer work.
Each time a guest user requests to read record data, the response runs in a mode that determines if sharing rules apply to the request.
Because the modes have different security implications, consider the sensitivity of your data to determine the safest method for your
business needs. You can also use separate flows or multiple Apex classes to run some requests in one mode and other requests in another
mode.
How to Treat Sensitive Information
Remove all sensitive information from records before returning data to an unauthenticated user. For security reasons, don’t use guessable
information like record IDs to retrieve records that contain sensitive information.
With Sharing
A record request that runs with sharing can’t access records unless sharing rules give the guest user access to them. Consider sharing
rules for read-only access if these scenarios are true:
•
You want to make the records public and accessible by anyone.
•
The target records can be selected with sharing rules without exposing other records.
Without Sharing
Warning: When you implement requests without sharing, design the requests and the response data carefully to ensure that
you don’t unintentionally expose your org’s sensitive data.
A record request that runs in system mode without sharing performs actions with system-level access and bypasses sharing rules. If you
aren’t careful about the actions it performs and how it performs them, the request can expose or modify record data when run without
sharing. A query that runs without sharing exposes all selected records to the public.
Consider system mode without sharing if any of these scenarios are true:
•
Your guest users need more than read-only access for the records.
•
You don’t want the records to be public.
•
You can’t select the records without exposing other records.
56
Unauthenticated Guest User GuidelinesDevelop Secure Sites: Authenticated and Guest Users

•
The target records are part of a parent-child relationship and access to the child records is limited by write access on the parent
records. Because sharing rules can’t give write access to guest users, run the request without sharing in this scenario.
Encrypted Record IDs for Record Selection
If a guest user creates a record and must access it later, encrypt the record ID with the record creation timestamp, and return the encrypted
string to the client. Provide the guest user with a URL that contains the encrypted string so they can avoid typing the long string. When
they request read access to the record, retrieve the encrypted string from the URL. To select the record, use the decrypted record ID.
Lightning Components
Lightning components that link directly with an object’s fields automatically perform object create, read, updated, and delete (CRUD)
permission and field-level security (FLS) checks to determine whether the components display for the user. For records that you don’t
share with guest users, the CRUD and FLS checks fail, and the components don’t display. To use Lightning components to display those
records, set their values to variables, and separately associate those variables with the object’s fields in Apex code.
Because this method works around the automatic CRUD and FLS checks, implement your Lightning components with these guidelines:
•
In your queries, include only the record fields that you need.
•
Don’t pass sensitive fields to the client-side code.
•
Pass only fields that the client requires to the client. All data sent to the client is public.
Code Samples
•
Sample Code With Sharing: Give Guest Users Access to Read Records
•
Sample Code Without Sharing: Give Guest Users Access to Create and Read Records in the Same Transaction
•
Sample Code Without Sharing: Give Guest Users Access to Create Records and Read Them Later
Flow Samples
•
Sample Flow With Sharing: Give Guest Users Access to Read Records
•
Sample Flow Without Sharing: Give Guest Users Access to Create and Read Records in One Flow
SEE ALSO:
Salesforce Help: Secure Guest Users’ Sharing Settings and Record Access
Salesforce Help: Sharing Rules
Salesforce Security Guide: Sharing Rules
Give Guest Users Access to Create Records
So guest users can create object records, configure the guest user profile to include create access for the desired object.
To grant create access to an object, you must grant read access to the object. If read access isn’t needed on that object, we recommend
removing all permissions for that object and running the create logic in a without sharing controller.
Tip: Perform data validation on guest-created data to ensure that it doesn’t impact your automated processes.
57
Unauthenticated Guest User GuidelinesDevelop Secure Sites: Authenticated and Guest Users

Record IDs and Guest Users
After record creation, don’t include the record ID in the response to the client. To create a unique record identifier for later access, encrypt
the record ID with the record creation timestamp, and return the encrypted string to the client.
When you retrieve a record, the record ID is automatically included in the object. Remove the record ID from the object, and don’t pass
it to the client.
Record Creation and Access in Apex Methods
Guest user sharing rules take effect after the transaction completes. If Apex code with sharing creates and then requests the newly
created record, and the guest user is relying on sharing rules to access the record, the read request fails because the guest sharing rules
haven’t taken effect. To allow a guest user to create a record and read the newly created record in the same method, define the class
with the without sharing keyword.
Record Creation and Access in Flow
In a flow, the Create Records element doesn’t create records until the interview executes a Screen, Local Action, or Pause element. To
create and read the same record in the same flow, insert a screen between record creation and retrieval, or read the record in an Apex
action.
Samples
•
Sample Flow: Give Guest Users Access to Create Records
•
Sample Flow Without Sharing: Give Guest Users Access to Create and Read Records in One Flow
•
Sample Code Without Sharing: Give Guest Users Access to Create and Read Records in the Same Transaction
SEE ALSO:
Salesforce Help: Configure the Guest User Profile
Encrypt Record IDs for Guest Users
Give Guest Users Access to Update Records
To allow guest users to update records, perform the action in the system context without sharing. Before you allow a user to update a
record, verify an encrypted token previously provided to the user as a best practice. To ensure that it’s the correct record, verify information
about the record, such as its creator.
Warning: The Summer ’20 release added new settings and updated guidelines for guest user record access. As of Winter ’21, the
guidelines introduced with the Summer ’20 update are enforced. After the Winter ’21 release, you must use the without sharing
mode because you can’t use sharing rules to grant guest users update access to records..
Lightning Components and Guest Users
Lightning components that link directly with an object’s fields automatically perform object permissions and field-level security (FLS)
checks to determine whether the components display for the user. If you have the Secure guest user record access setting enabled,
then you can’t give guest users access to update records. In that scenario, object permission checks that require update permissions fail
and the components don’t display.
58
Unauthenticated Guest User GuidelinesDevelop Secure Sites: Authenticated and Guest Users

To use Lightning components to handle guest user input, use variables to set the values of the Lightning components. Then separately
associate those variables with the record’s fields in the Apex code. Because this method works around the automatic object permissions
and FLS checks, implement your Lightning components with these guidelines:
•
Use server-side code to retrieve the record and verify it’s the record that you want to update before you perform the update.
•
Don’t pass record fields to the client unless you want to display them to the user. Any data you send to the client is public.
•
Don’t pass record IDs to the client. Don’t accept record IDs from the client. To create a unique identifier for a record, encrypt the
record ID as a string.
•
Use server-side logic to restrict the update to only the desired fields. Don’t use client-side code to determine server-side behavior.
•
Use server-side logic to validate data from the client before the code performs the update.
SEE ALSO:
Sample Code Without Sharing: Give Guest Users Access to Create Records and Update Them Later
Salesforce Developers Wiki: Enforcing CRUD and FLS
Encrypt Record IDs for Guest Users
Declarative Access Control Model Examples
These code and flow examples use the declarative access control model to provide unauthenticated guest users access to read records.
Sample Flow With Sharing: Give Guest Users Access to Read Records
In this sample flow, the guest user enters a date range and then views events within that range. The guest user has read access to
the records with sharing rules, so the guest user profile determines which fields the flow can access.
Sample Code With Sharing: Give Guest Users Access to Read Records
In this collection of code samples, the guest user enters a date range and then views events within that range. The guest user has
read access to the records via sharing rules.
Sample Flow With Sharing: Give Guest Users Access to Read Records
In this sample flow, the guest user enters a date range and then views events within that range. The guest user has read access to the
records with sharing rules, so the guest user profile determines which fields the flow can access.
Important: Before you give read access to guest users, see Give Guest Users Access to Read Records.
59
Declarative Access Control Model ExamplesDevelop Secure Sites: Authenticated and Guest Users

Flow Configuration
Because the guest user has access to the records via sharing rules, set the How to Run the Flow setting to User or System
Context—Depends on How Flow is Launched.
Enter Date Range (1)
The first element in the flow is a screen that displays start and end date input fields. The element saves the input dates in the variables
Start_Date and End_Date.
Get Events (2)
The next element is a Get Records query that selects events if they match these criteria:
•
The event’s StartDateTime is greater than the Start_Date variable.
•
The event’s EndDateTime is less than the End_Date variable.
•
The event’s isPrivate value is False.
•
The event’s isArchived value is False.
The element saves the selected events in the GetEvents variable.
Loop Records (3)
The Loop element loops over each event in the GetEvents variable.
Inside the loop, the Assignment element appends each event’s StartDateTime, EndDateTime, Subject, and Location
to a string.
Show Events (4)
The final element is a screen that displays the string that contains all the events.
SEE ALSO:
Salesforce Help: Secure Guest Users’ Sharing Settings and Record Access
Salesforce Help: Sharing Rules
Salesforce Help: Which Context Do Flows Run In?
Salesforce Help: Flow Elements
Sample Code With Sharing: Give Guest Users Access to Read Records
In this collection of code samples, the guest user enters a date range and then views events within that range. The guest user has read
access to the records via sharing rules.
Important: Before you give read access to guest users, see Give Guest Users Access to Read Records.
60
Declarative Access Control Model ExamplesDevelop Secure Sites: Authenticated and Guest Users

Aura Component: DisplayEvents.cmp
This sample Aura component displays two lightning:input components, where the user enters a start and end date to view
events. The lightning:card component displays each event’s StartDateTime, EndDateTime, Subject, and Location.
<aura:component controller="GuestUserEventsAuraController">
<aura:attribute name="events" type="Event[]"/>
<aura:attribute name="StartDate" type="String" default=""/>
<aura:attribute name="EndDate" type="String" default=""/>
<lightning:input type="datetime" name="StartDate" value="{!v.StartDate}"
aura:id="StartDate" label="Start after: " required="true"/>
<lightning:input type="datetime" name="EndDate" value="{!v.EndDate}" aura:id="EndDate"
label="End before: " required="true"/>
<lightning:button name="Submit" variant="brand" label="Find events" title="Find events"
onclick="{!c.handleSearch}"/>
<lightning:card title="Events">
<p class="slds-p-horizontal--small">
<aura:iteration items="{!v.events}" var="event">
{!event.Subject} ({!event.Location}) starts at {!event.StartDateTime} and
ends at {!event.EndDateTime} <br/>
</aura:iteration>
</p>
</lightning:card>
</aura:component>
Component Controller: DisplayEventsController.js
This sample JavaScript controller processes events for the Aura component and calls the methods in the helper file.
({
handleSearch : function(component, event, helper) {
helper.doSearch(component, event, helper);
}
})
JavaScript Helper: DisplayEventsHelper.js
This JavaScript helper creates an asynchronous request to find events within the two timestamps that the user submitted and defines
the actions to take when the request completes.
({
doSearch : function(component, event, helper) {
var start_date = component.find("StartDate").get("v.value");
var end_date = component.find("EndDate").get("v.value");
var action = component.get("c.searchEvents");
action.setParams({
"start_date": start_date,
"end_date": end_date
});
action.setCallback(this, function(response){
component.set("v.events", response.getReturnValue());
61
Declarative Access Control Model ExamplesDevelop Secure Sites: Authenticated and Guest Users

});
$A.enqueueAction(action);
}
})
Apex Controller: GuestUserEventsAuraController.cls
This sample Apex controller receives the call to find records from the JavaScript helper. It selects events that match these criteria:
•
The event’s StartDateTime is greater than the Start_Date parameter.
•
The event’s EndDateTime is less than the End_Date parameter.
•
The event’s isPrivate value is False.
•
The event’s isArchived value is False.
The query returns these fields for each of the events:
•
StartDateTime
•
EndDateTime
•
Location
•
Subject
•
Id
Because the guest users don’t need the record ID, a for loop copies all the other fields to a new Event object. Then, we add the new
objects to a new list and return that list to the client.
The guest user has access to the records with sharing rules, so we define the class with the with sharing keyword.
Warning: Any system or individual on the internet can invoke @AuraEnabled methods. Protect the execution of the method
by implementing procedural access checks. Make sure that the query selects only the desired records and only the required fields.
public with sharing class GuestUserEventsAuraController {
@AuraEnabled
public static List<Event> searchEvents(Datetime start_date, Datetime end_date){
List<Event> results = [SELECT Event.Subject,
Event.StartDateTime,
Event.EndDateTime,
Event.Location
FROM Event
WHERE Event.EndDateTime<:end_date AND
Event.StartDateTime>:start_date AND
Event.isPrivate=False AND
Event.isArchived=False];
List<Event> filtered_events = new List<Event>();
for (Event event : results) {
Event new_event = new Event(Subject = event.Subject,
StartDateTime =
event.StartDateTime,
EndDateTime =
event.EndDateTime,
Location = event.Location);
filtered_events.add(new_event);
62
Declarative Access Control Model ExamplesDevelop Secure Sites: Authenticated and Guest Users

}
return filtered_events;
}
}
SEE ALSO:
Salesforce Developers Wiki: Enforcing CRUD and FLS
Salesforce Help: Secure Guest Users’ Sharing Settings and Record Access
Salesforce Help: Sharing Rules
Apex Developer Guide
Lightning Aura Components Developer Guide
Custom Access Control Model Examples
These code and flow examples use a custom access control model to provide unauthenticated guest users access to create records.
Sample Code Without Sharing: Give Guest Users Access to Create Records and Read Them Later
These code samples support two separate interactions. In the first interaction, the guest user creates a case. To allow for future access,
an Apex method replaces the record ID with an encrypted string. When the guest user wants to read the case later, they enter the
encrypted string. An Apex method decrypts the string and uses it to retrieve the case.
Sample Flow: Give Guest Users Access to Create Records
In this sample flow, the guest user enters feedback and the flow stores it in a custom object record. The guest user doesn’t have
access to read the record after creation.
Sample Code Without Sharing: Give Guest Users Access to Create and Read Records in the Same Transaction
In this collection of code samples, the guest user enters details to report a support issue and Apex code creates a case. An Apex
method retrieves the new record and Aura components display parts of the record to the guest user after creation. The Apex code
runs without sharing because we aren’t relying on object permissions and platform sharing to allow the guest user to access the
record.
Sample Flow Without Sharing: Give Guest Users Access to Create and Read Records in One Flow
In this sample flow, the guest user enters details to report a support issue and the flow creates a case. After the guest user creates
the record, a default active user becomes the owner of the record and the guest user doesn’t have direct access to it. The flow then
retrieves the new case to get the case’s CaseNumber and Status fields and displays those fields to the guest user. Because
the guest user doesn’t own the record after creation and the flow must retrieve the record, the flow runs without sharing.
Sample Code Without Sharing: Give Guest Users Access to Create Records and Update Them Later
These code samples support two separate interactions. In the first interaction, the guest user creates a case. For security reasons, an
Apex method replaces the record ID with an encrypted string. When the guest user wants to close the case later, they enter that
encrypted string. An Apex method decrypts the string to get the record ID, uses the record ID to select the case, and updates the
case’s status.
63
Custom Access Control Model ExamplesDevelop Secure Sites: Authenticated and Guest Users

Sample Code Without Sharing: Give Guest Users Access to Create Records and Read
Them Later
These code samples support two separate interactions. In the first interaction, the guest user creates a case. To allow for future access,
an Apex method replaces the record ID with an encrypted string. When the guest user wants to read the case later, they enter the
encrypted string. An Apex method decrypts the string and uses it to retrieve the case.
Aura Component: CreateCase.cmp
This sample Aura component displays several components where a guest user can enter details about a new case or the token from an
existing case. After record creation, lightning:card components display the new case’s encrypted token or the status of the case
that matches the token.
For demonstration purposes, this sample uses a field where the guest user can enter their case’s token. To implement this scenario,
provide the guest user with a link that contains the token, and retrieve the token from the URL.
<aura:component controller="GuestUserCreateForLater">
<aura:attribute name="caseID" type="String"/>
<aura:attribute name="case_status" type="String"/>
<aura:attribute name="subject" type="String"/>
<aura:attribute name="description" type="String"/>
<aura:attribute name="email" type="String"/>
Enter details to create a new case
<lightning:input type="email" name="email" required="true" value="{!v.email}"
aura:id="email" label="Where should we send email updates?"/>
<lightning:input name="subject" label="Subject" required="true" value="{!v.subject}"
aura:id="subject"/>
<lightning:textarea name="description" required="true" label="Description"
value="{!v.description}" aura:id="description"/>
<lightning:button name="submit" variant="brand" label="Create case" title="Create case"
onclick="{!c.submitCase}"/>
<aura:if isTrue="{!v.caseID}">
<lightning:card title="Case">
<p class="slds-p-horizontal--small">
New case created:
<p>{!v.caseID}</p>
</p>
</lightning:card>
</aura:if>
Or enter an existing case token to view the status of the case
<lightning:textarea name="existing_case" required="false" label="Existing case token"
aura:id="existing_case"/>
<lightning:button name="submit" variant="brand" label="Lookup case" title="Lookup case"
onclick="{!c.lookupCase}"/>
<aura:if isTrue="{!v.case_status}">
<lightning:card title="Case">
<p class="slds-p-horizontal--small">
Case status:
<p>{!v.case_status}</p>
</p>
64
Custom Access Control Model ExamplesDevelop Secure Sites: Authenticated and Guest Users

</lightning:card>
</aura:if>
</aura:component>
Component Controller: CreateCaseController.js
This sample JavaScript controller processes events for the Aura component and calls the methods in the helper file.
({
submitCase : function(component, event, helper) {
helper.makeCase(component, event, helper);
}
lookupCase : function(component,event,helper){
helper.getCase(component,event,helper);
}
})
JavaScript Helper: DisplayCaseHelper.js
This JavaScript helper has two methods:
makeCase()
The makeCase() method creates an asynchronous request to create a case with the submitted data. When the request completes,
the callback stores the new case’s unique token in the caseID field in a variable used by the Aura component.
getCase()
The getCase() method uses a token entered by the guest user to asynchronously retrieve a case that matches the token. The
method’s callback catches the response from the Apex method and stores the value in the case_status variable.
({
makeCase : function(component, event, helper) {
var subject = component.find("subject").get("v.value");
var description = component.find("description").get("v.value");
var email = component.find("email").get("v.value");
var action = component.get("c.CreateCase");
action.setParams({
"subject": subject,
"description": description,
"email": email
});
action.setCallback(this, function(response){
component.set("v.caseID", response.getReturnValue());
});
$A.enqueueAction(action);
},
getCase : function(component,event,helper){
var case_token = component.find("existing_case").get("v.value");
var action = component.get("c.GetCase");
action.setParams({
"token":case_token
});
action.setCallback(this, function(response){
component.set("v.case_status", response.getReturnValue());
65
Custom Access Control Model ExamplesDevelop Secure Sites: Authenticated and Guest Users

});
$A.enqueueAction(action);
}
})
Apex Controller: GuestUserCreateForLater.cls
This sample Apex controller receives calls to create and retrieve cases. It uses the User Encryption Decryption AppExchange package to
encrypt and decrypt data.
CreateCase()
The CreateCase() Apex method creates a case with the guest user’s input. After record creation, it generates an encrypted
string from the record ID, the record’s CreatedDate field, and the current timestamp. The Apex method returns the encrypted
string.
GetCase()
The GetCase() method decrypts the provided string, validates the results, and passes the decrypted record ID and created
timestamp to a helper method to retrieve the original record. The response is the status of the record.
Define the class with the without sharing keyword because we aren’t relying on object permissions and platform sharing to
create and access records.
Warning: Any system or individual on the internet can invoke @AuraEnabled methods. Make sure that the query can retrieve
only the newly created record, and select only the required fields.
public class without sharing GuestUserCreateForLater {
@AuraEnabled
public static String CreateCase(String subject,
String description,
String email){
Case new_case = new Case(Subject=subject,
Description=description,
SuppliedEmail=email);
insert new_case;
List<Case> results = getCase(new_case.Id);
String encryptedID = ued.UserCryptoHelper.doEncrypt(results[0].Id+'|'+
results[0].CreatedDate.getTime() +'|'+System.DateTime.now().getTime());
return encryptedID;
}
public static final Long validTimestampMinutes = 10;
@AuraEnabled
public static String GetCase(String token){
String status = 'Case not found';
String decrypted_token = '';
try {
decrypted_token = ued.UserCryptoHelper.doDecrypt(token);
} catch(Exception e) {
return status;
}
66
Custom Access Control Model ExamplesDevelop Secure Sites: Authenticated and Guest Users

String[] decrypted_parts = decrypted_token.split('\\|');
String decryptedRecordId = decrypted_parts[0];
String created_timestamp = decrypted_parts[1];
String original_request_timestamp = decrypted_parts[2];
if( isTimestampValid(System.Long.valueOf(original_request_timestamp)) ){
List<Case> caseList = getCase(decryptedRecordId, created_timestamp);
if(caseList.size() == 1){
status = caseList[0].Status;
}else{
status = 'Case not found';
}
}
return status;
}
private static List<Case> getCase(String caseID, Datetime created_date)
{
List<Case> results = [SELECT Case.CaseNumber, Case.CreatedDate, Case.Status
FROM Case
WHERE Case.Id=:caseID AND Case.CreatedDate=:created_date];
return results;
}
private static Boolean isTimestampValid(Long timestamp)
{
return ((System.now().getTime() - timestamp) / 60000) < validTimestampMinutes;
}
}
Note: If you’re loading highly sensitive information, consider one of these additional measures to increase security.
•
Ask the user to enter additional information related to the data that they’re attempting to read or modify, which only they
know.
•
Require the user to log in to read or modify the data.
SEE ALSO:
Salesforce Help: Secure Guest Users’ Sharing Settings and Record Access
Apex Developer Guide
Lightning Aura Components Developer Guide
Sample Flow: Give Guest Users Access to Create Records
In this sample flow, the guest user enters feedback and the flow stores it in a custom object record. The guest user doesn’t have access
to read the record after creation.
Important: Before you give record creation access to guest users, read Give Guest Users Access to Create Records.
67
Custom Access Control Model ExamplesDevelop Secure Sites: Authenticated and Guest Users

Custom Feedback__c Object
This scenario uses the Feedback__c custom object to store feedback from guest users. A Feedback__c custom object has these fields,
listed in alphabetical order:
Email__c
Required. The guest user’s email address. Data type: Email
Score__c
Required. The feedback score entered by the guest user. Possible values are 0, 1, 2, 3, 4, 5.
Additional_comments__c
Any additional feedback entered by the guest user. Data type: Long Text Area
Flow Configuration
Because the flow doesn’t require read access to any records and we’re not relying on object permissions, set the How to Run the Flow
setting to System Context without Sharing—Access All Data.
Feedback Form (1)
The first element in the flow is a screen that displays these components:
•
An Email component for the user’s email address.
•
A Slider component for the user’s feedback score, set to allow whole numbers from 0 to 5.
•
A Long Text Area component for any additional comments.
Create Records (2)
The next element is a Create Records element that creates a Feedback__c record.
End Screen (3)
The final screen element displays text to thank the user for their feedback.
SEE ALSO:
Salesforce Help: Which Context Do Flows Run In?
Salesforce Help: Flow Elements
Salesforce Help: Allow Guest Users to Access Flows
Salesforce Help: Which Context Do Flows Run In?
Salesforce Help: Flow Elements
Salesforce Help: Allow Guest Users to Access Flows
68
Custom Access Control Model ExamplesDevelop Secure Sites: Authenticated and Guest Users

Sample Code Without Sharing: Give Guest Users Access to Create and Read Records
in the Same Transaction
In this collection of code samples, the guest user enters details to report a support issue and Apex code creates a case. An Apex method
retrieves the new record and Aura components display parts of the record to the guest user after creation. The Apex code runs without
sharing because we aren’t relying on object permissions and platform sharing to allow the guest user to access the record.
Aura Component: CreateCase.cmp
This sample Aura component displays several components where the user enters details about the case. After creation, the
lightning:card component displays the new case’s case number and status.
<aura:component controller="GuestUserCreateCase">
<aura:attribute name="caseNumber" type="String"/>
<aura:attribute name="status" type="String"/>
<aura:attribute name="subject" type="String" default=""/>
<aura:attribute name="description" type="String" default=""/>
<aura:attribute name="email" type="String" default=""/>
<aura:attribute name="name" type="String" default=""/>
<aura:attribute name="reason" type="String"/>
<aura:attribute name="type" type="String" default=""/>
<lightning:select name="select" label="Reason" required="true" value="{!v.reason}"
aura:id="reason">
<option value="installation">Installation</option>
<option value="equipmentcomplexity">Equipment Complexity</option>
<option value="performance">Performance</option>
<option value="breakdown">Breakdown</option>
<option value="equipmentdesign">Equipment Design</option>
<option value="feedback">Feedback</option>
<option value="other">Other</option>
</lightning:select>
<lightning:select name="type" label="Type" required="true" value="{!v.type}"
aura:id="type">
<option value="mechanical">Mechanical</option>
<option value="electrical">Electrical</option>
<option value="electronic">Electronic</option>
<option value="structural">Structural</option>
<option value="other">Other</option>
</lightning:select>
<lightning:input type="email" name="email" required="true" value="{!v.email}"
aura:id="email" label="Where should we send email updates?"/>
<lightning:input name="name" label="Name" required="true" value="{!v.name}"
aura:id="name"/>
<lightning:input name="subject" label="Subject" required="true" value="{!v.subject}"
aura:id="subject"/>
<lightning:textarea name="description" required="true" label="Description"
value="{!v.description}" aura:id="description"/>
69
Custom Access Control Model ExamplesDevelop Secure Sites: Authenticated and Guest Users

<lightning:button name="submit" variant="brand" label="Submit case" title="Submit case"
onclick="{!c.submitCase}"/>
<aura:if isTrue="{!v.caseNumber}">
<lightning:card title="Case">
<p class="slds-p-horizontal--small">
{!v.caseNumber} has status {!v.status}.
</p>
</lightning:card>
</aura:if>
</aura:component>
Component Controller: CreateCaseController.js
This sample JavaScript controller processes events for the Aura component and calls the methods in the helper file.
({
submitCase : function(component, event, helper) {
helper.makeCase(component, event, helper);
}
})
JavaScript Helper: DisplayCaseHelper.js
This JavaScript helper creates an asynchronous request to create a case with the submitted data. When the request completes, the
callback stores the case number and case status in variables used by the Aura component.
({
makeCase : function(component, event, helper) {
var subject = component.get("v.subject");
var description = component.get("v.description");
var email = component.get("v.email");
var name = component.get("v.name");
var reason = component.get("v.reason");
var type = component.get("v.type");
var action = component.get("c.CreateCase");
action.setParams({
"subject": subject,
"description": description,
"email": email,
"name": name,
"reason": reason,
"caseType": type
});
action.setCallback(this, function(response){
component.set("v.caseNumber", response.getReturnValue()[0]);
component.set("v.status", response.getReturnValue()[1]);
});
$A.enqueueAction(action);
}
})
70
Custom Access Control Model ExamplesDevelop Secure Sites: Authenticated and Guest Users

Apex Controller: GuestUserCreateCase.apxc
This sample Apex controller creates the record, retrieves the new record, and returns the required fields from the new record to the
client. Because object permissions and platform sharing aren’t used, this controller runs without sharing.
To avoid unintended exposure of record data, the CreateCase method returns only the CaseNumber and Status fields.
Warning: Any system or individual on the internet can invoke @AuraEnabled classes. Make sure that the method returns
only the required fields from the new record.
public without sharing class GuestUserCreateCase {
@AuraEnabled
public static List<String> CreateCase(String subject,
String description,
String email,
String name,
String reason,
String caseType,
String phone){
Case new_case = new Case(Subject=subject,
Description=description,
SuppliedEmail=email,
SuppliedName=name,
Reason=reason,
Type=caseType,
SuppliedPhone=phone);
insert new_case;
List<Case> results = getCase(new_case.Id);
List<String> response = new List<String>();
response.add(results[0].CaseNumber);
response.add(results[0].Status);
return response;
}
private static List<Case> getCase(String caseID)
{
List<Case> results = [SELECT Case.CaseNumber, Case.CreatedDate
FROM Case
WHERE Case.Id=:caseID];
return results;
}
}
SEE ALSO:
Salesforce Help: Secure Guest Users’ Sharing Settings and Record Access
Apex Developer Guide
Lightning Aura Component Developer Guide
71
Custom Access Control Model ExamplesDevelop Secure Sites: Authenticated and Guest Users

Sample Flow Without Sharing: Give Guest Users Access to Create and Read Records
in One Flow
In this sample flow, the guest user enters details to report a support issue and the flow creates a case. After the guest user creates the
record, a default active user becomes the owner of the record and the guest user doesn’t have direct access to it. The flow then retrieves
the new case to get the case’s CaseNumber and Status fields and displays those fields to the guest user. Because the guest user
doesn’t own the record after creation and the flow must retrieve the record, the flow runs without sharing.
Important: Before you give create and read access to guest users, read Give Guest Users Access to Read Records and Give Guest
Users Access to Create Records.
Flow Configuration
Because the flow creates a record and then retrieves the record without sharing, set the How to Run the Flow setting to System
Context Without Sharing—Access All Data.
Case Form (1)
The first element in the flow is a screen that displays these input components:
•
A Text component for the company’s name
•
A Name component for the submitter’s name
•
An Email component for the submitter’s email address
•
A Phone component for the submitter’s phone number
•
A Picklist component with option values from the record type’s Type_Options field
•
A Picklist component with option values from the record type’s Reason_Options field
•
A Text component for the subject of the case
•
A Long Text Area component for the description of the case
Assignment (2)
The second element assigns the data from the input components to a new Case record variable.
Create Records (3)
The next element is a Create Records element that uses the Case record variable to create a Case record. In addition to the information
entered by the guest user, set the element configuration to define the case’s origin field as Web.
Get Records (4)
The Get Records element retrieves the new record by its Id field that is automatically defined by the Create Records element. The
retrieved record is stored in a new Case record variable.
72
Custom Access Control Model ExamplesDevelop Secure Sites: Authenticated and Guest Users

End Screen (5)
The final screen element displays the Case’s CaseNumber and Status fields from the Get Record element’s Case record variable.
SEE ALSO:
Salesforce Help: Which Context Do Flows Run In?
Salesforce Help: Flow Elements
Salesforce Help: Allow Guest Users to Access Flows
Salesforce Help: Apex Actions
Salesforce Help: Flows in Transactions
Apex Developer Guide: InvocableMethod Annotation
Sample Code Without Sharing: Give Guest Users Access to Create Records and Update
Them Later
These code samples support two separate interactions. In the first interaction, the guest user creates a case. For security reasons, an Apex
method replaces the record ID with an encrypted string. When the guest user wants to close the case later, they enter that encrypted
string. An Apex method decrypts the string to get the record ID, uses the record ID to select the case, and updates the case’s status.
Aura Component: CreateCase.cmp
This sample Aura component displays components for record creation and closure.
To create a case, the guest user uses components to enter case details. After record creation, lightning:card components display
the new case’s encrypted token or the status of the case that matches the token.
For demonstration purposes, this sample displays a component where the guest user enters the case’s token directly. To implement this
scenario, provide the guest user with a link that contains the token, and retrieve the token from the URL.
<aura:component controller="GuestUserCreateForLater">
<aura:attribute name="caseID" type="String"/>
<aura:attribute name="case_status" type="String"/>
<aura:attribute name="subject" type="String"/>
<aura:attribute name="description" type="String"/>
<aura:attribute name="email" type="String"/>
Enter details to create a new case
<lightning:input type="email" name="email" required="true" value="{!v.email}"
aura:id="email" label="Where should we send email updates?"/>
<lightning:input name="subject" label="Subject" required="true" value="{!v.subject}"
aura:id="subject"/>
<lightning:textarea name="description" required="true" label="Description"
value="{!v.description}" aura:id="description"/>
<lightning:button name="submit" variant="brand" label="Create case" title="Create case"
onclick="{!c.submitCase}"/>
<aura:if isTrue="{!v.caseID}">
<lightning:card title="Case">
<p class="slds-p-horizontal--small">
New case created:
<p>{!v.caseID}</p>
73
Custom Access Control Model ExamplesDevelop Secure Sites: Authenticated and Guest Users

</p>
</lightning:card>
</aura:if>
Or enter an existing case token to close the case
<lightning:textarea name="existing_case" required="false" label="Existing case token"
aura:id="existing_case"/>
<lightning:button name="submit" variant="brand" label="Close case" title="Close case"
onclick="{!c.updateCase}"/>
<aura:if isTrue="{!v.case_status}">
<lightning:card title="Case">
<p class="slds-p-horizontal--small">
Case status:
<p>{!v.case_status}</p>
</p>
</lightning:card>
</aura:if>
</aura:component>
Component Controller: CreateCaseController.js
This sample JavaScript controller processes events for the Aura component and calls the methods in the helper file.
({
submitCase : function(component, event, helper) {
helper.makeCase(component, event, helper);
},
updateCase : function(component,event,helper){
helper.updateCase(component,event,helper);
}
})
JavaScript Helper: CaseHelper.js
This JavaScript helper has two methods:
makeCase()
The makeCase() method creates an asynchronous request to create a case with the submitted data. When the request completes,
the callback stores the new case’s unique token in the caseID field in a variable used by the Aura component.
updateCase()
The updateCase() method uses a token entered by the guest user to asynchronously update the case that matches the token.
The method’s callback catches the response from the Apex method and stores the value in the case_status variable.
({
makeCase : function(component, event, helper) {
var subject = component.find("subject").get("v.value");
var description = component.find("description").get("v.value");
var email = component.find("email").get("v.value");
var action = component.get("c.CreateCase");
action.setParams({
"subject": subject,
"description": description,
74
Custom Access Control Model ExamplesDevelop Secure Sites: Authenticated and Guest Users

"email": email
});
action.setCallback(this, function(response){
component.set("v.caseID", response.getReturnValue());
});
$A.enqueueAction(action);
},
updateCase : function(component,event,helper){
var case_token = component.find("existing_case").get("v.value");
var action = component.get("c.UpdateCase");
action.setParams({
"token":case_token
});
action.setCallback(this, function(response){
component.set("v.case_status", response.getReturnValue());
});
$A.enqueueAction(action);
}
})
Apex Controller: GuestUserCreateForLater.cls
This sample Apex controller receives calls to create and update cases. It uses the User Encryption Decryption AppExchange package to
encrypt and decrypt data.
CreateCase()
The CreateCase() Apex method creates a case with the guest user’s input. After record creation, it generates an encrypted
string from the record ID, the record’s CreatedDate field, and the current timestamp. The Apex replaces the new case’s ID with
the encrypted string.
UpdateCase()
The UpdateCase() method decrypts the provided string, validates the results, and uses the information to update the original
record’s status. The response is the status of the record or an error message, if one occurred.
Define the class with the with sharing keyword because it doesn’t directly access the records.
Warning: Any system or individual on the internet can invoke @AuraEnabled classes. Make sure that the query can update
only the correct record.
public with sharing class GuestUserCreateForLater {
@AuraEnabled
public static String CreateCase(String subject,
String description,
String email){
Case new_case = new Case(Subject=subject,
Description=description,
SuppliedEmail=email);
insert new_case;
List<Case> results = GuestUserCaseHelperWS.getCase(new_case.Id);
String encryptedID = ued.UserCryptoHelper.doEncrypt(results[0].Id+'|'+
results[0].CreatedDate.getTime() +'|'+System.DateTime.now().getTime());
75
Custom Access Control Model ExamplesDevelop Secure Sites: Authenticated and Guest Users

return encryptedID;
}
public static final Long validTimestampMinutes = 10;
@AuraEnabled
public static String UpdateCase(String token){
String status = 'Case not found';
String decrypted_token = '';
try {
decrypted_token = ued.UserCryptoHelper.doDecrypt(token);
} catch(Exception e) {
return status;
}
String[] decrypted_parts = decrypted_token.split('\\|');
String decryptedRecordId = decrypted_parts[0];
String created_timestamp = decrypted_parts[1];
String original_request_timestamp = decrypted_parts[2];
if( isTimestampValid(System.Long.valueOf(original_request_timestamp))) {
List<Case> caseList = GuestUserCaseHelperWS.getCase(decryptedRecordId,
created_timestamp);
if(caseList.size() == 1){
Case case_to_update = caseList[0];
case_to_update.Status = 'Closed';
try {
GuestUserCaseHelperWS.updateCase(case_to_update);
status = 'Closed';
} catch(DmlException e){
System.debug('An unexpected error has occurred: ' + e.getMessage());
}
}else{
status = 'Case not found';
}
}
return status;
}
private static Boolean isTimestampValid(Long timestamp)
{
return ((System.now().getTime() - timestamp) / 60000) < validTimestampMinutes;
}
}
Apex Helper Class: GuestUserCaseHelperWS.apxc
This sample Apex helper class defines methods that retrieve a record by its ID and update a record. The Apex controller calls this method.
76
Custom Access Control Model ExamplesDevelop Secure Sites: Authenticated and Guest Users

Define the class with the without sharing keyword so that it can retrieve and update the record without requiring sharing.
public without sharing class GuestUserCaseHelperWS {
public static List<Case> getCase(String caseID, Datetime created_date)
{
List<Case> results = [SELECT Case.CaseNumber, Case.CreatedDate, Case.Status
FROM Case
WHERE Case.Id=:caseIDAND Case.CreatedDate=:created_date];
return results;
}
public static Case updateCase(Case case_to_update)
{
update case_to_update;
return case_to_update;
}
}
SEE ALSO:
Salesforce Help: Secure Guest Users’ Sharing Settings and Record Access
Apex Developer Guide
Lightning Aura Components Developer Guide
Limit Access to Apex Classes
Allow guest and external users access to only those classes that they must call.
If an Apex class contains publicly exposed methods, such as methods using @InvocableMethod, @AuraEnabled,
@RestResource, or webservice, then guest and external users can invoke these methods with arbitrary parameters. But they
must have permission to execute the Apex class. We recommend limiting Apex class access to users with specific permission sets or
profiles. Allowing guest and external users full access to Apex classes isn’t secure. Think carefully about which users must call which
Apex classes, create permission sets for these roles, and enable the Apex class for the required permission sets.
Flow Security
If guest or external users must run flows, override the flow permission to grant access only to specific external user profiles, permission
sets, or site guest user profiles, rather than allowing users to run all flows. Avoid running flows in system context when possible, and
restrict access to subflows. Otherwise, ensure that you implement procedural access controls for those flows and subflows.
Flows are a powerful feature that can override platform security settings for access to objects and Apex classes. Flows can be used to
activate and deactivate permission sets. Yet screen flows are driven by the browser with user-controlled input parameters. Therefore,
we recommend overriding the run flow permission to assign access to specific flows based on the guest or external user profile or
permission set. For guest users, configure flow access policies on the guest user profile for the appropriate site.
It’s also a good security practice to remove permissions to run subflows, even if users run the subflow independently. From a security
perspective, it’s better to create two separate flows and give access only to the flow that the user runs directly, and not the one running
as a subflow. Grant flow access only to the highest-level parent flow and not to the subflows. The same recommendation can apply to
invocable Apex methods called by flows. Avoid granting user access to those classes, so that calling those methods is limited to only
the flows that they were meant to be called from.
77
Limit Access to Apex ClassesDevelop Secure Sites: Authenticated and Guest Users

Be aware that if a user has permission to run a screen flow, they can:
•
Invoke the flow at any time and with parameters of their choosing.
•
Cancel the flow at any time.
These considerations also apply to subflows, or flows called from other flows.
In particular, flow users can:
•
View and modify the input (start) variables to a screen flow.
•
View output variables returned from a screen subflow to the parent flow.
•
If they have permission to run the subflow, modify input variables to subflows.
If any of these abilities violates your security policy, don’t use subflows. For example, if billing information or other sensitive information
that must be kept confidential is handled by subflows. Keep business logic in the main flow.
SOQL Injection
Sanitize user-controlled data passed into dynamic SOQL queries.
SOQL or SOSL injection occurs when Apex code inserts user-controlled data into dynamic SOQL or SOSL queries without properly
sanitizing the input. There are two scenarios to consider:
•
Changing the overall structure of the query
•
Changing the value of a query parameter
Control these scenarios by invoking Apex code that prevents callers from accessing data they’re not entitled to.
Consider this code:
@AuraEnabled
public static List<Account> getAccountName(string userId) {
if (FeatureManagement.checkPermission('readAccount')) {
string query='SELECT Name FROM Account WHERE Id=\''+ userId + '\'';
return database.query(query);
}
}
The user potentially gains control over the query and accesses more information than they’re entitled to.
The return value of the query doesn’t limit the information the user can access. The user can submit a string, such as :
userId = '0035Y00003pPJiNQAW\' OR AnnualRevenue>100000.00 OR Name=\'a'
// 0035Y00003pPJiNQAW is any id to any object that is not an account
The return value of the query names all the accounts with an annual revenue in excess of $100,000, which is not what the developer
intended to return to the caller.
Fixing SOQL or SOSL injection requires the appropriate contextual encoding. Don’t apply String.escapeSingleQuotes to
every user input. Rather, sanitize fields based on where they appear in the SOQL or SOSL query.
•
For variables in WHERE (SOQL), ORDER BY (SOQL), WITH (SOSL), or FIND (SOSL) clauses, use bound variables:
string query='SELECT Name FROM Account WHERE Id=:userId';
•
For field and table names, call isAccessible on the describeResult of the field. Or to enforce declarative policies, use
your own procedural logic to limit the field or table names to what your security policy allows.
78
SOQL InjectionDevelop Secure Sites: Authenticated and Guest Users
•
For parameters in quoted strings, use bind variables. Don’t use bind variables or String.escapeSingleQuote to sanitize
table names and field names, or any parameters that don’t appear in a quoted context.
•
For other primitive types, cast the user input into a boolean, integer, Id, or other primitive (non-string) type.
Be aware that the WITH SECURITY_ENFORCED keyword doesn’t sanitize WHERE clauses, only SELECT and FROM clauses, so it isn’t a
sanitizer for SOQL or SOSL injection attacks.
79
SOQL InjectionDevelop Secure Sites: Authenticated and Guest Users

CHAPTER 5 Develop Secure Sites: CSP, LWS, and Lightning Locker
Aura and LWR sites in Experience Cloud use Content Security Policy (CSP) and either Lightning Web
Security (LWS) or Lightning Locker to secure the site from malicious attacks and custom code
vulnerabilities. Factor in the potential impact of these security features when you develop your own
custom components, use third-party components, or add custom code in the head markup.
In this chapter ...
• Resolve Lightning
Locker Conflicts in
Aura Sites
CSP
CSP is a W3C standard for controlling the source of content that can be loaded on a page. CSP rules work
at the page level and apply to all third-party components and custom code. By default, the framework’s
• Enable Third-Party
Components to Run
When Lightning
Locker Is Off
• Example: Adobe
Analytics and
headers allow content to be loaded only from secure (HTTPS) URLs and forbid XHR requests from
JavaScript.
Lightning Locker in
Aura Sites
Different levels of CSP script security are available from Experience Builder. CSP levels are specific to each
site.
Lightning Locker and Lightning Web Security
The Lightning Locker architectural layer enhances security by isolating individual Lightning component
namespaces in their own containers and enforcing coding best practices. Lightning Locker has been
the default security architecture for Lightning components and for Aura sites in Experience Cloud.
LWS is designed to make it easier for your components to use secure coding practices and aims to replace
Lightning Locker. As with Lightning Locker, the goal of LWS is to prevent Lightning components from
interfering with or accessing data that belongs to platform code or components from other namespaces.
However, the architecture of Lightning Web Security protects Lightning web components using a
different approach.
How LWS Applies At the Org and Site Levels
An admin can enable LWS at the org level to be used throughout the org instead of Lightning Locker
via the Use Lightning Web Security for Lightning web components and Aura components setting in
Session Settings in Setup.
This org-level setting affects Aura sites because when LWS is enabled in the org, LWS replaces Lightning
Locker at the site level. Then, if you disable the Lightning Locker setting in Experience Builder for an Aura
site, you’re actually disabling LWS.
LWR sites have their own instance of LWS, so the org setting for LWS has no effect on LWR sites. If you
disable Lightning Locker in the LWR site, the site’s instance of LWS is disabled, even if LWS is enabled in
the org.
80

Note: By default, Strict CSP is enabled for all new Experience Builder sites, which means that
Lightning Locker or LWS is also enabled. To access the Lightning Locker setting in Experience
Builder, select Relaxed CSP.
For the B2B store and the D2C store LWR templates in Commerce Cloud, LWS isn’t enabled by
default.
This table summarizes the effect of the org-level setting and the site-level setting in an Aura or LWR site.
LWS or Locker used
in the site
Org-level settingSite-level settingExperience Cloud
site framework
Aura
Lightning Locker
LWS
LWR
LWS (site’s instance)
LWS (site’s instance)
SEE ALSO:
Salesforce Help: CSP and Lightning Locker in Experience Builder Sites
Salesforce Help: Select a Security Level in Experience Builder Sites
Salesforce Help: CSP and Lightning Locker Design Considerations
Lightning Web Components Developer Guide: Security with Lightning Locker
Lightning Aura Components Developer Guide: Developing Secure Code
81
Develop Secure Sites: CSP, LWS, and Lightning Locker

Resolve Lightning Locker Conflicts in Aura Sites
Lightning Locker is enabled by default for all new Aura sites in Experience Cloud. However, occasionally a third-party component on the
page or custom code in your head markup doesn’t work as expected due to a conflict with Lightning Locker. In such a situation,
Salesforce recommends using one of the workarounds described here.
Use JavaScript Custom Events
Lightning Locker protects third-party components and custom code from interacting with resources from other namespaces, but not
from the head markup. This limitation means that your head markup can contain custom code that bypasses Lightning Locker and
introduces security vulnerabilities.
To address this limitation, isolate your third-party Aura and Lightning web components and custom code by using the CustomEvent
constructor in your head markup. Third-party components and custom code can then interact with your resources without being
responsible for loading or referencing that resource directly.
Any data that must be passed through the event to the listener is passed in the detail property, which is created when initializing
the event. The detail property is mapped to the dataLayer in your head markup listener. The custom events are then dispatched
to any resource that extends EventTarget. For an example of using custom events, see Adobe Analytics and Lightning Locker.
Warning: Be aware of the data that you’re passing with the JavaScript CustomEvent constructor, and ensure that your usage
is secure. Any JavaScript running on your page, including any third-party App Exchange components that you’re using, can
potentially listen for your event names and read this data.
Set an Aura Component to API 39.0
If your third-party component or custom code doesn’t interact with an Aura component as expected, you can set the Aura component
to Salesforce API version 39.0, which disables Lightning Locker for the component. See Disable Lightning Locker for a Component in
the Lightning Aura Components Developer Guide.
Warning: Disabling Lightning Locker for an Aura component can introduce security flaws into your site and prevent the component
from being available at design time or rendering at runtime.
For consistency and ease of debugging, avoid having a parent Aura component and a child component on different API versions.
Therefore, don’t use any Aura component set to API version 39.0 in a component hierarchy, such as a component within a component
or a component that’s extending another component.
If LWS is enabled in the org, setting API version 39.0 in the component doesn’t disable LWS for the component. However, LWS is likely
to allow behaviors of components that Lightning Locker blocks, removing the need to disable it.
Turn Off Lightning Locker
Warning: Use this workaround only as a last resort.
If you turn off Lightning Locker in your site, you disable it for all your site’s third-party components and custom code. The ramifications
can be far-ranging and unexpected, such as introducing security flaws into your site. And if a third-party component hasn’t been enabled
to work without Lightning Locker, it can prevent that component from being available at design time and rendering at runtime. When
Lightning Locker is turned off, components from different namespaces can interact with and access each other’s Document Object
Model (DOM), and restrictions around custom resources interacting with your site are relaxed.
For more information on disabling Lightning Locker, see Select a Security Level in Experience Builder Sites in Salesforce Help.
82
Resolve Lightning Locker Conflicts in Aura SitesDevelop Secure Sites: CSP, LWS, and Lightning Locker

Note: If LWS is enabled in the org, when you disable Lightning Locker in an Aura site, you actually disable LWS in the site. If you
disable Lightning Locker in the LWR site, the site’s instance of LWS is disabled, even if LWS is enabled in the org.
SEE ALSO:
ExperienceBundle for Experience Builder Sites
Experience Cloud Help: Select a Security Level in Experience Builder Sites
Salesforce Help: Add Markup to the Page <head> to Customize Your Experience Builder Site
Lightning Web Components Dev Guide: Communicate with Events
Lightning Aura Components Developer Guide: Communicating with Events
Enable Third-Party Components to Run When Lightning Locker Is Off
If you turn off Lightning Locker in your Experience Builder site, any third-party components installed from a managed package must be
configured to be available at design time and render at runtime.
You can turn off Lightning Locker from the Relaxed CSP security level.
If LWS is enabled in the org, when you disable Lightning Locker in an Aura site, you actually disable LWS in the site. If you disable Lightning
Locker in the LWR site, the site’s instance of LWS is disabled, even if LWS is enabled in the org. LWR sites can include third party libraries
without disabling Lightning Locker or LWS. For more information see Integrate Third-Party Libraries Using the Privileged Script Tag in
LWR Sites for Experience Cloud.
Warning: Turning off Lightning Locker can introduce security flaws to your site. Disable Lightning Locker only as a last resort.
Configure Third-Party Aura Components to Run Without Lightning Locker
For third-party Aura components, managed package developers must configure the
lightningcommunity:allowInRelaxedCSP interface for the component.
Configure Third-Party Lightning Web Components to Run Without Locker
For third-party Lightning web components, managed package developers must configure the
lightningCommunity__RelaxedCSP value in the capability tag of the component’s configuration file.
SEE ALSO:
ExperienceBundle for Experience Builder Sites
Experience Cloud Help: Select a Security Level in Experience Builder Sites
Salesforce Help: Where to Allowlist Third-Party Hosts for Experience Builder Sites
Lightning Web Component Reference: Allow In Relaxed Csp
Lightning Web Components Developer Guide: XML Configuration File Elements
83
Enable Third-Party Components to Run When Lightning Locker
Is Off
Develop Secure Sites: CSP, LWS, and Lightning Locker

Example: Adobe Analytics and Lightning Locker in Aura Sites
Because Adobe Analytics interacts with components in your Aura site, Lightning Locker can produce unexpected results. The recommended
workaround is to isolate Adobe Analytics by using JavaScript Custom Events in your head markup. Adobe Analytics can then interact
with components without being responsible for loading or referencing that resource directly.
Tip: LWR sites can include analytics by using a different strategy. For more information, see Integrate Third-Party Libraries Using
the Privileged Script Tag in LWR Sites for Experience Cloud.
Include Adobe Analytics in Your Aura Site
Add the Adobe Analytics script and applicable event listeners to your site’s head markup using the script tag.
<script>
document.addEventListener('analyticsEvent', function(e) {
//add logic here to tell your dataLayer about the event
//dataLayer.action = e.detail.action;
//dataLayer.label = e.detail.label;
//or map payload to an AA library event
});
document.addEventListener('analyticsViewChange', function() {
});
</script>
<script src="full-url-to-your-adobe-script" async></script>
Use Custom Events
For any component you want to interact with Adobe Analytics, implement a custom event using the detail property. This property
passes data through the event to the listener and is mapped to the dataLayer in your head markup listener. The custom events
can then be dispatched to any resource that extends EventTarget.
document.dispatchEvent(new CustomEvent('analyticsEvent', {'detail': {action: 'click',
label: 'Submitted Case'}}));
Warning: Be aware of the data you’re passing with the JavaScript CustomEvent constructor, and ensure that your usage is
secure. Any JavaScript running on your page, including Adobe Analytics, can potentially listen for your event names and read this
data.
Implement Additional Events for Aura Components
If Adobe Analytics interacts with an Aura component, you also must implement the forceCommunity:routeChange and
aura:locationChange events.
84
Example: Adobe Analytics and Lightning Locker in Aura SitesDevelop Secure Sites: CSP, LWS, and Lightning Locker

forceCommunity:routeChange tracks view changes within the Lightning Component Framework.
<aura:component implements="forceCommunity:availableForAllPageTypes">
<aura:handler event="forceCommunity:routeChange" action="{!c.handleRouteChange}" />
</aura:component>
handleRouteChange : function(component, event, helper) {
document.dispatchEvent(new Event('analyticsViewChange'));
}
aura:locationChange indicates that the hash part of the URL in the browser's location bar has been modified. However, changing
the hash part of a location URL is used only rarely—for example, to implement a tab change in the Tabs component.
SEE ALSO:
Salesforce Help: Add Markup to the Page <head> to Customize Your Experience Builder Site
Lightning Web Components Reference: Route Change
Lightning Web Components Reference: Location Change
Lightning Aura Components Developer Guide: What is the Lightning Component Framework?
Tab Layout
85
Example: Adobe Analytics and Lightning Locker in Aura SitesDevelop Secure Sites: CSP, LWS, and Lightning Locker

CHAPTER 6 Analyze and Improve Experience Builder Site
Performance
86

EDITIONS
Available in: both Salesforce
Classic (not available in all
orgs) and Lightning
Experience
Available in: Enterprise,
Performance, Unlimited,
and Developer Editions
USER PERMISSIONS
To customize an Experience
Cloud site:
• Be a member of the site
AND Create and Set Up
Experiences
OR
• Be a member of the site
AND View Setup and
Configuration AND an
experience admin,
publisher, or builder in
that site
To publish an Experience
Cloud site:
• Be a member of the site
AND Create and Set Up
Experiences
OR
• Be a member of the site
AND an experience
admin or publisher in
that site
The Salesforce Page Optimizer analyzes your site and identifies
issues that impact performance. Use the information to refine your
design and improve site performance for your members. The Page
Optimizer is a free plug-in available from the Chrome Web Store.
Download and install the plug-in as you would any Chrome
extension.
To download the Page Optimizer, in Experience Builder, click
on the left sidebar, and then click Advanced.
87
Analyze and Improve Experience Builder Site Performance

After installation, the Page Optimizer is located with your other Chrome extensions.
Insights
To analyze your site, navigate to your published site, load the page, and then launch the Page Optimizer.
88
Analyze and Improve Experience Builder Site Performance

The Insights tab (1) evaluates your page based on best practices for web applications developed using
the Lightning framework. This tab displays an overall performance score (3) along with individual scores
(5) for various analysis rules. To view details and suggested actions, click each rule. For more room to
work, click Popout (2).
The Insights tab is conservative in providing recommendations. For further insights, consider reviewing
the raw data presented on the Waterfall, Timeline, Charts, Cost, and Actions tabs.
To remove collected metrics, click Clear (4). Perform some user actions on the page to collect new
metrics, and then reopen the Page Optimizer. For example, to gather performance metrics for liking a
feed item, clear performance metrics, click Like, and reopen the Page Optimizer.
Waterfall
The Waterfall tab displays all network requests and performance instrumentation data. Click a row to
view contextual information in the sidebar. Click the arrow to the left of each row to expand the
information for each row.
89
Analyze and Improve Experience Builder Site Performance

Timeline
The Timeline tab provides a profile of each component’s rendering lifecycle. The timeline view is optimized
for displaying Lightning framework metrics, so it’s easier to interpret than Chrome DevTools.
Charts
The Charts tab displays trending information about memory and components as customers use your
page.
90
Analyze and Improve Experience Builder Site Performance

Components
The Components tab displays the lifecycle counts for each component on the page. This view helps you
identify potential component leaks and unexpected rendering behavior. Use the Component tab along
with the Cost tab for an overall view of component performance.
Cost
The Cost tab displays the amount of time each component was busy processing its logic. The lower the
time, the better the performance.
91
Analyze and Improve Experience Builder Site Performance

Actions
The Actions tab displays a list of all actions performed on the page along with their timing information.
Export
Export your analysis to a file to share with your development and support teams.
Submit Feedback
We want to hear from you. Share your comments, questions, requests, and any issues that you find.
Submit Feedback.
SEE ALSO:
Salesforce Developer Blog: Lightning Components Performance Best Practices
92
Analyze and Improve Experience Builder Site Performance

CHAPTER 7 Add Pardot Tracking to Your Experience Builder Site
Pardot can track visitor interactions and activities on a site, even when the visitors haven’t yet been
converted to a prospect. After tracking is enabled, use Pardot to view reports on visitor engagement,
and automatically score leads based on-site activity.
1. In Pardot, navigate to the campaign you want to track.
2. Click View Tracking Code, and copy the code.
3. Access Experience Builder of the site you want to add tracking to.
4. In Settings > Advanced, click Edit Head Markup, then paste in the Pardot tracking code.
Experience Builder sites are a single-page apps (SPA), so when the user navigates to different pages on
the site, only the content area reloads rather than the entire page. The Pardot script records the first load
of the site as a page view. Modify the script to allow in-app navigation within the page to be captured
more accurately in Pardot.
1. In the Edit Head Markup window, modify the Pardot tracking code so that changes in page state are
added to the session history.
Here’s a sample code snippet with modifications noted.
<script type='text/javascript'>
piAId = '{{%pardot-id-for-your-org%}}'; //no change from OOTB code
(format: 123456)
piCId = '';
piHostname = '{{%pardot-hostname-for-your-org%}}'; //no change
from OOTB code (format: www.yourpardottrackerdomain.com)
(function() {
//patching the history push state function to include calling
// the async_load function that sends data to Pardot
var pushState = history.pushState;
history.pushState = function() {
pushState.apply(history, arguments);
async_load();
};
function async_load(){0
var s = document.createElement('script'); s.type =
'text/javascript';
s.src = ('https:' == document.location.protocol ? 'https://'
: 'http://') + piHostname + '/pd.js';
var c = document.getElementsByTagName('script')[0];
c.parentNode.insertBefore(s, c);
}
if(window.attachEvent)
93

{
window.attachEvent('onload', async_load);
//attach event listener for browser history changes
// for browsers that support attachEvent
window.attachEvent('onpopstate', async_load);
}
else
{
window.addEventListener('load', async_load, false);
//add eventlistener for browser history changes
// for all other browsers
window.addEventListener('popstate', async_load, false);
}
})();
</script>
Update your site’s Content Security Policy (CSP) settings so that the head markup works as expected.
1. Access Experience Builder > Settings > Security.
2. Select Relaxed CSP: Permit Access to Inline Scripts and Allowed Hosts, and then click Allow
in the confirmation window.
3. Under CSP Errors, you see a list of blocked sites. Click Allow URL for each site you want to allow as
Pardot tracker domains.
After enabling a successful integration between Pardot and Experience Cloud, you can accurately track
page views and score leads based on a visitor’s Experience Cloud site navigation.
SEE ALSO:
Salesforce Help: Implement Tracking Code
Salesforce Help: Add Markup to the Page <head> to Customize Your Experience Builder Site
Salesforce Help: Where to Allowlist Third-Party Hosts for Experience Builder Sites
94
Add Pardot Tracking to Your Experience Builder Site

CHAPTER 8 Use a CMS with Your Experience Builder Site
Content management systems (CMS) give you the power to reuse content rather than having to duplicate
it. Using a CMS, you can feed content to multiple sites and also centrally update it to keep it current
everywhere at once.
Experience Cloud has two CMS options for your needs. Salesforce CMS is built into your org for creating,
managing, and organizing content with multiple channels in your org. And CMS Connect is a tool for
embedding content from a third-party CMS in your site. For more information about both options, refer
to CMS Developer Guide.
95

CHAPTER 9 Report on Deflections: The Deflection Signals
Framework
A lightningcommunity:deflectionSignal event is fired when a user initiates a case then
views a deflection item that addresses their issue and causes them to abandon the case.
In this chapter ...
• Case Create
Deflection Signal
For example, let’s say a user is filling out a form to create a customer case, and then sees a useful article
on the page. After clicking the article, the user finds it helpful and decides that creating a case is
unnecessary. A lightningcommunity:deflectionSignal event is then fired. The event
includes information about the user’s interaction with the article. The user’s action is reported as a
successful deflection because the user didn’t create a case.
You can report on these events through custom report types with the target object Community Case
Deflection Metrics. The signal appears in reports as either a Successful Deflection, Failed Deflection, or
Potential Deflection.
Note: Only those lightningcommunity:deflectionSignal events that are triggered
by authenticated users are reported.
SEE ALSO:
Case Create Deflection Signal
96

Case Create Deflection Signal
The lightningcommunity:deflectionSignal event is fired in an Aura site when a user is deflected away from creating a
customer case. After a user views an article or discussion, they’re asked if the interaction was helpful, and whether they want to abandon
their case.
Note: We gather data only for those lightningcommunity:deflectionSignal events that are triggered by
authenticated users.
You can configure the Case Deflection component to fire this event automatically using the component’s Deflection Metrics properties
in Experience Builder. The Case Deflection component works together with the Contact Support Form to register deflection interactions.
Attributes
The sourceType for deflection signals from the Case Deflection component is caseCreateDeflectionModal.
97
Case Create Deflection SignalReport on Deflections: The Deflection Signals Framework

The source is what the user has typed into the subject field or the description of the Case Create Form. The destination is the
ID of the Article or Discussion deflection item.
The payload is a JavaScript object key-value mapping. The following properties are used for this type of signal.
RequiredSupported ValuesDescriptionTypePayload Property
NoThe user’s answer to the
first question, asking
stringdeflectionAnswer
•
YES
•
NO
whether the deflection
item was helpful.
•
null—the user
didn’t vote
NoThe user’s answer to the
second question, asking
stringconfirmationAnswer
•
YES
•
NO
whether they wish to
stop creating a case.
•
null—the user
didn’t vote
NoThe state the popup
window was last left in
before it was closed.
stringstate
•
MeasureDeflectionState—the
user didn’t answer
the first question
•
ConfirmationQuestionState—the
user didn’t answer
the second question
•
ConfirmationMessageState—the
user answered both
questions
NoIndicates whether the
user created a case.
booleancaseCreated
•
true—the user
created a case
•
false—the user
didn’t create a case
Examples
Custom Aura components can listen to this system event and handle it as required. For example, if the user didn’t find the content helpful
the component can start another process.
Here’s a sample component that listens to the system event.
<aura:component implements="forceCommunity:availableForAllPageTypes">
<aura:attribute name="message" type="String" required="false"/>
<aura:handler event="lightningcommunity:deflectionSignal" action="{!c.handleSignal}"/>
<lightning:formattedText value="{!v.message}"/>
</aura:component>
98
Case Create Deflection SignalReport on Deflections: The Deflection Signals Framework

This client-side controller example handles the system event and checks for failed case deflections. That is, the controller checks for
interactions where the user didn’t find the deflection item helpful.
({
handleSignal: function(component, event, helper) {
var signal = event.getParams() || {},
sourceType = signal.sourceType,
payload = signal.payload;
// Process case create deflection signals
if (sourceType && sourceType === "caseCreateDeflectionModal") {
if (payload && payload.deflectionAnswer === "NO") {
component.set("v.message", "Sorry you didn't find that helpful.");
}
if (payload && payload.caseCreated === true) {
component.set("v.message", "We Apologize For The Inconvenience. We'll get
in touch with you shortly about your case.");
}
}
}
})
Custom Aura components that act as case create forms and case deflection components can also fire this event. Given valid parameters,
the event is automatically handled and processed for reporting. This example fires a lightningcommunity:deflectionSignal
event with values from the component attributes.
fireCaseDeflectionSignal : function(component, shouldSubmitSourceTypeSignals) {
var evt = $A.get("e.lightningcommunity:deflectionSignal");
evt.setParams({
sourceType: "caseCreateDeflectionModal",
source: cmp.get("v.deflectionTerm"),
destinationType: component.get("v.deflectionEntityType"),
destination: component.get("v.deflectionEntityId"),
payload: {
deflectionAnswer: component.get("v.deflectionAnswer"),
confirmationAnswer: component.get("v.confirmationAnswer"),
state: component.get("v.deflectionState"),
caseCreated: component.get("v.caseCreated")
},
shouldSubmitSourceTypeSignals: shouldSubmitSourceTypeSignals
});
evt.fire();
}
A user can successively view multiple deflection items before ultimately deciding whether to create or abandon a case. Each view fires
a lightningcommunity:deflectionSignal event. If you want to process all the events as a single batch, set
shouldSubmitSourceTypeSignals=true for the final event in which the user abandons or creates the case. This example
fires the last deflection signal event, based on whether the case was created or not.
fireCaseCreatedSignal : function(component, caseCreated) {
// Send all accumulated signals to the server to be processed
var evt = $A.get("e.lightningcommunity:deflectionSignal");
evt.setParams({
sourceType: "caseCreateDeflectionModal",
payload: {
caseCreated: caseCreated
99
Case Create Deflection SignalReport on Deflections: The Deflection Signals Framework

},
shouldSubmitSourceTypeSignals: true
});
evt.fire();
}
100
Case Create Deflection SignalReport on Deflections: The Deflection Signals Framework

CHAPTER 10 Deploy an Experience Cloud Site from Sandbox to
Production
EDITIONS
Available in: both Salesforce
Classic (not available in all
orgs) and Lightning
Experience
Available in: Enterprise,
Performance, Unlimited,
and Developer Editions
We recommend creating, customizing, and testing your Experience
Cloud site in a test environment, such as a sandbox, before
deploying it to your production org. When testing is complete, you
can use change sets or Metadata API to migrate your site from one
org to another. Deciding whether to use change sets or MD API
depends on several factors. Some things to consider are the
complexity of the changes that you’re migrating, your level of
comfort with developer tools, and the application lifecycle
management (ALM) model that you’re using.
To learn more about the ALM models and development options
available to you, check out Determine Which Application Lifecycle
Management Model Is Right for You on Trailhead.
In this chapter ...
• Deploy Your
Experience Cloud Site
with Change Sets
• Deploy Your
Experience Cloud Site
with the Metadata
API
• ExperienceBundle for
Experience Builder
Sites
• Avoid Deployment
Issues When Moving
Lightning Bolt Solutions aren’t suitable for deploying Experience Cloud sites between your orgs. Use a
Lightning Bolt Solution to share or sell a solution on AppExchange or implement a site with a turnkey
solution or new look.
to Enhanced LWR
Sites
• Considerations for
Deploying
Change Sets
If you’re more comfortable working with point-and-click tools, change sets are your deployment friend.
A change set represents a set of customizations in your org (or metadata components) that you can
deploy to a connected org.
Authenticated LWR
Sites
You can manage your application using declarative tools. You don’t have to use a command-line interface
or a version control system to meet your customization needs. You use the Setup menu to create changes
in a development environment. You then migrate the changes between environments as you work
through the ALM steps.
Your release artifact is a set of metadata changes relative to what’s in the production org. What gets
released is only metadata that has been added or changed—if it doesn’t change, it’s not in the release.
Metadata API
If you’re up to speed on Metadata API and more comfortable in the world of code, use Metadata API to
deploy changes programmatically. You can retrieve, deploy, create, update, and delete customization
information for your org, such as Experience Cloud sites, custom object definitions, and page layouts.
Using Metadata API is ideal when your changes are complex or when you need a more rigorous change
management process and an audit process (or version control system) to manage multiple work streams.
101

As with the change set process, the release artifact that you create is a set of metadata changes relative
to your production org.
Tip: Some Experience Cloud site settings and features aren’t yet supported in Metadata API, so
you have to migrate them manually between environments. Remember to track these changes
so that you don’t forget to migrate them.
SEE ALSO:
Trailhead: Build Apps Together with Package Development
102
Deploy an Experience Cloud Site from Sandbox to Production

Deploy Your Experience Cloud Site with Change Sets
EDITIONS
Available in: Salesforce
Classic (not available in all
orgs) and Lightning
Experience
Available in: Enterprise,
Performance, and
Unlimited Editions
Use change sets to move all or part of your Experience Cloud site between related orgs that have
a deployment connection. You can use the Network component type to move any full Experience
Cloud site. Or, you can use the Digital Experience component type to move partial site content for
enhanced LWR sites.
Deploy A Full Experience Cloud Site with Change Sets
Use change sets to move your Experience Cloud site between related orgs that have a
deployment connection, such as your sandbox and production orgs. Create, customize, and
test your site in your test environment and then migrate the site to production when testing
is complete.
Deploy Partial Experience Cloud Site Content with Change Sets
Use change sets to move individual Experience Cloud components and content between related orgs that have a deployment
connection, such as your sandbox and production orgs. Create and test changes in your test environment, and then migrate only
those changes to production when they’re ready.
Considerations for Deploying Experience Cloud Sites with Change Sets
Keep the following considerations and limitations in mind when migrating your Experience Builder or Salesforce Tabs + Visualforce
site with change sets.
Deploy A Full Experience Cloud Site with Change Sets
EDITIONS
Available in: Salesforce
Classic (not available in all
orgs) and Lightning
Experience
Available in: Enterprise,
Performance, and
Unlimited Editions
USER PERMISSIONS
Create and Set Up ExperiencesTo customize or publish an Experience Cloud
site:
Deploy Change Sets AND Modify All DataTo edit deployment connections and use
inbound change sets:
Note: If a user requires access only
to metadata for deployments, you can
enable the Modify Metadata Through
Metadata API Functions permission.
This permission gives such users the
access they need for deployments
without providing access to org data.
For details, see “Modify Metadata
Through Metadata API Functions
Permission” in Salesforce Help.
Create and Upload Change Sets, Create
AppExchange Packages, AND Upload
AppExchange Packages
To use outbound change sets:
Use change sets to move your Experience Cloud site between related orgs that have a deployment connection, such as your sandbox
and production orgs. Create, customize, and test your site in your test environment and then migrate the site to production when testing
is complete.
103
Deploy Your Experience Cloud Site with Change SetsDeploy an Experience Cloud Site from Sandbox to Production

You can use change sets to move full Experience Builder and Salesforce Tabs + Visualforce sites using the Network component type.
1. Create and test your site in your preferred test org, such as sandbox.
2. From Setup in your test org, enter Outbound Change Sets in the Quick Find box, and then select Outbound Change Sets.
3. Create a change set, and click Add in the Change Set Components section.
4. Select the Network component type, choose your site, and then click Add to Change Set.
5. To add dependent items, click View/Add Dependencies. We recommend selecting all the dependencies listed.
Tip:
•
For navigation menus that link to standard objects, custom list views aren’t included as dependencies. Manually add the
custom list view to your change list.
•
Manually add new or modified profiles or permission sets referenced in Administration > Members.
•
The list of dependencies has two Site.com items—MySiteName and MySiteName1. MySiteName holds the
various Visualforce pages that you can set in Administration in Experience Workspaces. MySiteName1 includes the
pages from Experience Builder.
6. Click Upload and select your target org, such as production.
Make sure that the target org allows inbound connections. The inbound and outbound orgs must have a deployment connection.
7. From Setup, select Inbound Change Sets and find the change set that you uploaded from your source org.
8. Validate and deploy the change set to make it available in the target org.
Warning: When you deploy an inbound change set, it overwrites the site in the target org.
9. Manually reconfigure any unsupported items in the target org site.
10. Add data for your site, and test it to make sure that everything works as expected. Then publish your changes to go live.
SEE ALSO:
Salesforce Help: Change Sets Best Practices
Salesforce Help: Upload Outbound Change Sets
Salesforce Help: Deploy Inbound Change Sets
Deploy Partial Experience Cloud Site Content with Change Sets
EDITIONS
Available in: Salesforce
Classic (not available in all
orgs) and Lightning
Experience
Available in: Enterprise,
Performance, and
Unlimited Editions
USER PERMISSIONS
Create and Set Up ExperiencesTo customize or publish an Experience Cloud
site:
Deploy Change Sets AND Modify All Data
If a user requires access only to metadata
for deployments, you can enable the Modify
Metadata Through Metadata API Functions
permission. This permission gives such users
the access they need for deployments
without providing access to org data. For
To edit deployment connections and use
inbound change sets:
details, see “Modify Metadata Through
104
Deploy Partial Experience Cloud Site Content with Change
Sets
Deploy an Experience Cloud Site from Sandbox to Production

Metadata API Functions Permission” in
Salesforce Help
.
Create and Upload Change Sets, Create AppExchange
Packages, AND Upload AppExchange Packages
To use outbound change sets:
Use change sets to move individual Experience Cloud components and content between related orgs that have a deployment connection,
such as your sandbox and production orgs. Create and test changes in your test environment, and then migrate only those changes to
production when they’re ready.
Partial deployment with change sets is available for enhanced LWR sites created in Winter ’23 and later.
You can use change sets to move partial content for Experience Builder sites using the Digital Experiences component type.
1. Create and test your site in your preferred test org, such as a sandbox.
2. From Setup in your test org, in the Quick Find box, enter Outbound Change Sets, and then select Outbound Change Sets.
3. Create a change set, and click Add in the Change Set Components section.
4. Select the Digital Experience component type.
5. Select the content that you want to deploy from the list of components, and then click Add To Change Set.
Tip:
•
To identify which enhanced LWR site each listed component belongs to, use the Type column. The Type column uses the
naming convention site/MySiteName.
•
To identify what content each listed component represents, use the Name column. The Name column uses the naming
convention sfdc_cms__<contentType>/<contentName>. For example, the name
sfdc_cms__brandingSet/Build_Your_Own_LWR represents a branding set named Build Your Own LWR.
6. Click Upload, and select your target org, such as production.
Make sure that the target org allows inbound connections. The inbound and outbound orgs must have a deployment connection.
7. From Setup, select Inbound Change Sets, and find the change set that you uploaded from your source org.
8. Validate and deploy the change set to make it available in the target org.
Warning: When you deploy an inbound change set, it overrides the corresponding site content in the target org.
9. Manually reconfigure any unsupported items in the target org site.
10. To make sure that everything works as expected, test your site. Then publish your changes to go live.
105
Deploy Partial Experience Cloud Site Content with Change
Sets
Deploy an Experience Cloud Site from Sandbox to Production

Considerations for Deploying Experience Cloud Sites with Change Sets
EDITIONS
Available in: Salesforce
Classic (not available in all
orgs) and Lightning
Experience
Available in: Enterprise,
Performance, and
Unlimited Editions
Keep the following considerations and limitations in mind when migrating your Experience Builder
or Salesforce Tabs + Visualforce site with change sets.
General
•
When you deploy an inbound change set, it overwrites the Experience Cloud site in the target
org. So although you can’t use a change set to delete a component, you can delete the pages
within an Experience Builder site. For example, let’s say you delete pages from an Experience
Builder site in sandbox and then create an updated outbound change set. When you redeploy
the change set in a target org, such as production, the pages are also deleted there.
•
If you update the Experience Cloud site template in the source org, ensure that you also update
the template in the target org before deploying the change set.
•
You can’t deploy to a target org that’s using an earlier release version. For example, if your source org is on Summer ’19 (API version
46.0), you can’t deploy to a target org on Spring ’19 (API version 45.0).
Administration
Administration settings are in Experience Workspaces.
•
Remember to add any new or modified profiles or permission sets referenced in Administration > Members to your outbound
change set. They’re not automatically included as dependencies.
•
For Experience Cloud sites created in a sandbox org before the Summer ’17 release, you must resave administration settings before
migration to transfer them successfully.
•
Until you publish your site in the target org, settings for the change password, forgot password, home, self-registration, and login
pages appear to return to their default values.
•
To update settings in the Members area and the Login & Registration area, you must deploy the changes in separate change sets.
First update and deploy the Members area setting, and then update and deploy the Login & Registration settings.
Navigation Menu
The Navigation Menu component is available in Experience Builder sites.
•
For menu items that link to objects, list views are reset to the default list view. Also, custom list views for standard objects aren’t
included as dependencies.
•
Deploying the navigation menu with additional menu items deletes any translations applied to existing menu items in the target
environment.
Recommendations
•
Updates to recommendation names aren’t supported. If you change the name of a recommendation in the source org having
previously migrated it, the target org treats it as a new recommendation.
•
Recommendation images aren’t supported.
•
When you deploy an inbound change set, it overwrites the target org’s scheduled recommendations with recommendations from
the source org.
106
Considerations for Deploying Experience Cloud Sites with
Change Sets
Deploy an Experience Cloud Site from Sandbox to Production

Partial Deployment for Enhanced LWR Sites
•
Partial site content deployment is available for enhanced LWR Experience Cloud sites created in Winter ’23 or later.
•
To deploy partial site content, make sure that the target org contains an existing site with the same name as the source site.
•
Adding a Digital Experience component to your outbound change set also adds that component’s variations to the change set. For
example, adding the Home view component automatically adds all translations for the Home view.
Unsupported Settings and Features
The following items aren’t supported. Manually add them after you deploy the inbound change set.
•
Navigational and featured topics
•
Audience targeting
•
Dashboards and engagement
•
Recommendation images
•
Branding panel images in Experience Builder
•
The following Administration settings in Experience Workspaces:
–
The Account field in the Registration section of the Login and Registration area
–
The Select which login options to display option in the Login section of the Login and Registration area
–
The Settings area
–
The Rich Publisher Apps area
SEE ALSO:
Salesforce Help: Change Sets Best Practices
Salesforce Help: Change Sets Implementation Tips
Deploy Your Experience Cloud Site with the Metadata API
EDITIONS
Available in: both Salesforce
Classic (not available in all
orgs) and Lightning
Experience
Available in: Enterprise,
Performance, Unlimited,
and Developer Editions
Use Metadata API to move your Experience Cloud site from one Salesforce org to another. Set up
and test your site in your test environment, and then retrieve the site’s data and deploy it to your
production org.
Depending on the site framework, the following metadata types combine to define the site. To
successfully migrate a site, use the Metadata API retrieve call to retrieve XML file representations
of your org’s components.
Network
Represents an Experience Cloud site. Contains administration settings, such as page override,
email, and membership configurations.
CustomSite
Contains the domain and page setting information, including indexPage, siteAdmin,
and URL definitions.
DigitalExperienceBundle and DigitalExperienceConfig or ExperienceBundle or SiteDotCom
The metadata type you require varies depending on the site type. Represents the different settings and components, such as pages,
branding sets, and themes, that make up a site.
107
Deploy Your Experience Cloud Site with the Metadata APIDeploy an Experience Cloud Site from Sandbox to Production

For enhanced LWR sites, introduced in Winter ’23 (API version 56.0), DigitalExperienceBundle and DigitalExperienceConfig combine
to provide text-based representations of your site elements and settings, but reimagined in a more content-focused structure. You
can retrieve editable site metadata, and quickly create, update, publish, and deploy sites programmatically. You can also partially
deploy enhanced LWR sites.
For non-enhanced LWR sites, ExperienceBundle provides text-based representations of the site’s settings, pages, and components.
You can retrieve editable site metadata, and quickly create, update, publish, and partially deploy sites programmatically.
For Aura sites, you can choose to use either ExperienceBundle or SiteDotCom but we recommend using ExperienceBundle. Before
Summer ’19 (API version 45.0 and earlier), the Network, CustomSite, and SiteDotCom metadata types combined to define an Aura
site. However, retrieving the SiteDotCom type produces a binary .site file that isn’t human readable. See ExperienceBundle for
Experience Builder Sites.
For Visualforce sites, Network represents the site.
For additional information on these metadata types and instructions on migrating data, see the Metadata API Developer Guide and the
Salesforce CLI Command Reference.
Required Metadata Types at a Glance
The metadata types that you use to deploy a site vary depending on the site type.
Visualforce SiteAura SiteLWR SiteEnhanced LWR
Site
Required Metadata Type
Network
CustomSite
DigitalExperienceBundle
DigitalExperienceConfig
ExperienceBundle or
SiteDotCom
ExperienceBundle
SiteDotCom
Tips and Considerations
•
Before migrating data to another org, enable digital experiences in the destination org and enter the same domain name that you
used in your sandbox org to avoid getting an error.
•
For each Experience Cloud site, the network component has a unique name and URL path prefix. When you retrieve the network
component, the generated XML file name is based on the name of the network. When migrating, the API looks at the file name and,
if it exists, updates the site. If it doesn’t exist, the API creates a site. If someone changes the site name in the sandbox and then tries
to migrate, they see an error. The API is trying to create a site with the existing path prefix.
•
Examine the XML file for CustomSite to make sure that all dependencies are brought over. If any are missing, explicitly state them
in the XML file.
•
In addition to the required components described previously, include all the other components required by your site. Components
can include such items as custom objects, custom fields, custom Lightning components, and Apex classes.
108
Deploy Your Experience Cloud Site with the Metadata APIDeploy an Experience Cloud Site from Sandbox to Production

•
To deploy the Network and Profile components using unlocked packages, create a separate unlocked package for each component
and deploy them individually.
•
When deploying an Aura site with ExperienceBundle, ensure that the SiteDotCom type isn’t included in the manifest file.
•
If you rename a site in Administration > Settings, make sure that the source and target sites have matching values for the
picassoSite and site attributes in the Network component.
•
If there are any changes to the guest user profile, include the profile as part of the site migration.
•
When you migrate user profiles, users are added to the site in the production org. Emails are then sent to members in the same way
as for any new site.
•
During deployment, make sure that the NavigationMenu developer name in the target org is the same as the developer name
in the source org.
•
If the containerType is CommunityTemplateDefinition, you can’t update an existing NavigationMenu via Metadata API.
•
To deploy an Aura site with a custom template, first retrieve and deploy the CommunityTemplateDefinition and the relevant metadata
types, such as CommunityThemeDefinition. Then retrieve and deploy ExperienceBundle or SiteDotCom and the relevant metadata
types.
•
Deploying the navigation menu with additional menu items deletes any translations applied to existing menu items in the target
environment.
•
To include navigation menus when you move your site, use the NavigationMenu metadata type.
•
You can’t deploy to a target org that’s using an earlier release version. For example, if your source org is on Summer ’19 (API version
46.0), you can’t deploy to a target org on Spring ’19 (API version 45.0).
•
NavigationLinkSet was deprecated in Winter ’20 (API version 47.0) and replaced by NavigationMenu.
•
ExperienceBundle doesn’t support retrieving and deploying across different API versions. If you’re trying to upgrade ExperienceBundle
metadata from an earlier API version to a later one—for example, from API version 48.0 to 49.0—take the following steps:
1. Set the API version in the package.xml manifest file to 48.0 and deploy the package.
2. Then, set the API version in package.xml to 49.0.
3. To get the latest ExperienceBundle updates, retrieve the package .
•
When deploying a site, you sometimes receive a warning message about invalid ID values. For example: The topicId property
of component 9b8a4e98-e724-4292-bd3c-0813adf9ddc2 references an object with the ID
value 0TO4R000000EGPEWA4. Occasionally, when deployed to a destination org, ID values
can become invalid—for example, if the referenced ID doesn’t exist in the destination
org. If you encounter component issues in your destination org, verify that the ID
values are correct.
In these situations, you can deploy the site successfully despite the warning. However, we recommend verifying in the target org
that the object ID referenced in the component is still valid. If the ID is incorrect, manually update the ID to resolve any component
issues in the target org. Alternatively, if it’s a custom component that you created, consider replacing the object ID with the object’s
API name instead to avoid the issue in future.
Sample Template
The following sample contains all the fields that you can migrate through the Metadata API.
<?xml version="1.0" encoding="UTF-8"?>
<Network xmlns="http://soap.sforce.com/2006/04/metadata">
<allowInternalUserLogin>true</allowInternalUserLogin>
<allowMembersToFlag>true</allowMembersToFlag>
109
Deploy Your Experience Cloud Site with the Metadata APIDeploy an Experience Cloud Site from Sandbox to Production

<allowedExtensions>txt,png,jpg,jpeg,pdf,doc,csv</allowedExtensions>
<caseCommentEmailTemplate>unfiled$public/ContactFollowUpSAMPLE</caseCommentEmailTemplate>
<changePasswordTemplate>unfiled$public/CommunityChangePasswordEmailTemplate</changePasswordTemplate>
</communityRoles>
<disableReputationRecordConversations>true</disableReputationRecordConversations>
<emailSenderAddress>[email protected]</emailSenderAddress>
<emailSenderName>MyCommunity</emailSenderName>
<enableCustomVFErrorPageOverrides>true</enableCustomVFErrorPageOverrides>
<enableDirectMessages>true</enableDirectMessages>
<enableGuestChatter>true</enableGuestChatter>
<enableGuestFileAccess>false</enableGuestFileAccess>
<enableInvitation>false</enableInvitation>
<enableKnowledgeable>true</enableKnowledgeable>
<enableNicknameDisplay>true</enableNicknameDisplay>
<enablePrivateMessages>false</enablePrivateMessages>
<enableReputation>true</enableReputation>
<enableShowAllNetworkSettings>true</enableShowAllNetworkSettings>
<enableSiteAsContainer>true</enableSiteAsContainer>
<enableTalkingAboutStats>true</enableTalkingAboutStats>
<enableTopicAssignmentRules>true</enableTopicAssignmentRules>
<enableTopicSuggestions>true</enableTopicSuggestions>
<enableUpDownVote>true</enableUpDownVote>
<forgotPasswordTemplate>unfiled$public/CommunityForgotPasswordEmailTemplate</forgotPasswordTemplate>
<gatherCustomerSentimentData>false</gatherCustomerSentimentData>
<lockoutTemplate>unfiled$public/CommunityLockoutEmailTemplate</lockoutTemplate>
<maxFileSizeKb>51200</maxFileSizeKb>
<networkMemberGroups>
<permissionSet>MyCommunity_Permissions</permissionSet>
<profile>Admin</profile>
</networkMemberGroups>
<networkPageOverrides>
<changePasswordPageOverrideSetting>VisualForce</changePasswordPageOverrideSetting>
<forgotPasswordPageOverrideSetting>Designer</forgotPasswordPageOverrideSetting>
<homePageOverrideSetting>Designer</homePageOverrideSetting>
<loginPageOverrideSetting>Designer</loginPageOverrideSetting>
<selfRegProfilePageOverrideSetting>Designer</selfRegProfilePageOverrideSetting>
</networkPageOverrides>
<picassoSite>MyCommunity1</picassoSite>
<selfRegistration>true</selfRegistration>
<sendWelcomeEmail>true</sendWelcomeEmail>
<site>MyCommunity</site>
<status>Live</status>
<tabs>
<defaultTab>home</defaultTab>
<standardTab>Chatter</standardTab>
</tabs>
<urlPathPrefix>mycommunity</urlPathPrefix>
110
Deploy Your Experience Cloud Site with the Metadata APIDeploy an Experience Cloud Site from Sandbox to Production

<welcomeTemplate>unfiled$public/CommunityWelcomeEmailTemplate</welcomeTemplate>
</Network>
Sample package.xml Manifest File
A manifest file defines the components that you’re trying to retrieve. The following sample shows a package.xml manifest file for
retrieving all the components of an Experience Builder site.
<?xml version="1.0" encoding="UTF-8"?>
<Package xmlns="http://soap.sforce.com/2006/04/metadata">
<types>
<members>*</members>
<name>Network</name>
</types>
<types>
<members>*</members>
<name>CustomSite</name>
</types>
<types>
<members>*</members>
<name>ExperienceBundle</name>
</types>
<types>
<members>*</members>
<name>CustomTab</name>
</types>
<types>
<members>*</members>
<name>CustomObject</name>
</types>
<types>
<members>*</members>
<name>ApexClass</name>
</types>
<types>
<members>*</members>
<name>ApexPage</name>
</types>
<types>
<members>*</members>
<name>ApexComponent</name>
</types>
<types>
<members>*</members>
<name>Portal</name>
</types>
<types>
<members>*</members>
<name>Profile</name>
</types>
<types>
<members>*</members>
<name>Document</name>
111
Deploy Your Experience Cloud Site with the Metadata APIDeploy an Experience Cloud Site from Sandbox to Production

</types>
<version>46.0</version>
</Package>
ExperienceBundle for Experience Builder Sites
The ExperienceBundle metadata type provides text-based representations of the different settings and components, such as pages,
branding sets, and themes, that make up an Experience Builder site. Whether it’s for your own org or you’re a consulting partner or ISV,
you can quickly update and deploy sites programmatically using your preferred development tools, including Salesforce Extensions for
VS Code, Salesforce CLI, or your favorite IDE or text editor.
Before the Summer ’19 release (API version 45.0 and earlier), the Network, CustomSite, and SiteDotCom metadata types combined to
define an Experience Builder site. However, retrieving the SiteDotCom type produces a binary .site file that isn’t human readable.
By retrieving the ExperienceBundle type instead of SiteDotCom, you can extract and edit granular site metadata in a human-readable
format, contained in a three-level folder structure.
Limitations
•
Managed packages aren’t supported.
ExperienceBundle Structure
When you retrieve ExperienceBundle, the data is stored in a three-level folder structure.
The experiences folder contains a folder for each Experience Builder site in your org. Each site_name
folder—customer_service in this example—contains subfolders that define the site and represent the different elements that
you access in Experience Builder. Each subfolder has .json files that contain the properties that you can edit on your local machine or
scratch org and then deploy.
112
ExperienceBundle for Experience Builder SitesDeploy an Experience Cloud Site from Sandbox to Production

Let’s take a closer look at the files that define each Experience Builder site.
ContentsFolder
branding_set_name.json defines the site’s branding set properties.brandingSets
config
•
site_name.json defines some site settings, such as public access and progressive rendering.
•
languages.json defines supported languages.
•
loginAppPage.json and mainAppPage.json are single-page applications (SPA).
loginAppPage.json is used for site pages that require a login, and mainAppPage is used
for all other pages.
An SPA is a web app that loads a single HTML page. Unlike a traditional website, which comprises
several pages that the user navigates between, an SPA consists of multiple views that update the
page dynamically as the user interacts with it.
Contains one file per page, named page_name.json, which defines the URL and other route-related
information.
routes
Contains one file per theme, named theme_name.json, which defines the theme.themes
Contains one file per variation, named experienceVariation_name.json.
You can use an experience variation to change the default behavior of an Experience Builder site based
on the audience, such as branding, page variations, component visibility, or component attributes.
variations
Contains one file per view, named view_name.json. Each file defines an SPA view, which is equivalent
to a page to the end user. A view consists of regions that contain other regions or components in the
rendered page.
views
Tip: Before you update the .json files of an Experience Builder site, we recommend making a copy of the site’s folder as a backup.
For a complete definition of ExperienceBundle and the files it includes, see the Metadata API Developer Guide.
Enable the ExperienceBundle Metadata Type
After you enable ExperienceBundle for Aura sites, Metadata API calls (retrieve and deploy) and Salesforce DX operations (pull,
push, and status) use the ExperienceBundle type instead of SiteDotCom.
If you use change sets to deploy your site, the list of dependencies includes two items of type Site.com—MySiteName and
MySiteName1. MySiteName1 now represents ExperienceBundle instead of SiteDotCom.
Note: You don’t need to enable the ExperienceBundle metadata type for LWR sites. LWR sites use ExperienceBundle by default.
1. From Setup, enter Digital Experiences in the Quick Find box, and then select Settings.
2. Select Enable ExperienceBundle Metadata API.
3. Save your changes.
113
ExperienceBundle for Experience Builder SitesDeploy an Experience Cloud Site from Sandbox to Production

Alternatively, you can enable this feature when creating a scratch org using a scratch org definition file. (See the Metadata Coverage
report.)
{
"orgName": "Sample Org",
"edition": "developer",
"features": [
"COMMUNITIES"
],
"settings": {
"experienceBundleSettings": {
"enableExperienceBundleMetadata": true
},
"communitiesSettings": {
"enableNetworksEnabled": true
}
}
}
Retrieve and Deploy ExperienceBundle Using Metadata API
In Metadata API, a manifest file defines the components that you’re trying to retrieve. This example shows a package.xml manifest
file for retrieving an Experience Builder site using ExperienceBundle instead of SiteDotCom.
<?xml version="1.0" encoding="UTF-8"?>
<Package xmlns="http://soap.sforce.com/2006/04/metadata">
<types>
<members>*</members>
<name>CustomSite</name>
</types>
<types>
<members>*</members>
<name>ExperienceBundle</name>
</types>
<types>
<members>*</members>
<name>Network</name>
</types>
<version>46.0</version>
</Package>
After you retrieve the .zip file, unzip it to access and edit the files.
114
ExperienceBundle for Experience Builder SitesDeploy an Experience Cloud Site from Sandbox to Production

See Deploying and Retrieving Metadata with the Zip File.
Retrieve and Deploy ExperienceBundle with Salesforce DX
Salesforce Developer Experience (DX) is a set of tools that streamlines the entire development lifecycle. It improves team development
and collaboration, facilitates automated testing and continuous integration, and makes the release cycle more efficient and agile.
If you’ve set up your Salesforce DX environment, you can quickly:
•
Retrieve all the Experience Builder sites in your org using sf project retrieve start
•
Deploy updates using sf project deploy start
•
Check for conflicts or changes on the server using sf project deploy preview or sf project retrieve
preview
•
Retrieve a list of available templates using sf community list template
•
Create a site using sf community create
•
Publish an Experience Builder site using sf community publish
If you’re not familiar with Salesforce DX, check out these great resources.
•
Salesforce DX Developer Guide
•
Quick Start: Salesforce DX (Trailhead)
•
Build Apps Together with Package Development (Trailhead)
•
Salesforce CLI Command Reference
SEE ALSO:
Blog Post: ExperienceBundle & Salesforce DX: A Developer’s Dream for Coding Lighting Communities
Metadata API Developer Guide: ExperienceBundle
Salesforce CLI Command Reference: community Commands
Avoid Deployment Issues When Moving to Enhanced LWR Sites
From Winter ’24, you can no longer disable the enhanced sites and content platform, which was first introduced in Winter ’23. As a result,
any site created from an LWR template is now an enhanced LWR site by default. Unlike non-enhanced LWR sites, which use the
ExperienceBundle metadata type, enhanced LWR sites use the DigitalExperienceBundle and the DigitalExperienceConfig types. However,
if you created a non-enhanced LWR site on a source org such as sandbox before Winter ’24, and you now want to deploy the site for
the first time to a target org such as production, this difference in metadata types can cause deployment issues.
In this case, instead of creating the site on the target org prior to deployment, we recommend using the deployment process to create
the site. Otherwise, if you first create the site on the target org, the new site is an enhanced LWR site—meaning it uses the
DigitalExperienceBundle and the DigitalExperienceConfig types. And because the non-enhanced LWR site on the source org uses
ExperienceBundle, if you then try to deploy it to the target org, the deployment fails due to the metadata type mismatch.
However, let’s say that you created the site in the target org prior to deployment. What can you do to resolve deployment errors?
Because you can’t delete Experience Cloud sites, we instead recommend renaming the site and updating the site URL in the target org
so that they no longer match the values in the source org. This approach frees up the deployment process to recreate the site in the
target org using the source org’s values.
115
Avoid Deployment Issues When Moving to Enhanced LWR
Sites
Deploy an Experience Cloud Site from Sandbox to Production

1. In the target org, on the Settings page of the site’s Administration workspace, rename the site so that it differs from the site in the
source org.
2. From Setup, in the Quick Find box, enter Custom URLs.
3. In Custom URLs, locate the two URLs for the site. Each site includes:
•
A Site.com Community URL that maps to the ExperienceBundle or DigitalExperienceBundle and DigitalExperienceConfig metadata
types, as appropriate
•
A Community URL that maps to CustomSite
4. Change both site URLs to ensure that they’re no longer the same as the site URLs in the source org.
5. After you update the site name and URL, deploy the site again either with change sets or with Metadata API using your preferred
deployment tools.
6. If you’re using Metadata API, remember to retrieve the site and include the Network and CustomSite types to allow the system to
automatically create the new non-enhanced LWR site in the target org. If you’re using change sets, remember to recreate the change
set before deploying.
SEE ALSO:
Salesforce Help: What Is the Enhanced Sites and Content Platform?
Metadata API Developer Guide: DigitalExperienceBundle
116
Avoid Deployment Issues When Moving to Enhanced LWR
Sites
Deploy an Experience Cloud Site from Sandbox to Production

Considerations for Deploying Authenticated LWR Sites
EDITIONS
Available in: Salesforce
Classic (not available in all
orgs) and Lightning
Experience
Available in: Enterprise,
Developer, Performance,
and Unlimited Editions
Beginning in Winter ’23, new LWR sites created through Experience Builder or Connect API don’t
include /s at the end of their URLs. URLs for authenticated LWR sites created before Winter ’23 still
include /s, and this URL structure update impacts deployment if sandbox and production URLs
don’t match. Learn which deployment scenarios are supported and how to resolve unsupported
deployment errors related to /s.
Note: The described scenarios assume that sandbox and production are on the same version
of Salesforce. Deploying a site from a newer version to an older version isn’t supported.
Metadata API Deployments
•
Creating a site through Metadata API deployment is supported, whether the source site’s URL
includes /s. If the source site’s URL includes /s, the new target site’s URL includes /s. If the source site’s URL doesn’t include /s, the
new target site’s URL doesn’t include /s.
•
To update a site with Metadata API deployment, the source site’s URL and the target site’s URL must match. Both URLs must include
/s, or neither URL can include /s.
•
To resolve a Metadata API deployment error related to /s, update your metadata bundle to add or remove /s from the source site’s
URL. Ensure that the source site’s URL matches the target site’s URL. You can’t add /s to or remove /s from the target site’s URL.
Change Set Deployments
•
Creating a site through change set deployment is supported, whether the source site’s URL includes /s. If the source site’s URL
includes /s, the new target site’s URL includes /s. If the source site’s URL doesn’t include /s, the new target site’s URL doesn’t include
/s.
•
To update a site with change set deployment, the source site’s URL and the target site’s URL must match. Both URLs must include
/s, or neither URL can include /s.
•
To resolve a change set deployment error related to /s, rename either the source site or the target site through the API or Experience
Builder. Renaming one of the sites creates a site instead of updating the target site. You can’t add /s to or remove /s from either the
source site’s URL or the target site’s URL.
117
Considerations for Deploying Authenticated LWR SitesDeploy an Experience Cloud Site from Sandbox to Production
INDEX
B
Branding panel 24
C
case create deflection 97
component bundles
configuration tips 10
design resources 9
components
profile menu 50
search 50
Content Security Policy (CSP) 80, 83–84
D
deflect case creation 96–97
deflection framework 96
design resources 9
E
events 11
Experience Cloud sites
change sets considerations 106
deploy 106
H
hide personal information 20
I
interfaces 11
introduction 1, 3
L
Lightning Locker 80, 82, 84
P
profile menu 50
S
Salesforce Lightning 3
search 50
security
authenticated users 53
external users 53–54, 77–78
guest users 53–54, 77–78
strict CSP 80, 83–84
118
