Resizing, Uploading and Using Images in Slate
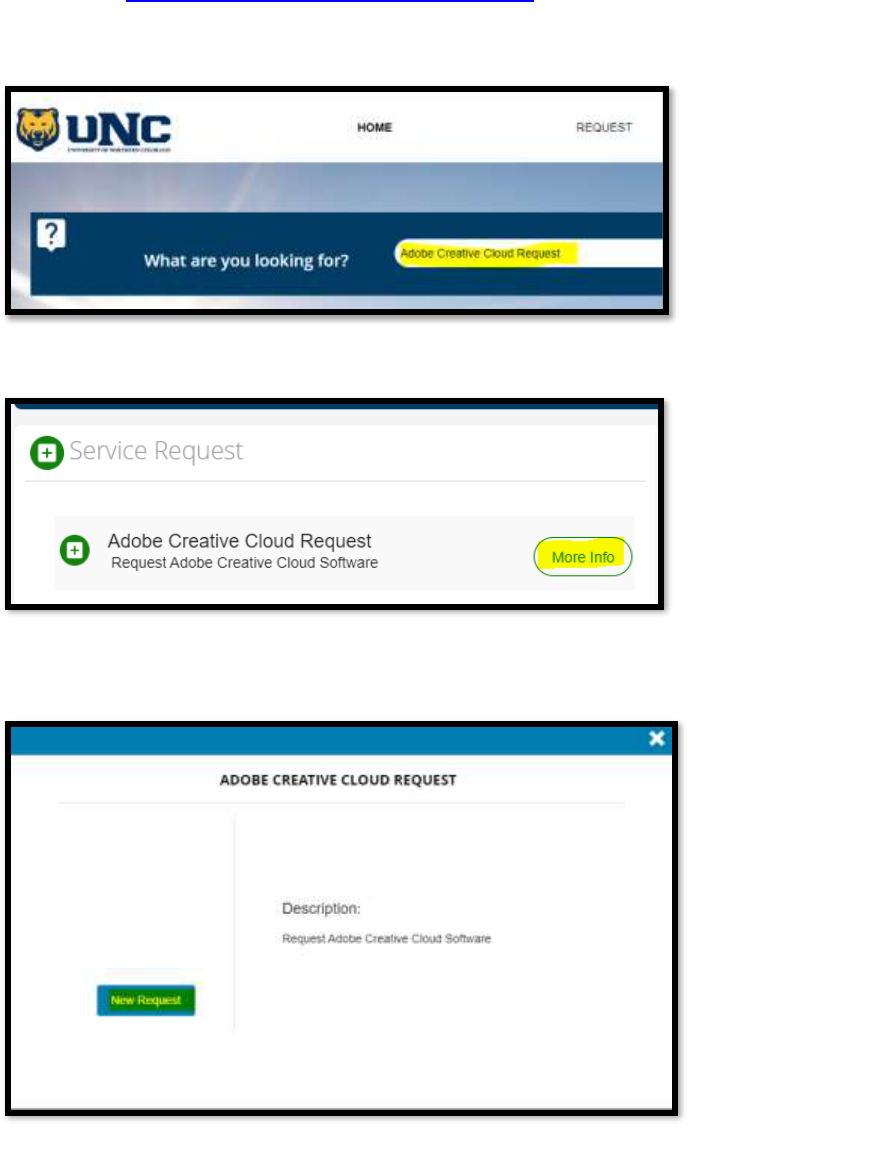
1. Request Adobe Creave Cloud Access if you don’t have access to Photoshop:
- Go to hps://unco-apps.easyvista.com/s/UNC-HELP and click on Employee Login.
- Type in “Adobe Creave Cloud Request” in the Keyword Search for “What are you looking
for? And hit the search glass.
- Click on “More Info.”
- and “New Request.”
- Complete and submit the form.

2. Follow these instrucons on how to crop photos in Photoshop:
hps://helpx.adobe.com/photoshop/using/crop-straighten-photos.html
3. Image size recommendaons for Slate:
a. Header/Hero/Banner images: 21:9 ratio (ultrawide). 1280 x 550 px is recommended.
JPEG or PNG format. Keep overall file size below 200k to avoid viewer delays when
opening.
b. 2-and 3-column story images: 3:2 ratio (standard photo). 800 x 533 px is recommended.
JPEG or PNG format. Keep overall file size below 120k to avoid viewer delays when
opening.
c. 2-column "blue or gold" story images: 1:1 ratio (square). 1000 x 1000 px is
recommended. JPEG or PNG format. Keep overall file size below 200k to avoid viewer
delays when opening.
d. 3-column icons: 1:1 ratio (square). 300 x 300 px is recommended. JPEG or PNG format.
Keep overall file size below 30k to avoid viewer delays when opening.
4. Upload images to Slate:
a. Click on Mailings.
b. Click on Library.
c. Click on “00-DEPARTMENTS” and your department subfolder. Don’t click on
“DEPARTMENTS,” which is an old folder that eventually will be deleted.

d. Once you are in your department subfolder, upload your image by clicking on the Upload
buon at the top.

e. We recommend giving the image a descripve name and including the image size in the
name so the image is easy to nd and you know what size the image is e.g.:
“lawrenson_sunset_18_1_800x533.jpg”
5. Adding or replacing an image in Slate:
To add an image in Slate, go to your mailing and select the image icon located near the center of
the toolbar. To replace an image in Slate, double-click on the image.

From the Image screen, select “Browse Server.” Click on “00-DEPARTMENTS” then your subfolder to
your images for use. If you can’t find the image you are looking for. Please submit the marketing request
form.
Here you can choose from the images available on the server. Simply double-click the image you wish to
use.
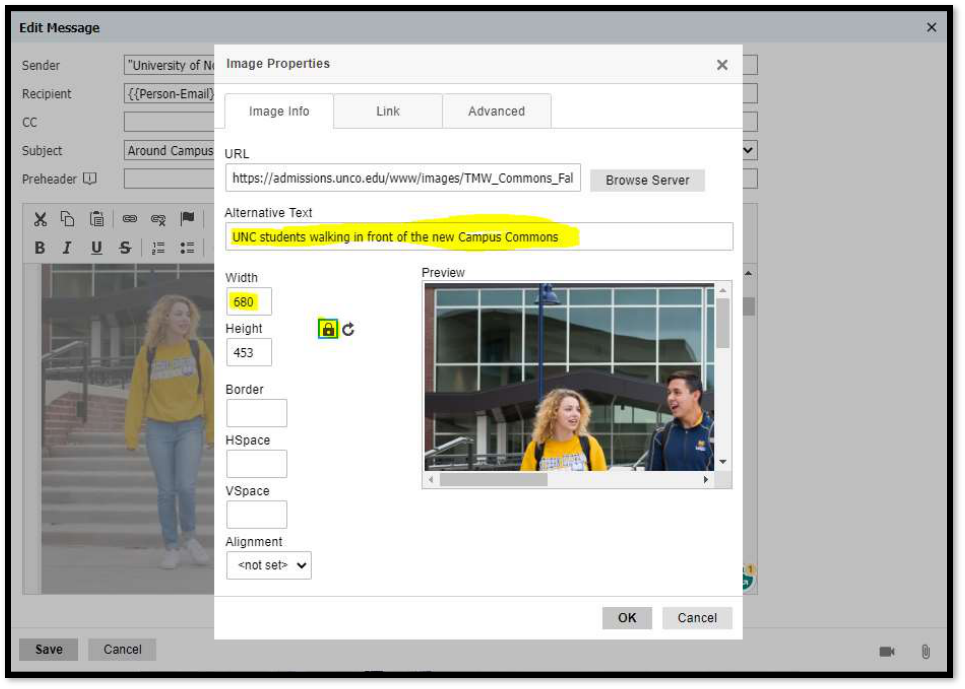
Once you have your image selected, you can adjust the size of it:
• For the header/hero/banner images, we recommend setting the width to 680px, as this fits well
on both desktop and mobile devices.
• For the two-column images, we recommend setting the width to 280px.
• For the three-column images, we recommend setting the width to 167px.
Finally, click OK to insert the image in the message as configured.
Make sure to select the Lock icon to keep the image dimensions proportional when you adjust them.
Before you leave this screen, fill out the Alternative Text box. Alt text (short for alternative text) is text
included in HTML code to describe an image on a webpage, providing context for search engine crawlers
as well as for those viewing a page with a screen reader. Assistance technology reads this text if unable
to display the image, so make sure it describes everything about the image as concisely as possible.
You can also link a webpage to your image. Simply select the link icon at the top of the Image Editor and
paste the link you wish to use in the URL box. From the Target drop-down menu, we recommend you
select the “New Window” option. This way, clicking the image opens a new tab on the student’s
browser.

6. Adding a video to Slate:
- Upload an image with a play buon and link to the image.
- Link the image to the YouTube video.

