
Oracle
®
Fusion Middleware
Creating Schemas with the Repository Creation Utility
12c (12.2.1)
E58101–01
October 2015
Documentation for database and system administrators that
describes how to create database schemas for Oracle Fusion
Middleware products.
Oracle Fusion Middleware Creating Schemas with the Repository Creation Utility, 12c (12.2.1)
E58101–01
Copyright
©
2015, Oracle and/or its affiliates. All rights reserved.
Primary Author: Phil Stubbs
This software and related documentation are provided under a license agreement containing restrictions on
use and disclosure and are protected by intellectual property laws. Except as expressly permitted in your
license agreement or allowed by law, you may not use, copy, reproduce, translate, broadcast, modify, license,
transmit, distribute, exhibit, perform, publish, or display any part, in any form, or by any means. Reverse
engineering, disassembly, or decompilation of this software, unless required by law for interoperability, is
prohibited.
The information contained herein is subject to change without notice and is not warranted to be error-free. If
you find any errors, please report them to us in writing.
If this is software or related documentation that is delivered to the U.S. Government or anyone licensing it on
behalf of the U.S. Government, then the following notice is applicable:
U.S. GOVERNMENT END USERS: Oracle programs, including any operating system, integrated software,
any programs installed on the hardware, and/or documentation, delivered to U.S. Government end users are
"commercial computer software" pursuant to the applicable Federal Acquisition Regulation and agency-
specific supplemental regulations. As such, use, duplication, disclosure, modification, and adaptation of the
programs, including any operating system, integrated software, any programs installed on the hardware,
and/or documentation, shall be subject to license terms and license restrictions applicable to the programs.
No other rights are granted to the U.S. Government.
This software or hardware is developed for general use in a variety of information management applications.
It is not developed or intended for use in any inherently dangerous applications, including applications that
may create a risk of personal injury. If you use this software or hardware in dangerous applications, then you
shall be responsible to take all appropriate fail-safe, backup, redundancy, and other measures to ensure its
safe use. Oracle Corporation and its affiliates disclaim any liability for any damages caused by use of this
software or hardware in dangerous applications.
Oracle and Java are registered trademarks of Oracle and/or its affiliates. Other names may be trademarks of
their respective owners.
Intel and Intel Xeon are trademarks or registered trademarks of Intel Corporation. All SPARC trademarks are
used under license and are trademarks or registered trademarks of SPARC International, Inc. AMD, Opteron,
the AMD logo, and the AMD Opteron logo are trademarks or registered trademarks of Advanced Micro
Devices. UNIX is a registered trademark of The Open Group.
This software or hardware and documentation may provide access to or information about content, products,
and services from third parties. Oracle Corporation and its affiliates are not responsible for and expressly
disclaim all warranties of any kind with respect to third-party content, products, and services unless
otherwise set forth in an applicable agreement between you and Oracle. Oracle Corporation and its affiliates
will not be responsible for any loss, costs, or damages incurred due to your access to or use of third-party
content, products, or services, except as set forth in an applicable agreement between you and Oracle.

Contents
Preface............................................................................................................................................................... vii
Intended Audience ..................................................................................................................................... vii
Documentation Accessibility .................................................................................................................... vii
Related Documents..................................................................................................................................... vii
Conventions................................................................................................................................................. vii
What's New in This Guide.......................................................................................................................... ix
New and Changed Features for Release 12c (12.2.1) .............................................................................. ix
Other Significant Changes in this Document for Release 12c (12.2.1) ................................................. ix
1 Understanding Repository Creation Utility
1.1 Verifying RCU System and Database Requirements ................................................................. 1-1
1.1.1 RCU Supported Platforms .................................................................................................. 1-1
1.1.2 Finding a Certified Database .............................................................................................. 1-1
1.1.3 Database Requirements for RCU ....................................................................................... 1-1
1.1.4 Additional Requirements for IBM DB2 Databases.......................................................... 1-2
1.2 Preparing for Schema Creation...................................................................................................... 1-2
1.2.1 Understanding System Load and Product Load ............................................................. 1-3
1.2.2 Granting Permissions to Users for Querying System Load Objects ............................. 1-4
1.2.3 Understanding Custom Prefixes........................................................................................ 1-4
1.2.4 Understanding the Service Table Schema ........................................................................ 1-5
1.2.5 Planning Your Schema Creation ........................................................................................ 1-5
1.2.6 About Integrating Components Using Declarative XML............................................... 1-8
1.3 Using RCU with Java Access Bridge (Windows Only) .............................................................. 1-8
1.3.1 Install Java Access Bridge.................................................................................................... 1-8
1.3.2 Configure RCU to Use Java Access Bridge....................................................................... 1-9
2 Obtaining and Running Repository Creation Utility
2.1 Obtaining RCU................................................................................................................................. 2-1
2.2 Starting RCU..................................................................................................................................... 2-1
2.3 Creating Schemas............................................................................................................................. 2-2
iii
2.3.1 Creating Schemas as a User with Full SYS or SYSDBA Privileges ............................... 2-2
2.3.2 Creating Schemas as a User With Limited Database Privileges.................................... 2-4
2.3.3 Verifying Schema Version Numbers................................................................................. 2-6
2.4 Dropping Schemas........................................................................................................................... 2-7
2.4.1 About Dropping Shared Tablespaces................................................................................ 2-8
2.4.2 Dropping Schemas and Deleting Datafiles (Windows Only)........................................ 2-9
3 Running Repository Creation Utility from the Command Line
3.1 Command Line Syntax and Parameters....................................................................................... 3-1
3.1.1 RCU Modes Available from the Command Line ............................................................ 3-2
3.1.2 RCU Operations Available from the Command Line..................................................... 3-2
3.1.3 RCU Command Line Parameters....................................................................................... 3-3
3.2 Using the -silent Command ........................................................................................................... 3-7
3.2.1 Using a Wallet to Store Passwords .................................................................................... 3-8
3.3 Using the -interactive Command .................................................................................................. 3-9
3.4 Using Response Files..................................................................................................................... 3-11
3.4.1 Understanding Response Files ......................................................................................... 3-12
3.4.2 Creating a RCU Response File from the Graphical Interface....................................... 3-12
3.4.3 Creating a RCU Response File from the Command Line............................................. 3-12
3.4.4 Performing RCU Operations Using a Response File..................................................... 3-13
3.5 Creating a Repository from the Command Line....................................................................... 3-14
3.6 Generating a System Load Script From the Command Line................................................... 3-14
3.7 Loading Data Into the Repository From the Command Line ................................................. 3-15
3.8 Dropping a Repository from the Command Line..................................................................... 3-16
3.9 Generating a List of Components in an Oracle Home from the Command Line ................ 3-16
3.10 RCU Environment Variables...................................................................................................... 3-16
A Understanding Repository Creation Utility Screens
A.1 Welcome........................................................................................................................................... A-2
A.2 Create Repository ........................................................................................................................... A-3
A.2.1 Create Repository................................................................................................................ A-3
A.2.2 Drop Repository .................................................................................................................. A-4
A.3 Database Connection Details ........................................................................................................ A-5
A.3.1 Connection Credentials for Oracle Databases and Oracle Databases with Edition-
Based Redefinition...................................................................................................................... A-6
A.3.2 Connection Credentials for MySQL Databases .............................................................. A-7
A.3.3 Connection Credentials for Microsoft SQL Server Databases ...................................... A-7
A.3.4 Connection Credentials for IBM DB2 Databases............................................................ A-7
A.4 Select Components (for Create Operation)................................................................................. A-7
A.5 Select Components (for Drop Operation) ................................................................................. A-10
A.6 Schema Passwords ....................................................................................................................... A-11
A.7 Custom Variables.......................................................................................................................... A-12
A.7.1 Custom Variables for Oracle Data Integrator ............................................................... A-12
iv
A.7.2 Custom Variables for Oracle SOA Suite ........................................................................ A-14
A.7.3 Custom Variable for Oracle WebCenter Portal Analytics........................................... A-15
A.8 Map Tablespaces........................................................................................................................... A-16
A.8.1 Default Tablespace Mappings ......................................................................................... A-17
A.8.2 Changing Default and Temporary Tablespaces ........................................................... A-17
A.8.3 Viewing and Changing Additional Tablespaces .......................................................... A-18
A.8.4 Managing Tablespaces and Datafiles ............................................................................. A-18
A.8.5 Encrypting Tablespaces.................................................................................................... A-20
A.9 Summary (for Create Operation) ............................................................................................... A-20
A.10 Summary (for Drop Operation)................................................................................................ A-22
A.11 Completion Summary (for Create Operation) ....................................................................... A-24
A.12 Completion Summary (for Drop Operation).......................................................................... A-25
B Understanding Repository Creation Utility Schemas, IDs, and Tablespaces
B.1 Repository Creation Utility Schemas, IDs, and Tablespaces .................................................... B-1
C Extending Repository Creation Utility to Configure Custom Application
Repositories
C.1 RCU Integration Options............................................................................................................... C-1
C.1.1 RCU JDBC Engine Compliant SQL*Plus Scripts ............................................................ C-1
C.1.2 Pure JDBC Scripts ................................................................................................................ C-2
C.1.3 SQL*Plus Scripts .................................................................................................................. C-2
C.1.4 External Processes ............................................................................................................... C-3
C.1.5 Java Code Using JavaAction .............................................................................................. C-3
C.2 RCU Configuration Files................................................................................................................ C-4
C.2.1 XML DTDs Defined by RCU.............................................................................................. C-4
C.2.2 Component Repository Configuration File ..................................................................... C-8
C.2.3 Component List Configuration File............................................................................... C-15
C.2.4 Soft-Prerequisite Support ................................................................................................ C-27
C.2.5 Default Tablespaces Configuration File ........................................................................ C-27
C.3 RCU Script Writing Guidelines ................................................................................................. C-28
C.3.1 Guidelines for RCU JDBC Engine Compliant SQL*Plus Scripts ............................... C-28
C.3.2 Guidelines for Pure JDBC Scripts................................................................................... C-29
C.3.3 Guidelines for SQL*Plus Scripts..................................................................................... C-29
C.3.4 Guidelines for SQL Server-Based Scripts...................................................................... C-29
D Troubleshooting Repository Creation Utility
D.1 General Troubleshooting Tips ...................................................................................................... D-1
D.2 RCU Log Files.................................................................................................................................. D-1
D.3 Need More Help?............................................................................................................................ D-3
v
vi

Preface
The Creating Schemas with the Repository Creation Utility book contains overview
information and usage instructions for Oracle Repository Creation Utility (RCU).
Intended Audience
This guide is intended for users who are installing Oracle Fusion Middleware
products and are comfortable running some system administration operations, such as
creating users and groups, adding users to groups, and installing operating system
patches on the computer where Oracle Fusion Middleware products will be installed.
Users on UNIX systems need root access to run some scripts.
Documentation Accessibility
For information about Oracle's commitment to accessibility, visit the Oracle
Accessibility Program website at http://www.oracle.com/pls/topic/lookup?
ctx=acc&id=docacc.
Access to Oracle Support
Oracle customers that have purchased support have access to electronic support
through My Oracle Support. For information, visit http://www.oracle.com/pls/
topic/lookup?ctx=acc&id=info or visit http://www.oracle.com/pls/
topic/lookup?ctx=acc&id=trs if you are hearing impaired.
Related Documents
For additional information, see the following manuals:
• Planning an Installation of Oracle Fusion Middleware
This document contains important information about planning and preparing for
Oracle Fusion Middleware product installations.
• Installing and Configuring the Oracle Fusion Middleware Infrastructure
The Repository Creation Utility is included with the Oracle Fusion Middleware
Infrastructure distribution.
Conventions
The following text conventions are used in this document:
vii

Convention Meaning
boldface
Boldface type indicates graphical user interface elements associated with an action, or
terms defined in text or the glossary.
italic Italic type indicates book titles, emphasis, or placeholder variables for which you
supply particular values.
monospace Monospace type indicates commands within a paragraph, URLs, code in examples,
text that appears on the screen, or text that you enter.
viii

What's New in This Guide
The following topics introduce the new and changed features of the Repository
Creation Utility and other significant changes that are described in this guide, and
provide pointers to additional information. This document is the new edition of the
formerly titled Oracle Fusion Middleware Repository Creation Utility User's Guide.
New and Changed Features for Release 12c (12.2.1)
Repository Creation Utility 12c (12.2.1) includes the following new and changed
schema creation features.
• If Transparent Data Encryption (TDE) is enabled in an Oracle database, RCU
provides an option on the command line and in the graphical interface to create
encrypted tablespaces.
For more information, see Encrypting Tablespaces.
• In 12c (12.1.3), RCU used ORACLE_HOME/oracle_common/rcu/log/
logdir.date_timestamp/rcu.log as the default log location. In 12c (12.2.1),
log files are now written (by default) to the
RCUdate_timestamp_random_number\logs directory inside the temporary
directory on your system.
For more information, see RCU Log Files.
• RCU operations can be performed using a response file, which allows you to pass
all valid RCU command-line parameters to RCU via a text file.
For more information, see Using Response Files.
• A wallet can be used in silent mode to store and provide password credentials to
RCU rather than directly entering passwords on the command line.
For information on running RCU from the command line, see Using the -silent
Command.
• A silent RCU operation was introduced to generate a list of component IDs for a
given Oracle home.
For more information, see Generating a List of Components in an Oracle Home
from the Command Line.
Other Significant Changes in this Document for Release 12c (12.2.1)
For 12c (12.2.1), this guide has been updated in several ways. Following are the
sections that have been added or changed:
ix
• Added a section to describe how to create encrypted tablespaces with RCU if TDE
(Transparent Data Encryption) is enabled in the database (Oracle or Oracle EBR).
See Encrypting Tablespaces.
• Added a section to describe how to generate and use a response file to perform a
RCU operation. See Using Response Files.
• Added a section to describe how to generate a list of component IDs for a given
Oracle home from the command line. See Generating a List of Components in an
Oracle Home from the Command Line.
• Modified the RCU default log location. For example, on UNIX operating systems,
the main RCU log (rcu.log) and component log files are now written to
the /tmp/RCUdate_timestamp_random_number/logs directory by default.
See RCU Log Files.
x

1
Understanding Repository Creation Utility
This chapter introduces you to the concepts and features you should be familiar with
before using the Repository Creation Utility (RCU).
Many of the Oracle Fusion Middleware components require the existence of schemas
in a database prior to installation. These schemas are created and loaded in your
database using the Repository Creation Utility (RCU).
This chapter contains the following content:
• Verifying RCU System and Database Requirements
• Preparing for Schema Creation
• Using RCU with Java Access Bridge (Windows Only)
1.1 Verifying RCU System and Database Requirements
This section contains links to important information about supported platforms for
RCU, certified databases, and database configuration information. Read this
information carefully before you obtain and run RCU.
• RCU Supported Platforms
• Finding a Certified Database
• Database Requirements for RCU
• Additional Requirements for IBM DB2 Databases
1.1.1 RCU Supported Platforms
To see the platforms on which you can run RCU, review the "RCU Supported
Platforms" section in the Oracle Fusion Middleware System Requirements and Specifications
document.
1.1.2 Finding a Certified Database
For a list of certified databases that can be used with RCU, refer to the certification
document for your release, located on the Oracle Fusion Middleware Supported System
Configurations page.
1.1.3 Database Requirements for RCU
Before you begin using RCU, review the "Repository Creation Utility (RCU)
Requirements" section in the Oracle Fusion Middleware System Requirements and
Specifications document.
Understanding Repository Creation Utility
1-1

This section contains important information about general and component-specific
database requirements that should be met before you run RCU.
Note that not all schemas are supported on all databases. Make sure you have read the
information in this section carefully so that you configure a certified database that
supports the schemas you need for your Fusion Middleware components.
1.1.4 Additional Requirements for IBM DB2 Databases
In addition to the typical space and configuration database requirements, IBM DB2
databases also have the following special requirements:
• On IBM DB2 databases running on Linux operating systems, there is a limitation
with regards to the length of the schema names.
• One database operating system user must be created for each schema that is
created in an IBM DB2 database.
For example, if you plan to create a schema named DEV_STB using RCU, then the
operating system user must be named dev_stb (all lowercase letters).
You can create the operating system user by running the following command as
root (this example creates the operating system user dev_stb and assigns the
provided password to the user):
/usr/sbin/useradd dev_stb -p password -d /scratch/dev_stb
You can then set the password of the user (for example, dev_stb) by running the
following commands as root:
passwd -u dev_stb
passwd dev_stb
Refer to your system documentation for more information.
For more information about RCU prerequisites for IBM DB2 databases, refer to the
Oracle Fusion Middleware System Requirements and Specifications document.
1.2 Preparing for Schema Creation
This section contains important information and concepts regarding schema creation
and organization.
The following topics are covered:
• Understanding System Load and Product Load
• Granting Permissions to Users for Querying System Load Objects
• Understanding Custom Prefixes
• Understanding the Service Table Schema
• Planning Your Schema Creation
• About Integrating Components Using Declarative XML
Preparing for Schema Creation
1-2 Creating Schemas with the Repository Creation Utility

1.2.1 Understanding System Load and Product Load
Schema creation in RCU is performed in multiple phases; each phase requires a
different level of access to your database.
• System Load Phase
During the system load phase, RCU will create the necessary tablespaces and
schemas and also the schema_version_registry, if it is not already present.
One entry for each component will be created in schema_version_registry,
and the entry will have the appropriate access and status set to "LOADED" in the
schema_version_registry table.
These actions must be performed by someone with SYS or SYSDBA privileges;
authentication credentials must be provided on the Database Connection Details
screen when running RCU.
If you do not have the necessary privileges, you can select Prepare Scripts for
System Load on the Create Repository screen. This will generate a SQL script
containing all the same SQL statements and blocks that would have been called if
RCU were to execute the actions for the selected components. After the script is
generated, a user with the necessary SYS or SYSDBA privileges can execute the
script to complete the system load phase.
After the system load phase is complete, any user can then run RCU again to
complete the schema creation by performing the product load phase.
Note:
If you need to generate the script for system load, you can only create schemas
on Oracle and Oracle EBR databases; the system load script is not supported
on any other database.
If you are performing the system load with full SYS or SYSDBA privileges,
then you can create the schemas on any certified database.
• Product Load Phase
During the product load phase, RCU will create procedures, functions, tables,
indexes and other objects within schemas and run any action that does not require
DBA access. Any non DBA user or the REGISTRYOWNER user can be used for this
step.
Before performing the product load phase, the user must be granted the following:
grant REGISTRYACCESS to user;
grant STBROLE to user;
After the product load phase is complete, the status for each component will
change from ‘LOADED’ to ‘VALID’ in the schema_version_registry.
• Optional Post-Product Load Phase
This optional step is needed for components that must execute product load scripts
requiring DBA privileges.
This step is required for the following components:
– Audit Services (IAU)
Preparing for Schema Creation
Understanding Repository Creation Utility 1-3

– Oracle Enterprise Scheduler (ESS)
1.2.2 Granting Permissions to Users for Querying System Load Objects
If you want to give a user with limited privileges the ability to query the system load
objects, you must grant the user the following before they can query the system load:
Note:
This user will be used for connecting to the system for queries, but the
generated scripts from the system load phase must be run by someone with
DBA privileges.
grant select_catalog_role to user;
grant select any dictionary to user;
grant create session to user;
grant select on schema_version_registry to user;
Note:
You may encounter a "Table or view does not exist" error message when you
execute the last command; this can be safely ignored.
After performing the system load, grant the following to the same user in order for
them to perform data load:
grant REGISTRYACCESS to user;
grant STBROLE to user;
1.2.3 Understanding Custom Prefixes
Schemas in your database can be grouped together using custom prefixes.
Note:
For important information regarding custom prefixes in IBM DB2 databases,
refer to "Size Limit for Schema Prefixes" in the Oracle Fusion Middleware System
Requirements and Specifications document.
The prefix is prepended to and separated from the schema name with an underscore
(_) character, as shown below:
prefix_schemaname
Prefixes:
• Can only contain alpha-numeric characters; no spaces or other special characters.
• Must begin with a letter.
• Must not be longer than 12 characters
The default prefix used by RCU is DEV; if DEV has already been used, then RCU will
default to DEV1, then DEV2, and so on. Prefixes are used to create and organize logical
Preparing for Schema Creation
1-4 Creating Schemas with the Repository Creation Utility

groups of schemas. For example, you may want to create a test version of the
Metadata Services (schema name MDS) called TEST_MDS; then, when are ready for
your production version, you can create a second version of the schema called
PROD_MDS. Both TEST_MDS and PROD_MDS may reside on the same or separate
databases.
You are only allowed to use a prefix once per schema within a single database. For
example, if you had a version of the Metadata Services schema called DEV_MDS, then
you can not use the DEV prefix again to create another version of the Metadata
Services schema (for example, DEV_MDS2).
If you want to create another version of the schema using the same prefix, you must
first drop the existing schema and then create the schema again.
The mapping between the prefixes and schemas is maintained in
schema_version_registry.
1.2.4 Understanding the Service Table Schema
The Service Table schema is a special schema that is installed automatically whenever
RCU is run. The service table stores basic schema configuration information (for
example, schema prefixes and passwords) that can then be accessed and used by other
Oracle Fusion Middleware components during domain creation.
For example, the configuration wizard has screens which you can configure to use the
data stored in the service table when RCU was run. After you provide the service table
schema credentials, the data from the service table is used to populate the fields on the
screen, thus saving you the need to manually populate that data yourself.
Once created, service tables are used to wire Oracle Fusion Middleware components
together. For more information, see "Cross-Component Wiring" in Administering Oracle
Fusion Middleware.
1.2.5 Planning Your Schema Creation
This topic provides examples to help you understand how schemas can be grouped
together and distributed depending on your specific environment.
The following examples are provided:
• Organizing Schemas on a Single Database for a Single Domain
• Organizing Schemas on Multiple Databases for a Single Domain
• Organizing Schemas on a Single Database for Multiple Domains
• Organizing Schemas on Multiple Databases for Multiple Domains
1.2.5.1 Organizing Schemas on a Single Database for a Single Domain
Figure 1-1 shows a set of schemas in a single database being used by a single
WebLogic domain. This is the simplest scenario in which all schemas using the DEV
prefix are grouped together and used by this single WebLogic domain.
Preparing for Schema Creation
Understanding Repository Creation Utility 1-5

Figure 1-1 Schemas on a Single Database for a Single Domain
DBHOST
Database with schemas
APPHOST
WebLogic Domain
Cluster (infra_cluster_1)
Machine (infra_machine_1)
Managed Server
(infra_server_1)
Managed Server
(infra_server_2)
Infrastructure Infrastructure
Administration Server
Enterprise Manager
DEV_MDS
DEV_IAU
DEV_IAU_APPEND
DEV_IAU_VIEWER
DEV_OPSS
DEV_STB
1.2.5.2 Organizing Schemas on Multiple Databases for a Single Domain
Figure 1-2 shows a single set of schemas distributed on multiple databases being used
by a single WebLogic domain.
Figure 1-2 Schemas on Multiple Databases for a Single Domain
DBHOST 1 DBHOST 2
DEV_MDS
DEV_IAU
DEV_IAU_APPEND
DEV_IAU_VIEWER
DEV_OPSS
DEV_UMS
DEV_WLS
DEV_STB
APPHOST
WebLogic Domain
Cluster (infra_cluster_1)
Machine (infra_machine_1)
Managed Server
(infra_server_1)
Managed Server
(infra_server_2)
Infrastructure Infrastructure
Administration Server
Enterprise Manager
Database with schemas Database with schemas
Note that the same schema prefix (in this case, DEV) can be used to group these related
schemas together, even across multiple databases.
1.2.5.3 Organizing Schemas on a Single Database for Multiple Domains
Figure 1-3 shows how schemas on a single database should be grouped for multiple
domains.
Preparing for Schema Creation
1-6 Creating Schemas with the Repository Creation Utility

Figure 1-3 Schemas on a Single Database for Multiple Domains
DBHOST
APPHOST
WebLogic Domain 1
Cluster (infra_cluster_1)
Machine (infra_machine_1)
Managed Server
(infra_server_1)
Managed Server
(infra_server_2)
Infrastructure Infrastructure
Administration Server
Enterprise Manager
Database with schemas
WebLogic Domain 2
Cluster (infra_cluster_2)
Machine (infra_machine_2)
Managed Server
(infra_server_1)
Managed Server
(infra_server_2)
Infrastructure Infrastructure
Administration Server
Enterprise Manager
DEV2_MDS
DEV2_IAU
DEV2_IAU_APPEND
DEV2_IAU_VIEWER
DEV2_OPSS
DEV2_STB
DEV1_MDS
DEV1_IAU
DEV1_IAU_APPEND
DEV1_IAU_VIEWER
DEV1_OPSS
DEV1_STB
In this example, the prefixes are grouped together by using DEV1 for one set of
schemas (used by WebLogic Domain 1), and DEV2 for the second set (used by
WebLogic Domain 2).
It is not possible to share a single set of schemas across multiple domains; each
domain must have its own set of schemas.
1.2.5.4 Organizing Schemas on Multiple Databases for Multiple Domains
Figure 1-4 shows one way to organize schemas on multiple databases for use with
multiple WebLogic domains.
Preparing for Schema Creation
Understanding Repository Creation Utility 1-7

Figure 1-4 Schemas on Multiple Databases for Multiple Domains
DBHOST 2DBHOST 1
APPHOST
WebLogic Domain 1
Cluster (infra_cluster_1)
Machine (infra_machine_1)
Managed Server
(infra_server_1)
Managed Server
(infra_server_2)
Infrastructure Infrastructure
Administration Server
Enterprise Manager
Database
with
schemas
WebLogic Domain 2
Cluster (infra_cluster_2)
Machine (infra_machine_2)
Managed Server
(infra_server_1)
Managed Server
(infra_server_2)
Infrastructure Infrastructure
Administration Server
Enterprise Manager
Database
with
schemas
DEV_MDS
DEV_IAU
DEV_IAU_APPEND
DEV_IAU_VIEWER
DEV_OPSS
DEV_STB
DEV_MDS
DEV_IAU
DEV_IAU_APPEND
DEV_IAU_VIEWER
DEV_OPSS
DEV_STB
Note that in this scenario it is possible to have separate domains on the same host use
schemas with the same name and prefix (DEV), since the schemas are located on
different databases.
1.2.6 About Integrating Components Using Declarative XML
RCU provides extensibility with XML DTDs. Using these DTDs, component owners
can integrate their components and prerequisites with RCU by providing a
configuration file that adheres to the provided DTD.
For more information, refer to Extending Repository Creation Utility to Configure
Custom Application Repositories.
1.3 Using RCU with Java Access Bridge (Windows Only)
Java Access Bridge enables assistive technologies, such as JAWS screen reader, to read
Java applications running on the Windows platform. Assistive technologies can read
Java-based interfaces, such as Oracle Universal Installer and Oracle Enterprise
Manager.
For more information, see the following topics:
• Install Java Access Bridge
• Configure RCU to Use Java Access Bridge
1.3.1 Install Java Access Bridge
To install Java Access Bridge:
1.
Download Java Access Bridge from the following URL:
Using RCU with Java Access Bridge (Windows Only)
1-8 Creating Schemas with the Repository Creation Utility

http://java.sun.com/javase/technologies/accessibility/accessbridge/
2. Install Java Access Bridge.
3. Copy the access-bridge.jar and jaccess-1_4.jar from your installation
location to the jre\lib\ext directory.
4. Copy the WindowsAccessBridge.dll, JavaAccessBridge.dll, and
JAWTAccessBridge.dll files from your installation location to the jre\bin
directory.
5. Copy the accessibility.properties file to the jre\lib directory.
1.3.2 Configure RCU to Use Java Access Bridge
To configure RCU to use Java Access Bridge after you complete the installation, set the
system variable ORACLE_OEM_CLASSPATH to point to the installed Java Access Bridge
files:
1.
Display System in the Control Panel.
2.
Select the Advanced tab.
3. Click the New button under the System Variable list. The New System Variable
dialog appears.
4. In the Variable Name field, enter ORACLE_OEM_CLASSPATH.
5. In the Variable Value field, enter the full path to access-bridge.jar and
jaccess-1_4.jar.
Use a semicolon to separate the two paths. Do not use quotes or character spaces.
6. Click OK.
Using RCU with Java Access Bridge (Windows Only)
Understanding Repository Creation Utility 1-9

Using RCU with Java Access Bridge (Windows Only)
1-10 Creating Schemas with the Repository Creation Utility

2
Obtaining and Running Repository Creation
Utility
This chapter contains instructions for obtaining and running the Repository Creation
Utility (RCU).
This chapter contains the following sections:
• Obtaining RCU
• Starting RCU
• Creating Schemas
• Dropping Schemas
2.1 Obtaining RCU
In 12c (12.2.1), RCU is available with the Oracle Fusion Middleware Infrastructure
distribution. For information about how to install this software and obtain RCU, see
Installing and Configuring the Oracle Fusion Middleware Infrastructure.
2.2 Starting RCU
After Oracle Fusion Middleware Infrastructure is installed, start RCU from the
ORACLE_HOME/oracle_common/bin directory.
Note:
If you are running RCU using a non-English database, you will need to set the
following language environment variables: LANG, LC_ALL, and NLS_LANG.
Use the environment commands that are appropriate for your environment.
For example, for UNIX operating systems running csh enter the following:
setenv LANG en_US.UTF8
setenv LC_ALL $LANG
setenv NLS_LANG american_america
It is generally a good practice to set the JAVA_HOME environment variable so
it references the location of the JDK software you will be using to run the
Repository Creation Utility (RCU). This ensures that RCU is using the proper
version of the JDK software.
On Linux operating systems:
Obtaining and Running Repository Creation Utility
2-1

cd ORACLE_HOME/oracle_common/bin
./rcu
On Windows operating systems:
cd ORACLE_HOME\oracle_common\bin
rcu.bat
RCU provides a command line interface in situations where Xserver is not available or
you have access to telnet terminals without display capabilities. The command line
interface also allows you to embed RCU from command line scripts or with some
Oracle Fusion Middleware components (for example, Enterprise Manager).
For more information using the CLI, see Running Repository Creation Utility from the
Command Line.
2.3 Creating Schemas
This section contains the following topics:
• Creating Schemas as a User with Full SYS or SYSDBA Privileges
• Creating Schemas as a User With Limited Database Privileges
• Verifying Schema Version Numbers
2.3.1 Creating Schemas as a User with Full SYS or SYSDBA Privileges
If you are a user with full SYS or SYSDBA privileges, and are able to provide valid
authentication credentials for database access, follow the instructions in this topic to
create schemas.
Click on the screen name to see more detailed information for that screen. Unless
otherwise noted, click Next to continue to the next screen.
Table 2-1 Schema Creation Steps for Full-Privilege Users
Screen
Description
Welcome This screen introduces you to RCU.
Create Repository
Select Create Repository, then select System Load and Product Load.
If you do not have full SYS or SYSDBA privileges on the database, select Prepare
Scripts for System Load and follow the schema creation instructions in Creating
Schemas as a User With Limited Database Privileges.
Database Connection Details Specify your database connection credentials.
Remember that if you are creating schemas on an IBM DB2 database, you must
have already created one operating system user for each schema you want to
create. See Additional Requirements for IBM DB2 Databases for more
information.
Click Next when you have specified your credentials. A separate dialog window
will appear while RCU checks connectivity and some database prerequisites.
When the database checking has passed without errors, click OK to dismiss the
dialog window and go to the next screen.
Creating Schemas
2-2 Creating Schemas with the Repository Creation Utility

Screen Description
Select Components (for
Create Operation)
Select the components for which you want to create schemas, and specify a prefix
to group them together.
You must remember the prefix and schema names for the components you are
installing; you will need this information during the configuration phase of your
product installation. Oracle recommends that you write these values down.
Schema Passwords Specify the passwords for your schema owners.
You must remember the passwords you enter on this screen; you will need this
information during the configuration phase of your product installation. Oracle
recommends that you write these values down.
Custom Variables Custom variables are required by some products for additional product
configuration information. This screen appears only if you selected Oracle Data
Integrator, SOA Suite, or WebCenter Portal — Analytics on the Select
Components screen. You can select Oracle Data Integrator, SOA Suite, or
WebCenter Portal — Analytics only if the Oracle home in which RCU was started
contains Oracle Data Integrator, Oracle SOA Suite, or Oracle WebCenter Portal,
respectively.
•
If Oracle Data Integrator is selected, the Custom Variables for Oracle Data
Integrator will be visible.
•
If SOA Suite is selected, the Custom Variables for Oracle SOA Suite will be
visible.
•
If WebCenter Portal - Analytics is selected, the Custom Variable for Oracle
WebCenter Portal Analytics will be visible.
•
If Oracle Data Integrator, SOA Suite, and WebCenter Portal - Analytics are
selected, the custom variables for Oracle Data Integrator, Oracle SOA Suite,
and Oracle WebCenter Portal Analytics will be visible on this screen.
Map Tablespaces
Use this screen to configure the desired tablespace mapping for the schemas you
want to create.
When you click Next, a separate dialog window will appear asking you to
confirm that you want to create these tablespaces. Click OK to proceed and
dismiss the dialog window.
A second dialog window will appear showing the progress of tablespace creation.
After this is complete, click OK to dismiss this window and go to the next screen.
Summary (for Create
Operation)
Verify the information on this screen, then click Create to begin schema creation.
Completion Summary (for
Create Operation)
Review the information on this screen to verify that the operation was completed
successfully. Click Close to complete the schema creation and dismiss RCU.
Creating Schemas
Obtaining and Running Repository Creation Utility 2-3

2.3.2 Creating Schemas as a User With Limited Database Privileges
If you are a user without SYS or SYSDBA privileges, or you are unable to provide
valid authentication credentials for database access, follow the instructions in this
topic to create schemas.
Table 2-2 Schema Creation Steps for Limited-Privilege Users
Screen Description
Welcome This screen introduces you to RCU.
Create Repository
Select Create Repository, then select Prepare Scripts for System Load.
See Understanding System Load and Product Load for more information about
these operations.
Database Connection Details Specify your database connection credentials.
Click Next when you have specified your credentials. A separate dialog window
will appear while RCU checks connectivity and some database prerequisites.
When the database checking has passed without errors, click OK to dismiss the
dialog window and go to the next screen.
NOTE: When performing system load and product load separately, RCU will not
verify that the database version you are using is supported and certified. For a list
of certified databases that can be used with RCU, refer to the certification
document for your release, located on the Oracle Fusion Middleware Supported
System Configurations page.
NOTE: Performing system load and product load separately is only supported on
Oracle or Oracle EBR databases.
Select Components (for
Create Operation)
Select the components for which you want to create schemas, and specify a prefix
to group them together.
You must remember the prefix and schema names for the components you are
installing; you will need this information during the configuration phase of your
product installation. Oracle recommends that you write these values down.
Custom Variables Custom variables are required by some products for additional product
configuration information. This screen appears only if you selected Oracle Data
Integrator, SOA Suite, or WebCenter Portal — Analytics on the Select
Components screen. You can select Oracle Data Integrator, SOA Suite, or
WebCenter Portal — Analytics only if the Oracle home in which RCU was started
contains Oracle Data Integrator, Oracle SOA Suite, or Oracle WebCenter Portal,
respectively.
•
If Oracle Data Integrator is selected, the Custom Variables for Oracle Data
Integrator will be visible.
•
If SOA Suite is selected, the Custom Variables for Oracle SOA Suite will be
visible.
•
If WebCenter Portal - Analytics is selected, the Custom Variable for Oracle
WebCenter Portal Analytics will be visible.
•
If Oracle Data Integrator, SOA Suite, and WebCenter Portal - Analytics are
selected, the custom variables for Oracle Data Integrator, Oracle SOA Suite,
and Oracle WebCenter Portal Analytics will be visible on this screen.
Map Tablespaces
Use this screen to configure the desired tablespace mapping for the schemas you
want to create.
Creating Schemas
2-4 Creating Schemas with the Repository Creation Utility

Screen Description
Summary (for Create
Operation)
Verify the information on this screen, then click Generate to begin script
generation.
By default, the scripts will be generated in the
RCUdate_timestamp_random_number/logs directory inside the temporary
directory on your system. For example, on UNIX operating systems, the scripts
will be generated in the /tmp/RCUdate_timestamp_random_number/logs
directory by default. If you want to specify a different location, click Browse and
select a location on your system.
The names of the scripts generated are script_systemLoad.sql and
script_postDataLoad.sql.
Completion Summary (for
Create Operation)
Review the information on this screen to verify that the operation was completed
successfully. Click Close to complete the schema creation and dismiss RCU.
N/A After the scripts are created, someone with SYS or SYSDBA privileges should
execute the script_systemLoad.sql script:
1. Login to SQL*Plus.
2. Enter the following command to execute the script_systemLoad.sql
script (replace the path to the script if you chose to save it in a custom
location):
@/tmp/RCUdate_timestamp_random_number/logs/script_systemLoad.sql
3.
While the script is running, the user will be prompted to set the schema
password for each schema being created. Specify the passwords as
prompted.
You will be returned to your system prompt when the script has been
executed.
N/A
After the script is executed, start RCU again and perform the product load phase
to complete schema creation.
Welcome This screen introduces you to RCU.
Create Repository
Select Create Repository, then select Perform Product Load.
See Understanding System Load and Product Load for more information about
these operations.
Database Connection Details Specify your database connection credentials.
Click Next when you have specified your credentials. A separate dialog window
will appear while RCU checks connectivity and some database prerequisites.
When the database checking has passed without errors, click OK to dismiss the
dialog window and go to the next screen.
Select Components (for
Create Operation)
From the drop-down list, select the prefix you specified earlier in this procedure.
Then, select the components for which you want to perform the product load.
Creating Schemas
Obtaining and Running Repository Creation Utility 2-5

Screen Description
Schema Passwords Specify the passwords for your schema owners.
You must remember the passwords you enter on this screen; you will need this
information during the configuration phase of your product installation. Oracle
recommends that you write these values down.
Custom Variables Custom variables are required by some products for additional product
configuration information. This screen appears only if you selected Oracle Data
Integrator, SOA Suite, or WebCenter Portal — Analytics on the Select
Components screen. You can select Oracle Data Integrator, SOA Suite, or
WebCenter Portal — Analytics only if the Oracle home in which RCU was started
contains Oracle Data Integrator, Oracle SOA Suite, or Oracle WebCenter Portal,
respectively.
•
If Oracle Data Integrator is selected, the Custom Variables for Oracle Data
Integrator will be visible.
•
If SOA Suite is selected, the Custom Variables for Oracle SOA Suite will be
visible.
•
If WebCenter Portal - Analytics is selected, the Custom Variable for Oracle
WebCenter Portal Analytics will be visible.
•
If Oracle Data Integrator, SOA Suite, and WebCenter Portal - Analytics are
selected, the custom variables for Oracle Data Integrator, Oracle SOA Suite,
and Oracle WebCenter Portal Analytics will be visible on this screen.
Summary (for Create
Operation)
Verify the information on this screen, then click Data Load to begin schema
creation.
Completion Summary (for
Create Operation)
Review the information on this screen to verify that the operation was completed
successfully. Click Close to complete the schema creation and dismiss RCU.
N/A This optional step is needed for components that generate and must execute
product load scripts requiring DBA privileges. After the product load phase is
complete, someone with SYS or SYSDBA privileges should execute the
script_postDataLoad.sql script.
This step is needed for the Audit Services (IAU) and Oracle Enterprise Scheduler
(ESS) components.
1. Login to SQL*Plus.
2. Enter the following command to execute the script_postDataLoad.sql
script (replace the path to the script if you chose to save it in a custom
location):
@/tmp/RCUdate_timestamp_random_number/logs/script_postDataLoad.sql
You will be returned to your system prompt when the script has been
executed.
2.3.3 Verifying Schema Version Numbers
When the schemas are created in your database, RCU creates and maintains a table
called schema_version_registry. This table contains schema information such as
Creating Schemas
2-6 Creating Schemas with the Repository Creation Utility

version number, component name and ID, date of creation and modification, and
custom prefix.
To verify that the schemas are installed properly, run the following query after
logging in to SQL*Plus:
select comp_name, version from schema_version_registry;
The comp_name argument retrieves the name of the component, and version
retrieves the version number. For example:
SQL> select comp_name, version from schema_version_registry;
COMP_NAME
--------------------------------------------------------------------------------
VERSION
------------------------------
Audit Service
12.2.1.0.0
Audit Service Append
12.2.1.0.0
Audit Service Viewer
12.2.1.0.0
COMP_NAME
--------------------------------------------------------------------------------
VERSION
------------------------------
Metadata Services
12.2.1.0.0
Oracle Platform Security Services
12.2.1.0.0
Service Table
12.1.3.0.0
COMP_NAME
--------------------------------------------------------------------------------
VERSION
------------------------------
User Messaging Service
12.2.1.0.0
WebLogic Services
12.2.1.0.0
8 rows selected.
2.4 Dropping Schemas
To drop schemas from the database, start RCU (see Starting RCU), then follow the
instructions in Table 2-3.
Click on the screen name to see more detailed information for that screen. Unless
otherwise noted, click Next to continue to the next screen.
Dropping Schemas
Obtaining and Running Repository Creation Utility 2-7

Table 2-3 RCU Screens and Description for Dropping Schemas
Screen Instructions and Action Required
Welcome This screen introduces you to RCU.
Create Repository
Select Drop Repository.
Database Connection
Details
Specify the connection details for your database, then click Next.
A separate dialog window will appear while RCU checks connectivity and some
database prerequisites. When the database checking has passed without errors,
click OK to dismiss the dialog window and go to the next screen.
Select Components (for
Drop Operation)
Select the prefix and the schemas you want to drop, then click Next.
A separate dialog window will appear asking you to verify that you want to drop
the selected schemas. Click OK to dismiss this window.
A second dialog window appears while RCU checks the prerequisites for the
schemas you are dropping. After this is complete, click OK to dismiss this window
and go to the next screen.
Custom Variables Custom variables are required by some products for additional product
configuration information. This screen appears only if you selected Oracle Data
Integrator, SOA Suite, or WebCenter Portal — Analytics on the Select Components
screen. You can select Oracle Data Integrator, SOA Suite, or WebCenter Portal —
Analytics only if the Oracle home in which RCU was started contains Oracle Data
Integrator, Oracle SOA Suite, or Oracle WebCenter Portal, respectively.
•
If Oracle Data Integrator is selected, the Custom Variables for Oracle Data
Integrator will be visible.
•
If SOA Suite is selected, the Custom Variables for Oracle SOA Suite will be
visible.
•
If WebCenter Portal - Analytics is selected, the Custom Variable for Oracle
WebCenter Portal Analytics will be visible.
•
If Oracle Data Integrator, SOA Suite, and WebCenter Portal - Analytics are
selected, the custom variables for Oracle Data Integrator, Oracle SOA Suite, and
Oracle WebCenter Portal Analytics will be visible on this screen.
Summary (for Drop
Operation)
Review the information on this screen, then click Drop to drop the schemas.
Completion Summary (for
Drop Operation)
Note the location of the log files, then click Close to dismiss the screen.
2.4.1 About Dropping Shared Tablespaces
Tablespaces that are shared among multiple schemas will not be dropped. For
example, if you created both the Audit Services (for example, DEV_IAU) and Metadata
Services (for example, DEV_MDS) schemas, both schemas would use the temporary
tablespace DEV_IAS_TEMP (see Default Tablespace Mappings).
If you then drop the DEV_IAU schema, the DEV_IAS_TEMP tablespace would not be
dropped since it is also being used by the DEV_MDS schema.
Dropping Schemas
2-8 Creating Schemas with the Repository Creation Utility

2.4.2 Dropping Schemas and Deleting Datafiles (Windows Only)
If you used RCU to drop a schema from a Windows-based database, and you want to
recreate the dropped schema, you will have to manually delete datafiles that were not
automatically removed when the schema was dropped.
Navigate to the DB_HOME\oradata directory and manually delete any remaining
datafiles before recreating the schema.
Oracle recommends that you check this directory for any remaining datafiles before
you attempt to recreate any dropped schema.
Dropping Schemas
Obtaining and Running Repository Creation Utility 2-9

Dropping Schemas
2-10 Creating Schemas with the Repository Creation Utility

3
Running Repository Creation Utility from
the Command Line
This chapter describes how to run RCU from the command line.
The command-line interface (CLI) is necessary for integration with both the Oracle
Fusion Middleware installer and Enterprise Manager during application deployment.
Additionally, you can use the CLI in cases where Xserver is not configured or if you
are using a telnet terminal that does not have proper display capabilities.
This chapter contains the following topics:
• Command Line Syntax and Parameters
• Using the -silent Command
• Using the -interactive Command
• Using Response Files
• Creating a Repository from the Command Line
• Generating a System Load Script From the Command Line
• Loading Data Into the Repository From the Command Line
• Dropping a Repository from the Command Line
• Generating a List of Components in an Oracle Home from the Command Line
• RCU Environment Variables
3.1 Command Line Syntax and Parameters
The syntax for the RCU command line interface is:
rcu mode operation {parameters}
There are two modes (-silent and -interactive) and seven operations (-
generateResponseFile, -responseFile, -createRepository, -
generateScript, -dataLoad, -dropRepository, and -listComponents). So,
the command can be written out as follows:
rcu [-silent | -interactive] [-generateResponseFile | -responseFile | -
createRepository | -generateScript | -dataLoad | -dropRepository | -listComponents]
{parameters}
The following topics describe each of the modes, operations, and parameters:
• RCU Modes Available from the Command Line
Running Repository Creation Utility from the Command Line
3-1

• RCU Operations Available from the Command Line
• RCU Command Line Parameters
3.1.1 RCU Modes Available from the Command Line
This topic lists and describes the RCU modes available from the command line.
Table 3-1 RCU Modes Available from the Command Line
Command Description
-silent Run RCU with minimal or no interaction from the command line.
For more information, see Using the -silent Command.
-interactive Run the RCU graphical interface. This is the default if neither -silent nor -
interactive is specified.
This command (whether specified or not) allows you to pre-populate certain
screens with information as specified from the response file or from the command
line. You can pre-populate the Create Repository and Database Connection Details
screens.
For more information, see Using the -interactive Command.
3.1.2 RCU Operations Available from the Command Line
This topic lists and describes the RCU operations available from the command line.
Table 3-2 RCU Operations Available from the Command Line
Command
Description
-
generateResponseFile
Run RCU with -silent to generate a RCU response file that contains all valid
RCU command line parameters.
For more information, see Creating a RCU Response File from the Command Line
-responseFile Run RCU with either -silent or -interactive to perform a RCU operation
using a response file.
For more information, see Performing RCU Operations Using a Response File
-createRepository Run RCU with either -silent or -interactive to create a repository.
For more information, see Creating a Repository from the Command Line.
-generateScript Run RCU with either -silent or -interactive to generate a script for system
load.
For more information, see Generating a System Load Script From the Command
Line.
-dataLoad Run RCU with either -silent or -interactive to load data into the repository.
For more information, see Loading Data Into the Repository From the Command
Line.
-dropRepository Run RCU with either -silent or -interactive to drop a repository.
For more information, see Dropping a Repository from the Command Line.
-listComponents Run RCU with -silent to generate a list of components for a given Oracle home.
For more information, see Generating a List of Components in an Oracle Home
from the Command Line
Command Line Syntax and Parameters
3-2 Creating Schemas with the Repository Creation Utility

3.1.3 RCU Command Line Parameters
This topic lists and describes the various command line parameters. These parameters
can be passed to RCU as input by directly entering the parameters on the command
line or by using a response file.
Table 3-3 RCU Command Line Parameters and Descriptions
Parameter Required? Valid for Which
Operation?
Description
-
compInfoXMLLocatio
n
No -createRepository
-generateScript
-dataLoad
-dropRepository
Full path to the location of the
ComponentInfo.xml file. The default
location is ORACLE_HOME/
oracle_common/rcu/config (on UNIX
operating systems) or ORACLE_HOME
\oracle_common\rcu\config (on
Windows operating systems).
-
storageXMLLocation
No -createRepository
-generateScript
-dataLoad
-dropRepository
Full path to the location of the
StorageInfo.xml file. The default location is
ORACLE_HOME/oracle_common/rcu/
config (on UNIX operating systems) or
ORACLE_HOME\oracle_common\rcu
\config (on Windows operating systems).
-databaseType No -createRepository
-generateScript
-dataLoad
-dropRepository
Type of database to which you are connecting.
If you are performing the system load and
product load concurrently as a user with full
DBA privileges, the valid options are ORACLE,
SQLSERVER, IBMBD2, MYSQL, or EBR.
If you do not have permissions to perform
system load and product load concurrently and
need to generate a script, you can only use the
ORACLE and EBR database types.
For more information about system load and
product load, see Understanding System Load
and Product Load.
-connectString Yes -createRepository
-generateScript
-dataLoad
-dropRepository
Credentials for connecting to your database.
For Oracle or EBR-enabled databases, use the
following format:
host:port:sid
For all other database types, use:
server_name/host:port:database_name
-edition No -createRepository
-generateScript
-dataLoad
-dropRepository
Edition name. This is only valid if you specify
databaseType=EBR.
Command Line Syntax and Parameters
Running Repository Creation Utility from the Command Line 3-3

Parameter Required? Valid for Which
Operation?
Description
-dbUser Yes -createRepository
-generateScript
-dataLoad
-dropRepository
-
generateResponseF
ile
Database user name (for example, the default
user name on Oracle databases is SYS).
This parameter is required if the —
createWallet parameter is provided during
the -generateResponseFile operation.
RCU uses the database user name as the key/
alias to store the database user password when
generating wallet. If the —createWallet
parameter is not provided, the database user
name is optional.
-dbRole No -createRepository
-generateScript
-dataLoad
-dropRepository
Database user role (for example, SYSDBA for
the SYS user on Oracle databases).
-unicodeSupport No -createRepository
-dropRepository
Specify Yes or No for unicode support. Default
is Yes. This is only valid if you specify
databaseType=SQLSERVER.
-
skipCleanupOnFailu
re
No -createRepository
-generateScript
-dataLoad
Whether or not you want to skip the schema
cleanup if schema creation fails. Valid values
are Yes or No. The default is No.
-scriptLocation No -generateScript Specify the location to save the generated script
for system load repository.
-
useSamePasswordFor
AllSchemaUsers
No -createRepository
-dataLoad
-
generateResponseF
ile
Whether or not you want to use the same
password for all schemas. Valid values are
true or false. The default is false.
-
selectDependentsFo
rComponents
No -createRepository
-generateScript
-dataLoad
-dropRepository
-
generateResponseF
ile
Whether or not you want to have RCU
automatically select dependent schemas for
your components. Valid values are true or
false. The default is false.
-honorOMF No -createRepository
-generateScript
If value is set to true, RCU creates datafiles
using Oracle-Managed Files (OMF) naming
format.
Valid values are true or false. The default is
false.
Command Line Syntax and Parameters
3-4 Creating Schemas with the Repository Creation Utility

Parameter Required? Valid for Which
Operation?
Description
-encryptTablespace No -createRepository
-generateScript
Whether or not you want to encrypt all new
tablespaces that will be created by RCU. This
option is valid only if you have TDE
(Transparent Data Encryption) enabled in the
database (Oracle or Oracle EBR) when you
start RCU. TDE tablespace encryption allows
you to encrypt sensitive data stored in
tablespaces.
Valid values are true or false. The default is
false. If value is set to true, all new
tablespaces created by RCU will be encrypted
only if TDE is enabled in the database.
Tablespaces that were created before RCU was
launched cannot be encrypted using this
option.
-
skipTablespaceDrop
No -dropRepository This parameter allows you to skip dropping
tablespaces during the -dropRepository
operation.
Valid values are Yes or No. Specify Yes to skip
tablespace drop. The default is No.
-variables No -createRepository
-generateScript
-dataLoad
-dropRepository
Comma separated variables in the format
variablename=value. See RCU Environment
Variables for a list of RCU environment
variables.
-schemaPrefix No -createRepository
-generateScript
-dataLoad
-dropRepository
-
generateResponseF
ile
Prefix for your schemas. For more information
about schema prefixes, refer to Planning Your
Schema Creation and Select Components (for
Create Operation).
This parameter is required if the —
createWallet parameter is provided during
the -generateResponseFile operation.
RCU uses the prefixed schema name as the
key/alias to store schema passwords when
generating wallet. If the —createWallet
parameter is not provided, the schema prefix is
optional.
Command Line Syntax and Parameters
Running Repository Creation Utility from the Command Line 3-5

Parameter Required? Valid for Which
Operation?
Description
-component Yes -createRepository
-generateScript
-dataLoad
-dropRepository
ID of the component(s) you want to add or
drop. To specify a single component, use the
format:
-component component_ID
To specify multiple components, use the
format:
-component component_ID -component
component_ID
For a list of valid component (schema) IDs,
refer to Understanding Repository Creation
Utility Schemas, IDs, and Tablespaces. Multiple
components are sometimes necessary because
of dependencies; for example, you cannot
create the Oracle Platform Security Services
(OPSS) schema if the Audit Services (IAU)
schema does not already exist. In this case, you
must specify both schemas:
-component OPSS -component IAU
-tablespace No -createRepository
-generateScript
Tablespace name of the component. This
tablespace must exist in the database if you are
using this option.
-tempTablespace No -createRepository
-generateScript
TEMP tablespace name of the component. This
tablespace must exist in the database if you are
using this option.
-createWallet No -
generateResponseF
ile
Provide this parameter if you want to create a
wallet file to securely store your RCU
passwords, such as the database user
password, schema passwords, and custom
variable passwords.
RCU accepts password credentials stored in an
Oracle Wallet. That is, you can use the
generated wallet later in silent situations to
provide your passwords to RCU without
having to directly enter passwords on the
command line.
The wallet will be generated in the same
directory as the response file.
Command Line Syntax and Parameters
3-6 Creating Schemas with the Repository Creation Utility

Parameter Required? Valid for Which
Operation?
Description
-walletDir No -createRepository
-generateScript
-dataLoad
-dropRepository
Absolute path of wallet directory where your
RCU passwords used for creating or dropping
schemas are stored. If you choose to use a
wallet to provide passwords to RCU, RCU will
retrieve the required passwords from the
specified directory. This option is valid for
silent mode only.
The wallet must already exist and contain the
required passwords if you are using this
option. If the wallet does not contain the
required passwords, RCU will prompt you for
the missing passwords on the command line.
This directory should contain a valid
cwallet.sso file. RCU supports auto-login
wallets only (password is not needed to open
wallet).
-responseFileDir No -
generateResponseF
ile
Absolute path of RCU response file directory.
If specified, RCU generates a response file
named rcuResponseFile.properties in
the given directory.
If not specified, RCU generates a response file
in the $HOME/.rcu directory by default.
-ComponentList No -
generateResponseF
ile
Comma-separated list of component IDs for the
components in the Oracle home that you want
to add to the response file. To generate a list of
valid component IDs for a specific Oracle
home, see Generating a List of Components in
an Oracle Home from the Command Line.
If not specified, all valid components in the
Oracle home will be added to the response file
by default.
3.2 Using the -silent Command
Specify -silent if you want to run RCU with minimal interaction once you have
entered the command.
You must specify all mandatory command line parameters in the command. For
example:
rcu -silent -createRepository -connectString database_connect_string -dbUser -
database_user -component component
In this scenario, RCU will prompt you for the database and component schema
passwords from the command line. If you specify multiple components, you will be
prompted for the passwords in the order in which the components are specified.
Instead of directly entering all the RCU parameters on the command line, you can
provide the location and name of a file containing certain input values. This file (called
a response file) allows you to provide values for all valid RCU command-line
parameters to RCU via a text file. When you run RCU, all values will be read from the
response file to create or drop schemas. For more information, see Using Response
Files.
Using the -silent Command
Running Repository Creation Utility from the Command Line 3-7

If you want to avoid all interaction from the command line, you can create a text file
containing all the necessary passwords (one password per line) and then use the -f
option to pass this password file to RCU. For example, if you create a file called
passwordfile.txt, you can use the command below:
rcu -silent -createRepository -connectString database_connect_string -dbUser -
database_user -component component1_name -component
component2_name -f < passwordfile.txt
The passwordfile.txt file would contain, in order:
database_password
component1_schema_password
component2_schema_password
It is important to make sure that the passwords in the file are specified in the same
order as the components on the command line.
Once the installation is complete the password file must be removed. The passwords
are maintained in cleartext format and therefore present a security risk if the password
file is left in place after installation.
Instead of using a plain text password file, you can create an Oracle Wallet file
containing all the necessary passwords and then use the -walletDir parameter to
pass this file to RCU. For more information, see Using a Wallet to Store Passwords.
3.2.1 Using a Wallet to Store Passwords
If you are running RCU from the command line, password credentials (for example,
schema passwords) can be stored and provided to RCU in an Oracle Wallet file.
When you run RCU from the command line, RCU prompts you to enter values for any
required passwords by default. To avoid entering passwords on the command line,
you can create a wallet file to securely store and encrypt any necessary passwords.
You can then pass the wallet to RCU by providing the wallet location with the
walletDir parameter.
Creating a Wallet Using RCU
A wallet for providing RCU passwords can be generated by RCU as part of response
file creation:
• To create a wallet using the RCU graphical interface, see Creating a RCU Response
File from the Graphical Interface.
• To create a wallet using the RCU command line interface, see Creating a RCU
Response File from the Command Line.
Once the wallet is created, this file can be reused to store and provide passwords for
multiple sessions.
Note that RCU only supports auto-login wallets (no password is needed to open a
wallet). Password-protected wallets are not supported.
When the wallet is generated by RCU, RCU uses the prefixed schema name as the
key/alias for storing schema passwords, which allows you to more easily reuse the
same wallet for multiple sessions. For database user password, the alias is the
database user name (for example, SYS). If the same password is used for all the
schemas, then RCU uses the alias prefix_COMMON_SCHEMA_PASSWORD to save
the password in the wallet.
Using the -silent Command
3-8 Creating Schemas with the Repository Creation Utility

Example 3-1 Using the —walletDir Parameter
After the wallet is created and contains the necessary passwords, use the —walletDir
parameter to pass this file to RCU so that you do not have to directly enter your
passwords on the command line. Alternatively, the wallet location can be provided to
RCU via a response file.
For example:
./rcu -silent -createRepository -connectString examplehost.exampledomain.com:
1521:example_sid -dbUser sys -dbRole sysdba
-schemaPrefix DEV -component MDS -component STB -walletDir /home/exampleuser/wallet
When you pass the wallet to RCU, RCU expects all the necessary passwords to be in
the wallet, which include:
• Database user password
• Schema passwords
• Custom Variable passwords (for Oracle Data Integrator)
In this example, the wallet should contain passwords for the database user (sys), the
Metadata Services (MDS) schema, and the Service Table (STB) schema. If a wallet does
not contain all the necessary passwords, you will be prompted to enter the missing
passwords on the command line.
3.3 Using the -interactive Command
Specify -interactive to run the RCU graphical interface.
This is the default if neither -silent nor -interactive is specified.
You can specify information from the command line that would be populated in the
graphical interface to expedite your RCU operation. For example, if you run RCU with
the following command:
./rcu
The Database Connection Details page contains blank fields, as shown below:
Using the -interactive Command
Running Repository Creation Utility from the Command Line 3-9

But if you run RCU with a few parameters from the command line:
./rcu -interactive -createRepository -connectString examplehost.exampledomain.com:
1521:example_sid -dbUser SYS -component MDS
The Database Connection Details page contains the information supplied from the
command line:
Using the -interactive Command
3-10 Creating Schemas with the Repository Creation Utility

When you run the RCU graphical interface, you can provide the location and name of
a file (called a response file) containing certain input values (for example, database
connection details). These are the values that are asked for during a typical session
using the graphical interface. The values you enter in the response file can be used to
populate certain RCU screens. For more information, see Using Response Files.
3.4 Using Response Files
Before running RCU, you can provide information that is required to perform a
specific RCU operation in a response file. For example, you can provide your database
connection details, a list of components to be added or dropped, and the schema prefix
to RCU via a response file. A response file can be used to automate a RCU session.
When you run RCU using a response file, RCU reads the information provided in the
response file to complete the RCU operation.
For more information, see the following topics:
• Understanding Response Files
• Creating a RCU Response File from the Graphical Interface
• Creating a RCU Response File from the Command Line
• Performing RCU Operations Using a Response File
Using Response Files
Running Repository Creation Utility from the Command Line 3-11

3.4.1 Understanding Response Files
A response file is a properties file in which all RCU command-line parameters can be
provided as input to RCU to perform a RCU operation.
Rather than directly entering the RCU Command Line Parameters on the command
line, you can provide values for these parameters to RCU via a text file. This file can be
generated from the RCU graphical interface (using the values you provide in the RCU
screens) or from the command line. After you create the response file, the parameters
can be modified in a text editor or be used exactly as-is to perform a RCU operation at
a later time.
If you choose to run RCU from the command line with a response file, the values you
specify in the response file are the values for the RCU parameters that you would
normally provide on the command line during a typical silent RCU session. If you
choose to run the RCU graphical interface with a response file, the values you specify
in the response file are used to pre-populate the fields on certain screens.
3.4.2 Creating a RCU Response File from the Graphical Interface
The Save Response File option on the Summary (for Create Operation) or the
Summary (for Drop Operation) screen saves the information you provide in the RCU
screens to a response file.
After you click the Save Response File option, you will be prompted to specify a
location for where you want to create this file. By default, RCU saves the response file
in the $HOME/.rcu directory.
Because the response file needs to contain password information, RCU provides the
Save Passwords in Wallet option to securely store and encrypt any passwords you
provide on the RCU screens in a wallet. You can use the wallet later in silent situations
to provide the necessary passwords to RCU so that you do not have to directly enter
your passwords on the command line. When you run RCU from the command line,
the wallet location can be provided to RCU on the command line or using a response
file. If a wallet directory is not provided to RCU, you will be prompted for the
required passwords.
3.4.3 Creating a RCU Response File from the Command Line
This topic shows the full syntax for the RCU command line interface to generate a
RCU response file.
rcu -silent -generateResponseFile
[-responseFileDir absolute_path_of_response_file_directory]
[-schemaPrefix schema_prefix]
[-componentList list_of_component_IDs]
[-createWallet]
[-useSamePasswordForAllSchemaUsers [true|false]]
[-selectDependentsForComponents [true|false]]
[-dbUser database_username]
If the —createWallet parameter is provided, then values for —dbUser and —
schemaPrefix are required. Otherwise, the —dbUser and —schemaPrefix
parameters are optional. RCU uses the prefixed schema name and the database user
name as the key/alias to store schema passwords and the database user password in
the wallet, respectively.
Using Response Files
3-12 Creating Schemas with the Repository Creation Utility

If you provide —createWallet and —useSamePasswordForAllSchemaUsers
true on the command line, then all schema passwords will be set to the same value in
wallet.
If the —createWallet parameter is provided, RCU will prompt you to enter a value
for each password that will be stored in the wallet.
Below is a sample command to generate a RCU response file on a UNIX operating
system:
./rcu -silent -generateResponseFile -componentList OPSS,IAU -schemaPrefix DEV -
createWallet
-responseFileDir /home/exampleuser/rcu -useSamePasswordForAllSchemaUsers true
-selectDependentsForComponents true -dbUser sys
In this example, a response file and wallet are created in the /home/
exampleuser/rcu directory, and the information provided on the command line
(such as the list of components) is added to the response file.
3.4.4 Performing RCU Operations Using a Response File
This topic shows the full syntax for the RCU command line interface to perform a RCU
operation using a response file. You use a response file to provide input to RCU to
automate a RCU operation from the command line or from the graphical interface.
If you choose to run the graphical interface with a response file, RCU will pre-
populate certain RCU screens (such as the Database Connection Details screen) based
on the input values you provide in the response file. If you choose to run RCU from
the command line, you can use a response file to provide values for all valid RCU
parameters rather than directly entering these parameters on the command line.
The full syntax for the RCU command line interface to perform a RCU operation with
a response file is shown below:
rcu [-silent|-interactive] -responseFile absolute_path_of_response_file
Below is a sample command to automate a silent RCU session using a response file on
a UNIX operating system:
./rcu -silent -responseFile /home/exampleuser/rcu/rcuResponseFile.properties
Note:
• If you provide a value for a parameter on the command line and in the
response file, RCU will use the value provided on the command line.
• Before running RCU, ensure that you have provided the required
information in the response file. If some of the mandatory properties in the
response file are missing values when you run RCU, RCU will notify you
and exit.
• For connecting to certain databases (for example, SQL Server), the dbRole
parameter is not normally required when you run RCU. However, when a
RCU response file is generated, the dbRole parameter is marked as
required in the response file by default. As a result, if you are using a
response file, the dbRole field must not be left blank even if the database
role is not required to connect to a database like SQL Server.
Using Response Files
Running Repository Creation Utility from the Command Line 3-13

3.5 Creating a Repository from the Command Line
This topic shows the full syntax for the RCU command line interface to create a
repository.
rcu [-silent | -interactive] -createRepository
[-compInfoXMLLocation ComponentInfo.xml_file_location]
[-storageXMLLocation Storage.xml_file_location]
[-databaseType [ORACLE|EBR]]
-connectString database_connect_string
[-edition edition_name]
-dbUser database_username
[-dbRole database_user_role]
[-unicodeSupport [Yes|No]]
[-skipCleanupOnFailure [true|false]]
[-useSamePasswordForAllSchemaUsers [true|false]]
[-selectDependentsForComponents [true|false]]
[-honorOMF [true|false]]
[-encryptTablespace [true|false]]
[-variables variablename=value]
[-schemaPrefix schema_prefix]
-component component_ID
[-tablespace component_tablespace_name]
[-tempTablespace component_temp_tablespace_name]
[-walletDir absolute_path_of_wallet_directory]
In order to work properly, make sure that the parameters are specified in the same
order that they are listed. For example, do not specify the -compInfoXMLLocation
parameter after the -component parameter.
When specifying the -component, you must use the correct component IDs, which
are listed in Understanding Repository Creation Utility Schemas, IDs, and
Tablespaces.
Before you create any schemas, you must be aware of and specify all dependencies for
the component you are loading. For example, the SOAINFRA schema depends on the
MDS and ORASDPM schemas; if you try to load the SOAINFRA schema without
specifying both the MDS and ORASDPM schemas, or if the MDS and ORASDPM schemas
do not already exist in the database, RCU will stop before any loading takes place.
Below is a sample command to create the OPSS schema on a UNIX operating system:
./rcu -silent -createRepository -databaseType ORACLE -connectString
examplehost.exampledomain.com:1521:exampleSID -dbUser sys
-dbRole sysdba -schemaPrefix TEST -component OPSS -component MDS
3.6 Generating a System Load Script From the Command Line
This topic shows the full syntax for the RCU command line interface to generate a
system load script.
rcu [-silent | -interactive] -generateScript
[-compInfoXMLLocation ComponentInfo.xml_file_location]
[-storageXMLLocation Storage.xml_file_location]
[-databaseType [ORACLE|EBR]]
-connectString database_connect_string
[-edition edition_name]
-dbUser database_username
[-dbRole database_user_role]
[-skipCleanupOnFailure [Yes|No]]
[-scriptLocation script_location]
Creating a Repository from the Command Line
3-14 Creating Schemas with the Repository Creation Utility

[-selectDependentsForComponents [true|false]]
[-honorOMF [true|false]]
[-encryptTablespace [true|false]]
[-variables variablename=value]
[-schemaPrefix schema_prefix]
-component component_ID
[-tablespace component_tablespace_name]
[-tempTablespace component_temp_tablespace_name]
[-walletDir absolute_path_of_wallet_directory]
In order to work properly, make sure that the parameters are specified in the same
order that they are listed. For example, do not specify the -compInfoXMLLocation
parameter after the -component parameter.
When specifying the -component, you must use the correct component IDs, which
are listed in Understanding Repository Creation Utility Schemas, IDs, and
Tablespaces.
Before you create a script, you must be aware of and specify all component
dependencies. For example, the SOAINFRA schema depends on the MDS and ORASDPM
schemas; if you specify the SOAINFRA schema without specifying both the MDS and
ORASDPM schemas, or if the MDS and ORASDPM schemas do not already exist in the
database, RCU will stop before competing the operation.
Below is a sample command to create a system load script on a UNIX operating
system:
./rcu -silent -generateScript -databaseType ORACLE -connectString
examplehost.exampledomain.com:1521:exampleSID -dbUser sys
-dbRole sysdba -scriptLocation /tmp/RCUdate_timestamp_random_number/logs/ -
schemaPrefix TEST
-component OPSS -component MDS
3.7 Loading Data Into the Repository From the Command Line
This topic shows the full syntax for the RCU command line interface to load data into
a repository.
rcu [-silent | -interactive] -dataLoad
[-compInfoXMLLocation ComponentInfo.xml_file_location]
[-storageXMLLocation Storage.xml_file_location]
[-databaseType [ORACLE|EBR]]
-connectString database_connect_string
[-edition edition_name]
-dbUser database_username
[-dbRole database_user_role]
[-skipCleanupOnFailure [Yes|No]]
[-useSamePasswordForAllSchemaUsers [true|false]]
[-selectDependentsForComponents [true|false]]
[-variables variablename=value]
[-schemaPrefix schema_prefix]
-component component_ID
[-walletDir absolute_path_of_wallet_directory]
Below is a sample command to perform a data load on a UNIX operating system:
./rcu -silent -dataLoad -databaseType ORACLE -connectString
examplehost.exampledomain.com:1521:exampleSID -dbUser sys -dbRole
sysdba -schemaPrefix TEST -component OPSS -component MDS
Loading Data Into the Repository From the Command Line
Running Repository Creation Utility from the Command Line 3-15

3.8 Dropping a Repository from the Command Line
This topic shows the full syntax for the RCU command line interface to drop a
repository.
rcu [-silent | -interactive] -dropRepository
[-compInfoXMLLocation ComponentInfo.xml_file_location]
[-storageXMLLocation Storage.xml_file_location]
[-databaseType [ORACLE|EBR]]
-connectString database_connect_string
[-edition edition_name]
-dbUser database_username
[-dbRole database_user_role]
[-unicodeSupport [Yes|No]]
[-selectDependentsForComponents [true|false]]
[-skipTablespaceDrop [Yes|No]]
[-variables variablename=value]
[-schemaPrefix schema prefix]
-component component_ID
[-walletDir absolute_path_of_wallet_directory]
In order to work properly, make sure that the parameters are specified in the same
order that they are listed. For example, do not specify the -compInfoXMLLocation
parameter after the -component parameter.
You must also be aware of schema dependencies when dropping schemas (see
Understanding Repository Creation Utility Schemas, IDs, and Tablespaces). For
example, several schemas require the MDS schema to be present; if you choose to drop
the MDS schema, then all the schemas that require the MDS schema will stop working.
Below is a sample command to drop the OPSS schema on a UNIX operating system:
./rcu -silent -dropRepository -databaseType ORACLE -connectString
examplehost.exampledomain.com:1521:exampleSID -dbUser sys -dbRole
sysdba -schemaPrefix TEST -component OPSS
3.9 Generating a List of Components in an Oracle Home from the
Command Line
This topic shows the full syntax for the RCU command line interface to generate a list
of valid components that are available in a given Oracle home.
rcu -silent -listComponents
This command displays the name, component ID, and the supported database types
for each component that is available in the Oracle home in which RCU was started.
The Component ID and database type are the values you must specify with the -
component and —databaseType parameters, respectively, when you run RCU from
the command line.
3.10 RCU Environment Variables
Table 3-4 shows the variables picked up by RCU from the environment. If the
environment variable is not set, then RCU uses the default value.
Dropping a Repository from the Command Line
3-16 Creating Schemas with the Repository Creation Utility

Table 3-4 RCU Environment Variables
Variable Default Description
RCU_LOG_LOCATION /tmp (UNIX operating
systems)
C:\Users\user_name
\AppData\Local\Temp
(Windows operating systems)
Location of the RCU log file.
RCU_TIMESTAMP_LOG_DI
R
true Determines whether or not a directory with the
format logdir.yyyy-dd_hh-mm is created for
the RCU log file.
Set this variable to true or false.
RCU_LOG_NAME rcu.log Name of the RCU log file.
RCU_LOG_LEVEL ERROR Determines the RCU log level.
Set this variable to one of SEVERE, ERROR,
NOTIFICATION, or TRACE.
RCU_JAVA_OPTIONS N/A Set this variable to any Java Virtual Machine (JVM)
argument.
For example:
setenv RCU_JAVA_OPTIONS -Djava.io.tmpdir=/
scratch/mytmpDir
RCU Environment Variables
Running Repository Creation Utility from the Command Line 3-17

RCU Environment Variables
3-18 Creating Schemas with the Repository Creation Utility

A
Understanding Repository Creation Utility
Screens
This appendix contains screenshots and descriptions for all of the Repository Creation
Utility screens.
The following topics are included:
• Welcome
• Create Repository
• Database Connection Details
• Select Components (for Create Operation)
• Select Components (for Drop Operation)
• Schema Passwords
• Custom Variables
• Map Tablespaces
• Summary (for Create Operation)
• Summary (for Drop Operation)
• Completion Summary (for Create Operation)
• Completion Summary (for Drop Operation)
Understanding Repository Creation Utility Screens
A-1

A.1 Welcome
This is the first screen that appears when RCU is started. Note the navigation pane on
the left that summarizes the tasks that RCU will help you complete. Each item in the
navigation pane represents a specific screen that will prompt you for information
required to create or drop your schemas.
Welcome
A-2 Creating Schemas with the Repository Creation Utility

A.2 Create Repository
Use this screen to select the action you want to perform.
• Create Repository
• Drop Repository
A.2.1 Create Repository
Select Create Repository to create component schemas in the database. The following
table describes the options available:
Option
Description
System Load and
Product Load
Select this option to perform both System Load and Product Load operations.
Users must have DBA or SYSDBA permissions to select this option.
This option can be performed on any certified database.
Create Repository
Understanding Repository Creation Utility Screens A-3

Option Description
Prepare Scripts for
System Load
Select this option to perform actions that require DBA or SYSDBA permissions:
• Create tablespaces and schemas.
• Create the schema_version_registry (if not already present).
• Create entries in schema_version_registry for each selected component, set the
proper access permissions, and set the status of the component to "LOADED" in the
schema_version_registry table.
Any SYSDBA or non-DBA user can select this option. However, DBA privileges are
required to execute the SQL script to complete the system load phase.
This option is only supported on Oracle and Oracle EBR databases.
Perform Product
Load
Select this option to load and create procedures, functions, tables, indexes and other
objects within schemas and run any action that does not require DBA access.
Any non-DBA user or the REGISTRYOWNER user can select this option.
Before selecting this option, the user must be granted the following to perform data load:
grant REGISTRYACCESS to user;
grant STBROLE to user;
A.2.2 Drop Repository
Select Drop Repository to remove component schemas from the database.
Create Repository
A-4 Creating Schemas with the Repository Creation Utility

A.3 Database Connection Details
Use this screen to specify the connection credentials to the database in which you will
be creating or dropping your schemas. Select one of the following depending on your
database:
• Connection Credentials for Oracle Databases and Oracle Databases with Edition-
Based Redefinition
• Connection Credentials for MySQL Databases
• Connection Credentials for Microsoft SQL Server Databases
• Connection Credentials for IBM DB2 Databases
Click Next when you are finished entering the connection credentials for your
database. The following screen appears, indicating the progress of the installer
establishing the connection with the specified database:
Database Connection Details
Understanding Repository Creation Utility Screens A-5

If an error occurs while the connection is being established, the error message(s)
appear in the Messages field on the Database Connection Details screen.
Specific database requirements for the various schemas can be found in the Oracle
Fusion Middleware System Requirements and Specifications document.
For certified database versions, see the System Requirements and Supported Platforms for
Oracle Fusion Middleware 12c document, which is available on the Oracle Fusion
Middleware Supported System Configurations page.
A.3.1 Connection Credentials for Oracle Databases and Oracle Databases with Edition-
Based Redefinition
For Oracle databases and Oracle databases with edition-based redefinition, specify the
following connection credentials:
Field
Description
Host Name Enter the name of the server where your database is running. Use the following format:
examplehost.exampledomain.com
For Oracle RAC databases, specify the VIP name or one of the node names in this field.
Port Enter the port number for your database. The default port number for Oracle databases is
1521.
Service Name Specify the service name for the database. Typically, the service name is the same as the
global database name.
If you are unsure what the service name for your database is, you can obtain it from the
SERVICE_NAMES parameter in the database's initialization parameter file. If the
initialization parameter file does not contain the SERVICE_NAMES parameter, then the
service name is the same as the global database name, which is specified in the DB_NAME
and DB_DOMAIN parameters.
For Oracle RAC databases, specify the service name of one of the nodes in this field. For
example:
examplehost.exampledomain.com
Username Enter the user name for your database. The default user name is SYS.
Password Enter the password for your database user.
Role Select the database user's role from the drop-down list:
• Normal
• SYSDBA
Database Connection Details
A-6 Creating Schemas with the Repository Creation Utility

A.3.2 Connection Credentials for MySQL Databases
For MySQL databases, specify the following connection credentials:
Field Description
Host Name Enter the host name, IP address, or complete server name in host\server format of the
server where your database is running.
Port Enter the port number for your database.
Database Name Specify the name of your database.
Username Specify the name of a user with administrator privileges.
Password Enter the password for your database user.
A.3.3 Connection Credentials for Microsoft SQL Server Databases
For Microsoft SQL Server databases, specify the following connection credentials:
Field Description
Unicode Support Select Yes or No from the drop-down list.
Server Name Enter the host name, IP address, or complete server name in host\server format of the
server where your database is running.
Port Enter the port number for your database.
Database Name Specify the name of your database.
Username Specify the name of a user with administrator privileges.
Password Enter the password for your database user.
A.3.4 Connection Credentials for IBM DB2 Databases
For IBM DB2 databases, specify the following connection credentials:
Field
Description
Server Name Enter the host name, IP address, or complete server name in host\server format of the
server where your database is running.
Port Enter the port number for your database.
Database Name Specify the name of your database.
Username Specify the name of a user with DB Owner privileges. The default user name for IBM DB2
databases is db2admin.
Password Enter the password for your database user.
A.4 Select Components (for Create Operation)
Below is the Select Components screen if you selected Create on the Create Repository
screen.
Select Components (for Create Operation)
Understanding Repository Creation Utility Screens A-7

The following table describes the fields on this screen.
Field
Description
Select existing prefix Use this option to create schemas using an existing prefix which you can select
from the drop-down list. If you select this option, you can only create schemas that
do not already have this prefix in the database (for example, if DEV_MDS already
exists, you will not be able to select the MDS schema on the page to create it again).
Create new prefix Use this option to create a new custom prefix that can be used to group your
schema together. The prefix name must be a minimum of one character in length
and cannot exceed 12 alphanumeric characters (0-9, a-z, or A-Z) in length (not
including the underscore character). Prefixes should not start with a number. No
whitespace or special characters are allowed.
You can edit the schema name or prefix by clicking the item you want to change in
the "Schema Owner" column and editing the table cell directly.
For more information about custom prefixes, see Understanding Custom Prefixes.
Select Components (for Create Operation)
A-8 Creating Schemas with the Repository Creation Utility

Field Description
Component Use the "Component" column in the table to select the component schema you
want to create.
When you select a component, any other components that may be required by the
component you select are also selected. For example, if you select Oracle Platform
and Security Services, then the Audit Services schema is also automatically
selected if it has not already been selected. The Audit Services schema is required
by the Oracle Platform and Security Services schema.
If a component has a plus sign (+) next to its name, then there are sub components
available. Click on the plus sign (+) to expand the category to view all sub
components. If you want to select a component with all its subcomponents, click on
the top-most box with the plus sign (+).
If you are creating component schemas on an IBM DB2 database, see important
information in Additional Requirements for IBM DB2 Databases.
Schema Owner This column shows the name of the schema owner for each component (custom
prefix and schema name). You can edit the schema owner value by clicking the
item you want to change in this column and editing the table cell directly.
Note:
You must remember the Schema Owner name for the components you are
installing; you will need this information during the configuration phase of
your Oracle Fusion Middleware product installation. Oracle recommends that
you write this value down.
Click Next when you are finished specifying your prefix and schema names and when
you are finished selecting components. The following screen appears, indicating the
progress of component prerequisite checking before the schemas are created.
If an error occurs during the prerequisite checking, the error message(s) appear in the
Messages field on the Select Components screen.
Click OK to dismiss this screen.
Select Components (for Create Operation)
Understanding Repository Creation Utility Screens A-9

A.5 Select Components (for Drop Operation)
Below is the Select Components screen if you selected Drop on the Create Repository
screen.
The following table describes the fields on this screen:
Field
Description
Select schemas with
prefix of
Use the drop-down list in this field to select an existing custom prefix - all schemas
associated with this prefix will be removed.
Component Select the component schemas you want to remove.
NOTE: Unlike create operations, schema dependencies are not handled automatically by
RCU for drop operations. When you remove a schema, you must also remove the
schemas which depend on the schema you are removing. For example, the Audit
Services schema is required by the Oracle Platform Security Services schema; if you
remove the Audit Services schema, the Oracle Platform Security Services schema will
no longer work.
Schema Owner This column shows the schema owner (custom prefix and schema name).
For drop operations, this column cannot be edited.
Click Next when you are finished. The following screen appears:
Select Components (for Drop Operation)
A-10 Creating Schemas with the Repository Creation Utility

If an error occurs during the prerequisite checking, the error message(s) appear in the
Messages field on the Select Components screen.
Click OK to dismiss this screen.
A.6 Schema Passwords
Below is the Schema Passwords screen.
Schema Passwords
Understanding Repository Creation Utility Screens A-11

There are three ways to specify schema passwords on this screen; they are described in
the following table:
Option Description
Use same password for all
schemas
Select this option if you want to use a single password for all schemas and
their auxiliary schemas. In the Password field, enter your password. Enter
your password again in the Confirm Password field.
Use main schema passwords for
auxiliary schemas
Select this option if you want to specify different passwords for the main
schemas, but still have the same password used for their respective auxiliary
schemas. If you select this option, only the main schemas will be visible in the
table. For each schema, you must enter each schema's password in the
Schema Password column in the table, and enter the same password in the
Confirm Password column.
Specify different passwords for
all schemas
Select this option if you want to specify unique passwords for the main
schemas and auxiliary schemas. If you select this option, all main schemas
and auxiliary schemas will be visible in the table. For each schema and
auxiliary schema, you must enter the password in the Schema Password
column in the table, and enter the same password in the Confirm Password
column.
Note:
You must remember the passwords you enter on this screen; you will need
this information during the configuration phase of your Oracle Fusion
Middleware product installation. Oracle recommends that you write these
values down.
A.7 Custom Variables
Custom variables are required by some products for additional product configuration
information. This screen appears only if you selected Oracle Data Integrator, SOA
Suite, or WebCenter Portal — Analytics on the Select Components screen. You can
select Oracle Data Integrator, SOA Suite, or WebCenter Portal — Analytics only if the
Oracle home in which RCU was started contains Oracle Data Integrator, Oracle SOA
Suite, or Oracle WebCenter Portal, respectively.
• If Oracle Data Integrator is selected, the Custom Variables for Oracle Data
Integrator will be visible.
• If SOA Suite is selected, the Custom Variables for Oracle SOA Suite will be visible.
• If WebCenter Portal - Analytics is selected, the Custom Variable for Oracle
WebCenter Portal Analytics will be visible.
• If Oracle Data Integrator, SOA Suite, and WebCenter Portal - Analytics are
selected, the custom variables for Oracle Data Integrator, Oracle SOA Suite, and
Oracle WebCenter Portal Analytics will be visible on this screen.
A.7.1 Custom Variables for Oracle Data Integrator
Below is the Custom Variables screen for Oracle Data Integrator:
Custom Variables
A-12 Creating Schemas with the Repository Creation Utility

The custom variables for Oracle Data Integrator are described in the following table:
Variable
Description
Supervisor Password Password of the supervisor user. You must confirm this password on the
following line.
You must enter a password for the Supervisor Password and Confirm
Supervisor Password fields. These fields are required before you can
continue. The password should be between 6 and 12 characters.
Work Repository Type Specify how the Work Repository will be used:
•
Use Development (D) for creating a development repository. This type of
repository allows management of design-time objects such as data models
and projects (including interfaces, procedures, etc.) A development
repository also includes the run-time objects (scenarios and sessions). This
type of repository is suitable for development environments.
•
Use Execution (E) for creating an execution repository: This type of
repository only includes run-time objects (scenarios, schedules and
sessions). It allows launching and monitoring of data integration jobs in
Operator Navigator. Such a repository cannot contain any design-time
artifacts. Designer Navigator cannot be used with it. An execution
repository is suitable for production environments.
This field is optional. The default value is D.
Work Repository Name A unique name for the Work Repository (for example: DEVWORKREP1).
This field is optional.
Custom Variables
Understanding Repository Creation Utility Screens A-13

Variable Description
Work Repository Password Provide a password for the Work Repository. If you provide a password, you
must confirm the password on the following line.
The Work Repository Password and Confirm Work Repository Password
fields are optional.
Encryption Algorithm Select the encryption algorithmm, either AES-128 or AES-256.
This field is optional. The default value is AES-128.
A.7.2 Custom Variables for Oracle SOA Suite
Below is the Custom Variables screen for Oracle SOA Suite:
The custom variables for Oracle SOA Suite are described in the following table:
Variable
Description
Database Profile Specify the database profile you want to use for Oracle SOA Suite. This
determines the size of the SOA database.
The default value is SMALL.
Healthcare Integration Specify whether or not you want to enable Healthcare Integration for Oracle
SOA Suite.
The default value is NO.
Custom Variables
A-14 Creating Schemas with the Repository Creation Utility

A.7.3 Custom Variable for Oracle WebCenter Portal Analytics
Below is the Custom Variables screen for Oracle WebCenter Portal Analytics:
Specify Y if you want to install Analytics with database partitioning enabled, or N if
you do not want to enable database partitioning. The default value is N.
Custom Variables
Understanding Repository Creation Utility Screens A-15

A.8 Map Tablespaces
This screen only appears if you selected the Create option on the Create Repository
screen. The following topics are covered:
• Default Tablespace Mappings
• Changing Default and Temporary Tablespaces
• Viewing and Changing Additional Tablespaces
• Managing Tablespaces and Datafiles
• Encrypting Tablespaces
Click Next when you are finished with your tablespace information. The following
screen appears, asking you to confirm the creation of tablespaces for any new
schemas.
Map Tablespaces
A-16 Creating Schemas with the Repository Creation Utility

Note:
• RCU only creates tablespaces for those components associated with RCU.
•
The Encrypt Tablespace check box appears on this screen only if
Transparent Data Encryption (TDE) is enabled in the database (Oracle or
Oracle EBR) when RCU is started. For more information, see Encrypting
Tablespaces.
Click OK to continue. The following screen appears, indicating the progress of the
tablespace creation.
Click Stop to cancel tablespace creation. When the tablespaces are created, click OK to
dismiss this window.
A.8.1 Default Tablespace Mappings
The default tablespace mapping for each component are shown in Understanding
Repository Creation Utility Schemas, IDs, and Tablespaces.
In the "Default Tablespace" and "Temp Tablespace" columns, you can click on the
tablespace cell to select from a list of available additional tablespace names.
A.8.2 Changing Default and Temporary Tablespaces
To change the default tablespace for a component, select the tablespace name in the
Default Tablespace column, then select the tablespace name you want to use from the
drop-down list. You can have your components use as many or as few tablespaces as
desired to suit your configuration.
To change the temporary tablespace for a component, select the tablespace name in the
Temp Tablespace column, then select the tablespace name you want to use from the
drop-down list.
Map Tablespaces
Understanding Repository Creation Utility Screens A-17

A.8.3 Viewing and Changing Additional Tablespaces
Some components have additional tablespaces associated with their schemas. If this is
the case, the Additional Tablespaces button will appear on this screen. If none of the
selected components have additional tablespaces, then this button will not appear.
To view and change additional tablespaces associated with the selected components,
click the Additional Tablespaces button. Only those components with additional
tablespaces as defined in the configuration files will appear on this screen.
To change the tablespace you want to use for a component, click in the "Tablespace
Name" column and select the tablespace you want to use from the drop-down list.
Click OK when you are finished.
A.8.4 Managing Tablespaces and Datafiles
To manage your tablespaces and datafiles, click the Manage Tablespaces button. You
will see a screen similar to the following:
The following topics are covered in this section:
• Adding, Modifying, and Removing Tablespaces
• Adding, Modifying, and Removing Datafiles
A.8.4.1 Adding, Modifying, and Removing Tablespaces
Only tablespaces that will be created by RCU can be modified or removed.
Tablespaces that existed before RCU was launched are visible on this screen but are
grayed out and cannot be modified or removed.
Only tablespaces that are used by a component are created. You can specify a new
tablespace here, but unless it is actually used by a component it will not be created.
Map Tablespaces
A-18 Creating Schemas with the Repository Creation Utility

To modify a tablespace, select the tablespace name on the left-hand portion of the
screen, and edit the fields as described in the following table:
Field Description
Name Edit the tablespace name this field to change the name of your tablespace.
Type Specify whether you want this tablespace to be a temporary tablespace or permanent
tablespace.
Block Size (KB) Specify the block size (in Kilobytes) to be used for data retrieval.
Storage Type
Select Use Bigfile Tablespace if you want to create a bigfile tablespace; this is
typically used if you have single large files instead of multiple small files. Select Use
Automatic Segment Space Management if you want to use bitmaps to manage the
free space within segments.
To add a tablespace, click Add and specify the same details as above (for modifying a
tablespace) for your new tablespace.
To remove a tablespace, select the tablespace name from the navigation tree, then click
Remove. This tablespace will not get created.
A.8.4.2 Adding, Modifying, and Removing Datafiles
In the Datafiles section, specify the datafiles that make up the selected tablespace.
To add a datafile, click the icon with the plus sign (+):
The Add Datafile screen appears:
Provide the information described in the following table:
Field
Description
File Name Specify the name of the datafile.
NOTE: Datafile names with a dash or hyphen (-) character are not permitted.
Map Tablespaces
Understanding Repository Creation Utility Screens A-19

Field Description
File Directory Specify the location where this datafile will reside.
Size Specify the initial size of the datafile. Use the drop-down list to specify the size in
kilobytes (KB), megabytes (MB), or gigabytes (GB).
Automatically extend
datafile when full
(AUTOEXTEND)
Select Automatically extend datafile when full (AUTOEXTEND) if you want to
automatically extend the size of your datafile when it becomes full. In the
"Increment" field, specify the size by which your datafile should be increased each
time it becomes full. Use the drop-down list to specify the size in kilobytes (KB),
megabytes (MB), or gigabytes (GB).
If you want to limit maximum size of the datafile, specify this value in the
"Maximum Size" field.
Similarly, to modify or edit a datafile, select the icon next to the datafile name you
want to edit, then click the icon with the pencil:
To delete a datafile, select the icon next to the datafile name you want to delete, then
click the icon with the "X":
A.8.5 Encrypting Tablespaces
Select the Encrypt Tablespace check box on the Map Tablespaces screen if you want to
encrypt all the new tablespaces that will be created by RCU.
The Encrypt Tablespace check box appears on the Map Tablespaces screen only if you
have TDE (Transparent Data Encryption) enabled in the database (Oracle or Oracle
EBR) when you start RCU. If TDE is not enabled, this check box will not appear. If
TDE is enabled in the database and you provide the —encryptTablespace true
option when you start RCU, the check box will be selected by default.
TDE tablespace encryption allows you to encrypt sensitive data stored in tablespaces.
For more information about Transparent Data Encryption, see Introduction to
Transparent Data Encryption in the Oracle Database Advanced Security Guide.
Note:
When you select this option, all new tablespaces created by RCU will be
encrypted.
You cannot select specific tablespaces on this screen to be encrypted. Also,
tablespaces that were created before RCU was launched cannot be encrypted
using this option.
A.9 Summary (for Create Operation)
Below is the Summary screen if you selected Create on the Create Repository screen.
Summary (for Create Operation)
A-20 Creating Schemas with the Repository Creation Utility

Click Save Response File if you want to save the RCU session to a text file (called a
response file). The response file collects all the information that you have provided in
the RCU screens.
The values in the response file can be used exactly as-is (or modified as needed) to run
RCU at a later time. If you choose to run the graphical interface, the data provided in
the response file can be used to pre-populate the RCU screens. If you choose to run
RCU from the command line, you can use a response file to provide values for all
valid command-line parameters to RCU rather than directly specifying these
parameters on the command line. For more information, see Using Response Files.
When you click Save Response File, you will see the following screen:
The following table describes the fields on this screen:
Summary (for Create Operation)
Understanding Repository Creation Utility Screens A-21
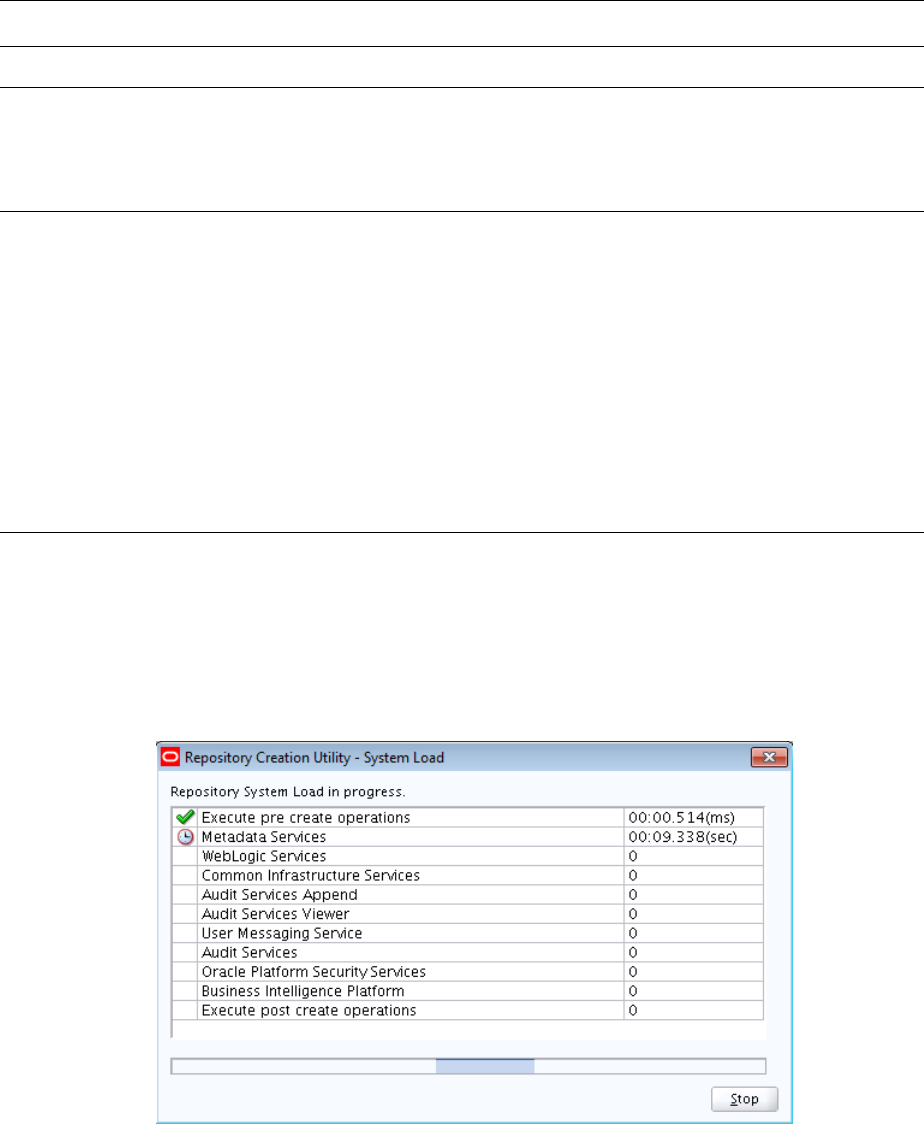
Element Description
Directory to save Response file
Specify the full path of the directory where the
response file will be saved. By default, RCU saves the
response file in the $HOME/.rcu directory.
Click Browse to search for a specific directory.
Save Passwords in Wallet
Select this option to securely store the passwords you
provided on the RCU screens in an Oracle Wallet file,
such as the schema passwords provided on the Schema
Passwords screen.
By default, this option is not selected. RCU will not
save your passwords unless you select this option.
You can use the wallet later in silent situations to
provide the necessary passwords to RCU without
having to directly enter your passwords on the
command line. If a wallet is not provided to RCU in
silent mode, you will be prompted to enter the required
passwords.
Click OK to generate the response file (and wallet if selected) in the given location and
return to the Summary screen.
Review the information on the Summary screen, and click Create to begin schema
creation. The operations summarized on this page will be performed when you click
Create.
While the schemas are being created, you will see the following progress screen:
Click Stop if you want to stop creating the schemas.
A.10 Summary (for Drop Operation)
Below is the Summary screen if you selected Drop on the Create Repository screen.
Summary (for Drop Operation)
A-22 Creating Schemas with the Repository Creation Utility

Click Save Response File if you want to save the RCU session to a text file (called a
response file). The response file collects all the information that you have provided in
the RCU screens.
The values in the response file can be used exactly as-is (or modified as needed) to run
RCU at a later time. If you choose to run the graphical interface, the data provided in
the response file can be used to pre-populate the RCU screens. If you choose to run
RCU from the command line, you can use the response file to provide values for all
valid command-line parameters to RCU rather than directly specifying these
parameters on the command line.
When you click Save Response File, you will see the following screen:
The following table describes the fields on this screen:
Summary (for Drop Operation)
Understanding Repository Creation Utility Screens A-23

Element Description
Directory to save Response file
Specify the full path of the directory where the
response file will be saved. By default, RCU saves the
response file in the $HOME/.rcu directory.
Click Browse to search for a specific directory.
Save Passwords in Wallet
Select this option to securely store the passwords you
provided on the RCU screens in an Oracle Wallet file,
such as the schema passwords provided on the Schema
Passwords screen.
By default, this option is not selected. RCU will not
save your passwords unless you select this option.
You can use the wallet later in silent situations to
provide the necessary passwords to RCU without
having to directly enter your passwords on the
command line. If a wallet is not provided to RCU in
silent mode, you will be prompted to enter the required
passwords.
Click OK to generate the response file (and wallet if selected) in the given location and
return to the Summary screen.
Review the information on the Summary screen, and click Drop to begin the
operations summarized on this page.
While the schema(s) are being dropped, you will see the following progress screen:
Click Stop if you want to cancel the operation.
A.11 Completion Summary (for Create Operation)
Below is the Completion Summary screen if you selected Create on the Create
Repository screen.
Completion Summary (for Create Operation)
A-24 Creating Schemas with the Repository Creation Utility

This screen contains information about the log files that were created from this RCU
operation. You can click on the name of a particular log file to view the contents of that
file.
If there were any problems encountered during schema creation, you can troubleshoot
the issue using the log files. For more information, refer to RCU Log Files.
If errors are encountered during a Create operation, or if a Create operation fails for
any component, the Cleanup for failed components checkbox appears on this page
and is selected by default. If selected, RCU will perform cleanup operations for the
component that failed during the Create operation. If you choose not to select this
checkbox, you can cleanup the failed component at a later time by performing a Drop
operation for the failed component(s).
Review the information on this screen, then click Close to dismiss this screen.
A.12 Completion Summary (for Drop Operation)
Below is the Completion Summary screen if you selected Drop on the Create
Repository screen.
Completion Summary (for Drop Operation)
Understanding Repository Creation Utility Screens A-25

Note the log file names for each component that are visible in the "Logfile" column.
By default, the main RCU log (rcu.log) and component log files are written to the
RCUdate_timestamp_random_number/logs directory inside the temporary
directory on your system.
For example:
• On UNIX operating systems:
/tmp/RCUdate_timestamp_random_number/logs
• On Windows operating systems:
C:\Users\user_name\AppData\Local\Temp\RCUdate_timestamp_random_number
\logs
Click rcu.log to view the contents of the main RCU log in a separate window.
If there were any problems encountered during schema creation, you can troubleshoot
the issue using the log files. For more information, see Troubleshooting Repository
Creation Utility.
Review the information on this screen, then click Close to dismiss this screen.
Completion Summary (for Drop Operation)
A-26 Creating Schemas with the Repository Creation Utility

B
Understanding Repository Creation Utility
Schemas, IDs, and Tablespaces
This appendix lists the available schemas that can be created using RCU, and also their
component IDs and dependencies.
It includes the following topic:
• Repository Creation Utility Schemas, IDs, and Tablespaces
B.1 Repository Creation Utility Schemas, IDs, and Tablespaces
Table B-1 lists the schemas along with their component IDs, tablespace mappings, and
dependencies.
The "Schema Owner" is the name of the schema that you will see in RCU and is also
the name you must provide in the Oracle Fusion Middleware Configuration Wizard
on the Configure JDBC Component Schema screen, prepended by the custom prefix.
The "Component ID" is the value you must specify with the -component parameter
when you are creating or dropping schemas using the command line.
Note:
Not all schemas are supported on all database types. For more information,
refer to "Verifying Requirements for Repository Creation Utility" in the Oracle
Fusion Middleware System Requirements and Specifications document.
Table B-1 Schema Component IDs, Tablespace Mappings, and Dependencies
Component
Schema
Owner
Component ID Default
Tablespace
Temp
Tablespace
Dependencies
AS Common Schemas
Metadata Services MDS MDS MDS IAS_TEMP None
Audit Services IAU IAU IAS_IAU IAS_TEMP Audit Services
Append
(IAU_APPEND)
Audit Services
Viewer
(IAU_VIEWER)
Audit Services Append IAU_APPEND IAU_APPEND IAS_IAU IAS_TEMP None
Audit Services Viewer IAU_VIEWER IAU_VIEWER IAS_IAU IAS_TEMP None
Understanding Repository Creation Utility Schemas, IDs, and Tablespaces B-1

Component Schema
Owner
Component ID Default
Tablespace
Temp
Tablespace
Dependencies
Oracle Platform Security
Services
OPSS OPSS IAS_OPSS IAS_TEMP Audit Services
(IAU)
Audit Services
Append
(IAU_APPEND)
Audit Services
Viewer
(IAU_VIEWER)
User Messaging Service UMS UCSUMS IAS_UMS IAS_TEMP Metadata
Services (MDS)
WebLogic Services WLS WLS WLS IAS_TEMP None
Oracle Enterprise Scheduler ESS ESS ESS IAS_TEMP Metadata
Services (MDS)
Audit Services
(IAU)
Audit Services
Append
(IAU_APPEND)
Audit Services
Viewer
(IAU_VIEWER)
Oracle
Platform
Security
Services
(OPSS)
Common Infrastructure Services
(formerly Service Table)
1
STB STB STB IAS_TEMP None
Oracle Data Integrator
Master and Work Repository ODI_REPO ODI ODI_USER ODI_TEMP
SOA Suite
Repository Creation Utility Schemas, IDs, and Tablespaces
B-2 Creating Schemas with the Repository Creation Utility

Component Schema
Owner
Component ID Default
Tablespace
Temp
Tablespace
Dependencies
SOA Infrastructure SOAINFRA SOAINFRA SOAINFRA IAS_TEMP Metadata
Services (MDS)
Audit Services
(IAU)
Audit Services
Append
(IAU_APPEND)
Audit Services
Viewer
(IAU_VIEWER)
Oracle
Platform
Security
Services
(OPSS)
User
Messaging
Service (UMS)
WebLogic
Services (WLS)
Managed File Transfer
Managed File Transfer MFT MFT MFT IAS_TEMP Metadata
Services (MDS)
Audit Services
(IAU)
Audit Services
Append
(IAU_APPEND)
Audit Services
Viewer
(IAU_VIEWER)
Oracle
Platform
Security
Services
(OPSS)
User
Messaging
Service (UMS)
Oracle
Enterprise
Scheduler
(ESS)
Oracle Business Intelligence
Repository Creation Utility Schemas, IDs, and Tablespaces
Understanding Repository Creation Utility Schemas, IDs, and Tablespaces B-3

Component Schema
Owner
Component ID Default
Tablespace
Temp
Tablespace
Dependencies
Business Intelligence Platform BIPLATFORM BIPLATFORM BIPLATFOR
M
IAS_TEMP Metadata
Services (MDS)
Oracle
Platform
Security
Services
(OPSS)
Audit Services
(IAU)
Audit Services
Append
(IAU_APPEND)
Audit Services
Viewer
(IAU_VIEWER)
WebCenter Portal
Portal and Services WEBCENTER WEBCENTER IAS_WEBCE
NTER
IAS_TEMP Metadata
Services (MDS)
Oracle
Platform
Security
Services
(OPSS)
Audit Services
(IAU)
Audit Services
Append
(IAU_APPEND)
Audit Services
Viewer
(IAU_VIEWER)
Portlet Producers PORTLET PORTLET IAS_PORTL
ET
IAS_TEMP Oracle
Platform
Security
Services
(OPSS)
Audit Services
(IAU)
Audit Services
Append
(IAU_APPEND)
Audit Services
Viewer
(IAU_VIEWER)
Repository Creation Utility Schemas, IDs, and Tablespaces
B-4 Creating Schemas with the Repository Creation Utility

Component Schema
Owner
Component ID Default
Tablespace
Temp
Tablespace
Dependencies
Analytics ACTIVITIES ACTIVITIES IAS_ACTIV
ITY
IAS_TEMP Oracle
Platform
Security
Services
(OPSS)
Audit Services
(IAU)
Audit Services
Append
(IAU_APPEND)
Audit Services
Viewer
(IAU_VIEWER)
Discussions DISCUSSION
S
DISCUSSIONS IAS_DISCU
SS
IAS_TEMP Oracle
Platform
Security
Services
(OPSS)
Audit Services
(IAU)
Audit Services
Append
(IAU_APPEND)
Audit Services
Viewer
(IAU_VIEWER)
WebCenter Content
Oracle WebCenter Content
Server — Search Only
OCSSEARCH CONTENTSEAR
CH
OCSSEARCH OCSSEARCH
_TEMP
None
Oracle WebCenter Content
Server — Complete
OCS CONTENT OCS OCS_TEMP Oracle
Platform
Security
Services
(OPSS)
Audit Services
(IAU)
Audit Services
Append
(IAU_APPEND)
Audit Services
Viewer
(IAU_VIEWER)
Repository Creation Utility Schemas, IDs, and Tablespaces
Understanding Repository Creation Utility Schemas, IDs, and Tablespaces B-5

Component Schema
Owner
Component ID Default
Tablespace
Temp
Tablespace
Dependencies
Oracle WebCenter Enterprise
Capture
CAPTURE CAPTURE CAPTURE CAPTURE_T
EMP
Metadata
Services (MDS)
Oracle
Platform
Security
Services
(OPSS)
Audit Services
(IAU)
Audit Services
Append
(IAU_APPEND)
Audit Services
Viewer
(IAU_VIEWER)
WebCenter Sites
WebCenter Sites WCSITES WCSITES TS_WCSITE
S
TS_TMP_WC
SITES
Oracle
Platform
Security
Services
(OPSS)
Audit Services
(IAU)
Audit Services
Append
(IAU_APPEND)
Audit Services
Viewer
(IAU_VIEWER)
WebCenter Sites — Visitor
Services
WCSITES_VS WCSITESVS TS_WCSITE
S_VS
TS_TMP_WC
SITES_VS
Oracle
Platform
Security
Services
(OPSS)
Audit Services
(IAU)
Audit Services
Append
(IAU_APPEND)
Audit Services
Viewer
(IAU_VIEWER)
Oracle GoldenGate
Repository Creation Utility Schemas, IDs, and Tablespaces
B-6 Creating Schemas with the Repository Creation Utility

Component Schema
Owner
Component ID Default
Tablespace
Temp
Tablespace
Dependencies
Monitor Server OGGMON OGGMON OGGMON IAS_TEMP Oracle
Platform
Security
Services
(OPSS)
Audit Services
(IAU)
Audit Services
Append
(IAU_APPEND)
Audit Services
Viewer
(IAU_VIEWER)
Veridata Repository VERIDATA VERIDATA VERIDATA_
USER
VERIDATA_
TEMP
Oracle
Platform
Security
Services
(OPSS)
Audit Services
(IAU)
Audit Services
Append
(IAU_APPEND)
Audit Services
Viewer
(IAU_VIEWER)
Oracle Enterprise Data Quality
(EDQ)
EDQ Config Repository EDQCONFIG EDQ_CONF EDQ_CONF EDQ_CONFT
EMP
Oracle
Platform
Security
Services
(OPSS)
Audit Services
(IAU)
Audit Services
Append
(IAU_APPEND)
Audit Services
Viewer
(IAU_VIEWER)
Repository Creation Utility Schemas, IDs, and Tablespaces
Understanding Repository Creation Utility Schemas, IDs, and Tablespaces B-7

Component Schema
Owner
Component ID Default
Tablespace
Temp
Tablespace
Dependencies
EDQ Results Repository EDQRESULTS EDQ_RES EDQ_RES EDQ_RESTE
MP
Oracle
Platform
Security
Services
(OPSS)
Audit Services
(IAU)
Audit Services
Append
(IAU_APPEND)
Audit Services
Viewer
(IAU_VIEWER)
EDQ Config
Repository
(EDQCONFIG)
EDQ Staging Repository EDQSTAGING EDQ_STAGING EDQ_STAGI
NG
EDQ_STAGI
NGTEMP
Oracle
Platform
Security
Services
(OPSS)
Audit Services
(IAU)
Audit Services
Append
(IAU_APPEND)
Audit Services
Viewer
(IAU_VIEWER)
EDQ Config
Repository
(EDQCONFIG)
EDQ Results
Repository
(EDQRESULTS)
1
For more information about the Service Table schema, see Understanding the Service Table Schema.
Repository Creation Utility Schemas, IDs, and Tablespaces
B-8 Creating Schemas with the Repository Creation Utility

C
Extending Repository Creation Utility to
Configure Custom Application Repositories
This appendix describes the configuration XML files that can be used to generate
custom schema creation and deletion scripts.
RCU provides an XML-based framework for component owners to plug in your
schema creation and deletion scripts into RCU. This chapter provides some details of
the configuration XML files and script-writing guidelines that are used to integrate
your components with RCU.
The following topics are covered in this appendix:
• RCU Integration Options
• RCU Configuration Files
• RCU Script Writing Guidelines
C.1 RCU Integration Options
The following topics describe the options that RCU provides for integrating
component scripts:
• RCU JDBC Engine Compliant SQL*Plus Scripts
• Pure JDBC Scripts
• SQL*Plus Scripts
• External Processes
• Java Code Using JavaAction
RCU JDBC Engine Compliant SQL*Plus Scripts is the recommended option for
integrating component scripts. SQL*Plus and External Processes are only intended for
integrating Legacy/Classic components such as Oracle Portal 10g or Identity
Management. Components that have a dependency on SQL*Plus scripts cannot be
loaded with RCU when running from the installed Oracle home. They can only be
used when running RCU from CD.
C.1.1 RCU JDBC Engine Compliant SQL*Plus Scripts
The RCU JDBC Engine emulates a set of SQL*Plus features over JDBC. This set is
broad enough to cover the requirements of schema creation. Your component teams
can integrate existing SQL*Plus scripts with a few minor changes.
The RCU JDBC Engine parses the SQL*Plus script to get individual statements and
then runs each statement over JDBC. Command line arguments to scripts and
Extending Repository Creation Utility to Configure Custom Application Repositories
C-1

substitution using DEFINE variables are supported. Script can be nested (for example,
one script can call other scripts). Component teams can specify list of expected errors
and fatal errors to RCU through configuration files and RCU would interpret these
when running the scripts.
These scripts are easy to maintain and use as they can be run in SQL*Plus in
development environment. However, Oracle recommends that the RCU JDBCEngine
tool is also used in your development environment to ensure that these scripts run
properly when integrated with RCU.
C.1.2 Pure JDBC Scripts
This option is recommended for non-Oracle databases (for Oracle databases, RCU
JDBC Engine Compliant SQL*Plus scripts should be used). Contents of the script file
should be a valid PL/SQL block, which can be called with
Connection.prepareCall() or Connection.createStatement(). Standard
JDBC Bind variables with '?' convention are supported.
Some disadvantages of this option are:
• No nested scripts, which can mean a larger number of scripts.
• May require a more significant re-work for component teams to re-write the scripts
in this format.
• Difficult to maintain as every DDL statement has to be wrapped with in EXECUTE
IMMEDIATE.
• Cannot be run using SQL*Plus in development environment.
• Less useful error support since the whole block would fail in case of any errors.
Below is an example:
<Action TYPE="JDBC" PERCENT_PROGRESS="20">
<ValidIf DBTYPE="ORACLE" />
<Command TYPE="INLINE">DROP USER %SCHEMA_USER% CASCADE</Command>
</Action>
And a second example:
<Action TYPE="Java" PERCENT_PROGRESS="100">
<Command TYPE="METHOD">
oracle.ias.version.SchemaVersionUtil:utilSetComponentValid
</Command>
<Parameters>
<Parameter TYPE="String">MDS</Parameter>
</Parameters>
</Action>
C.1.3 SQL*Plus Scripts
This option is mainly for the consumption of legacy components that need to be
loaded from RCU.
Example:
<Action TYPE="SQLPlus" PERCENT_PROGRESS="100">
<Command TYPE="SCRIPT">%SCRIPT_HOME%/oid/scripts/seedldap.sql</Command>
<IgnorableErrors>
RCU Integration Options
C-2 Creating Schemas with the Repository Creation Utility

<Error Type="ORA-01918">user name does not exist</Error>
</IgnorableErrors>
</Action>
And a second example:
<Action TYPE="JDBCSqlScript" PERCENT_PROGRESS="20">
<ValidIf DBTYPE="ORACLE" />
<Command TYPE="SCRIPT">%SCRIPT_HOME%/mds/sql/mds_user.sql</Command>
<Parameters>
<Parameter TYPE="CmdLine">%SCHEMA_USER%</Parameter>
<Parameter TYPE="CmdLine">%SCHEMA_PASSWORD%</Parameter>
<Parameter TYPE="CmdLine">%DEFAULT_TABLESPACE%</Parameter>
<Parameter TYPE="CmdLine">%TEMPORARY_TABLESPACE%</Parameter>
</Parameters>
</Action>
C.1.4 External Processes
This option is provided only for those components that have their own configuration
tool for schema creation, like OPCA (Oracle Portal 10g). This is not a recommended
option for any new component, as this option cannot make use of RCU error handling
framework.
Example:
<Action TYPE="HostCmd">
<Command TYPE="SCRIPT">%RCU_HOME%/rcu/integration/cdb/config/bin/configure</Command>
<Parameters>
<Parameter TYPE="ProcessInput">%JDBC_CONNECT_STRING%</Parameter>
<Parameter TYPE="ProcessInput">%DBADMIN_USER%</Parameter>
<Parameter TYPE="ProcessInput">%DBADMIN_PASSWORD%</Parameter>
<Parameter TYPE="ProcessInput">%PREFIX_NAME%</Parameter>
<Parameter TYPE="ProcessInput">%SCHEMA_USER%</Parameter>
<Parameter TYPE="ProcessInput">%SCHEMA_PASSWORD%</Parameter>
<Parameter TYPE="ProcessInput">%DEFAULT_TABLESPACE%</Parameter>
<Parameter TYPE="ProcessInput">%TEMPORARY_TABLESPACE%</Parameter>
</Parameters>
</Action>
C.1.5 Java Code Using JavaAction
This option is provided to components that have Java code, which can accept a JDBC
connection and execute SQL statements. This is generally used when huge amounts of
data has to be seeded or LOBs need to be created.
Example:
<Action TYPE="Java">
<Command TYPE="METHOD">
oracle.ias.version.SchemaVersionUtil:utilCreateRegistryEntry
</Command>
<Parameters>
<Parameter TYPE="Connection"></Parameter>
<Parameter TYPE="String">%SCHEMA_USER%</Parameter>
</Parameters>
</Action>
A second example:
RCU Integration Options
Extending Repository Creation Utility to Configure Custom Application Repositories C-3

<Action TYPE="Java">
<Command TYPE="METHOD">oracle.webdb.config.PortalConfigAssistant:main</Command>
<Parameters>
<Parameter TYPE="StringArray">-mode PORTAL -s %SCHEMA_USER% -p
%DBADMIN_PASSWORD% -c %DB_HOSTNAME%:%DB_PORTNUMBER%:%DB_SERVICE% -silent -verbose -
owa -u %DEFAULT_TABLESPACE% -t %TEMPORARY_TABLESPACE% -d %SCHEMA_USER%_DOC -l
%SCHEMA_USER%_LOG -in %SCHEMA_USER%_IDX -demo -report -voh %RCU_HOME% -log
%RCU_LOG_LOCATION% -oh %SQLPLUS_HOME% -mrc %PREFIX_NAME% -rcu </Parameter>
</Parameters>
</Action>
C.2 RCU Configuration Files
RCU provides the following configuration files types for component integration:
• XML DTDs Defined by RCU
• Component Repository Configuration File
• Component List Configuration File
• Soft-Prerequisite Support
• Default Tablespaces Configuration File
C.2.1 XML DTDs Defined by RCU
This section describes the XML DTDs defined by RCU:
• Component Descriptor Configuration File
• Repository Configuration File
• Master List of Supported Components
• Storage Attributes Configuration File
C.2.1.1 Component Descriptor Configuration File
Each component owner would provide a configuration file adhering to following
DTD, which lists the pre-requisites and actions:
The Component Descriptor configuration file is called ComponentInfo.dtd and is
located in the ORACLE_HOME/oracle_common/rcu/config (on UNIX operating
systems) or ORACLE_HOME\oracle_common\rcu\config (on Windows operating
systems) directory:
<?xml version="1.0" encoding="UTF-8" ?>
<!ENTITY % commonDTD SYSTEM "RCUCommon.dtd">
%commonDTD;
<!ELEMENT ComponentInfo (Display, PrefixSettings, Component*,
PrerequisiteDescriptor*, ExecutionDescriptor?, FatalErrors?, IgnorableErrors?)>
<!ATTLIST ComponentInfo
VERSION CDATA #REQUIRED
TYPE CDATA #REQUIRED
RESOURCE_BUNDLE_PACKAGE CDATA #IMPLIED>
<!ELEMENT PrefixSettings (DetectQuery*)>
<!ATTLIST PrefixSettings
USE_SCHEMA_PREFIX (TRUE|FALSE) "TRUE"
USE_TABLESPACE_PREFIX (TRUE|FALSE) "TRUE">
<!ELEMENT Component (ValidIfSet?, ValidIf?, Display, RepositoryConfigFile?,
RCU Configuration Files
C-4 Creating Schemas with the Repository Creation Utility

DetectQuery*, SchemaVersion?, SchemaUser?, AdditionalSchemaUser*, Dependents?,
DatabaseName?, Tablespaces?, CustomVariables?)>
<!ATTLIST Component
ID CDATA #REQUIRED
PROGRESS_UNITS CDATA #IMPLIED
IS_GROUPING_COMPONENT (TRUE|FALSE) "FALSE"
DEFAULT_SELECTED (TRUE|FALSE) "FALSE"
CHILD_OF CDATA #IMPLIED
MANDATORY_SELECTED (TRUE|FALSE) "FALSE">
<!ELEMENT Display (#PCDATA)>
<!ATTLIST Display
NLS_ID CDATA #IMPLIED>
<!ELEMENT RepositoryConfigFile (#PCDATA)>
<!ELEMENT DetectQuery (#PCDATA)>
<!ATTLIST DetectQuery
OPERATION (CREATE|DROP) 'CREATE'
TYPE (ORACLE|SQLSERVER|IBMDB2|EBR|MYSQL) 'ORACLE'>
<!ELEMENT SchemaVersion (#PCDATA)>
<!ELEMENT SchemaUser (#PCDATA)>
<!ATTLIST SchemaUser
USER_EDITABLE (TRUE|FALSE) "TRUE"
PREFIXABLE (TRUE|FALSE) "TRUE"
IS_CREATED (TRUE|FALSE) "TRUE"
MAX_LENGTH CDATA "30">
<!ELEMENT AdditionalSchemaUser (#PCDATA)>
<!ATTLIST AdditionalSchemaUser
STARTS_WITH_SCHEMA_USER (TRUE|FALSE) "TRUE" >
<!ELEMENT Dependents (Dependent*)>
<!ELEMENT Dependent (#PCDATA)>
<!ATTLIST Dependent
COMPONENT_ID CDATA #REQUIRED
ALT_COMPONENT_ID CDATA #IMPLIED>
<!ELEMENT DatabaseName (#PCDATA)>
<!ELEMENT Tablespaces (Tablespace*)>
<!ATTLIST Tablespace TYPE (DEFAULT_TABLESPACE|TEMPORARY_TABLESPACE|
ADDITIONAL_TABLESPACE1|ADDITIONAL_TABLESPACE2|ADDITIONAL_TABLESPACE3|
ADDITIONAL_TABLESPACE4|ADDITIONAL_TABLESPACE5|ADDITIONAL_TABLESPACE6|
ADDITIONAL_TABLESPACE7|ADDITIONAL_TABLESPACE8|ADDITIONAL_TABLESPACE9|
ADDITIONAL_TABLESPACE10|ADDITIONAL_TABLESPACE11|ADDITIONAL_TABLESPACE12|
ADDITIONAL_TABLESPACE13|ADDITIONAL_TABLESPACE14|ADDITIONAL_TABLESPACE15|
ADDITIONAL_TABLESPACE16|ADDITIONAL_TABLESPACE17|ADDITIONAL_TABLESPACE18|
ADDITIONAL_TABLESPACE19|ADDITIONAL_TABLESPACE20|ADDITIONAL_TABLESPACE21|
ADDITIONAL_TABLESPACE22|ADDITIONAL_TABLESPACE23|ADDITIONAL_TABLESPACE24|
ADDITIONAL_TABLESPACE25|ADDITIONAL_TABLESPACE26|ADDITIONAL_TABLESPACE27|
ADDITIONAL_TABLESPACE28|ADDITIONAL_TABLESPACE29|ADDITIONAL_TABLESPACE30|
ADDITIONAL_TABLESPACE31) "DEFAULT_TABLESPACE">
<!ELEMENT Tablespace (Prompt, TablespaceName)>
<!ELEMENT Prompt (#PCDATA)>
<!ATTLIST Prompt NLS_ID CDATA #IMPLIED>
<!ELEMENT TablespaceName (#PCDATA)>
<!ELEMENT CustomVariables (Variable*)>
<!ATTLIST Variable
TYPE (STRING|NUMBER|PASSWORD|EXISTING_PASSWORD|FILE) "STRING"
MAX_LENGTH CDATA "30"
MIN_LENGTH CDATA "0"
OPERATION (CREATE|DROP|BOTH) "BOTH"
DEFAULT_VALUE CDATA "">
<!ELEMENT Variable (Name,Display)><!ELEMENT Name (#PCDATA)>
RCU Configuration Files
Extending Repository Creation Utility to Configure Custom Application Repositories C-5

C.2.1.2 Repository Configuration File
The Repository configuration file is called RepositoryConfig.dtd and is located in
the ORACLE_HOME/oracle_common/rcu/config (on UNIX operating systems) or
ORACLE_HOME\oracle_common\rcu\config (on Windows operating systems)
directory:
<?xml version="1.0" encoding="UTF-8" ?>
<!ENTITY % commonDTD SYSTEM "RCUCommon.dtd">
%commonDTD;
<!ELEMENT RepositoryConfig (PrerequisiteDescriptor*, ExecutionDescriptor,
DeleteDescriptor?)>
<!ATTLIST RepositoryConfig
COMP_ID CDATA #REQUIRED>
<!ELEMENT DeleteDescriptor (Action*)>
C.2.1.3 Master List of Supported Components
RCU maintains a master list of supported components, which contains entries for each
supported component. Every time a new component is added, the master list of
supported components is updated with the reference of the XML integration file
provided by component owner.
This configuration file is called RCUCommon.dtd and is located in the ORACLE_HOME/
oracle_common/rcu/config (on UNIX operating systems) or ORACLE_HOME
\oracle_common\rcu\config (on Windows operating systems) directory:
<?xml version="1.0" encoding="UTF-8" ?>
<!ELEMENT PrerequisiteDescriptor (DBPrerequisiteSet*, DBPrerequisite*)>
<!ATTLIST PrerequisiteDescriptor
TYPE (CREATE|DROP|REGISTER|DEREGISTER|SYSTEMLOAD|DATALOAD) 'CREATE'>
<!ELEMENT DBPrerequisiteSet (ValidIfSet?, ValidIf?, PrereqSetErrorMsg?,
DBPrerequisite*)>
<!ATTLIST DBPrerequisiteSet
OPERATOR (OR|AND) "OR"
SOFT (TRUE|FALSE) "FALSE">
<!ELEMENT DBPrerequisite (ValidIfSet?, ValidIf?, PrereqIdentifier, PrereqValue,
PrereqErrorMsg?)>
<!ATTLIST DBPrerequisite
PREREQ_TYPE (InitParameter|DBOption|Java|DBComponent|DBVersion|DBObject|CustomSQL|
TablespaceFreeMB) "CustomSQL"
DATA_TYPE (STRING|NUMBER|VERSION) "STRING"
COMPARE_OPERATOR (EQ|GT|LT|NE|GE|LE|COMPARE_VERSION) "EQ"
SOFT (TRUE|FALSE) "FALSE">
<!ELEMENT PrereqIdentifier (#PCDATA)>
<!ELEMENT PrereqValue (#PCDATA)>
<!ELEMENT PrereqSetErrorMsg (#PCDATA)>
<!ATTLIST PrereqSetErrorMsg
NLS_ID CDATA #IMPLIED>
<!ELEMENT PrereqErrorMsg (#PCDATA)>
<!ATTLIST PrereqErrorMsg
NLS_ID CDATA #IMPLIED>
<!ATTLIST PrereqValue
UNIT (KB|MB|NoUnit) 'NoUnit'>
<!ELEMENT ExecutionDescriptor (Action*)>
<!ATTLIST ExecutionDescriptor
TYPE (Load|PreLoad|PostLoad|DataLoad|PostDataLoad) "Load">
<!ELEMENT Action (ValidIfSet?, ValidIf?, Command, Parameters?, FatalErrors?,
IgnorableErrors?)>
RCU Configuration Files
C-6 Creating Schemas with the Repository Creation Utility

<!ATTLIST Action
TYPE (JDBCSqlScript|JDBC|SQLPlus|HostCmd|Java) "JDBCSqlScript"
DB_VERSION CDATA #IMPLIED
PERCENT_PROGRESS CDATA #IMPLIED
CONNECT_AS_OWNER (TRUE|FALSE) "FALSE"
CONNECT_AS_REGISTRYOWNER (TRUE|FALSE) "FALSE"
RESET_SESSION (TRUE|FALSE) "FALSE">
<!ELEMENT Command (#PCDATA)>
<!ATTLIST Command
TYPE (SCRIPT|INLINE|METHOD) "SCRIPT">
<!ELEMENT Parameters (Parameter*)>
<!ELEMENT Parameter (#PCDATA)>
<!ATTLIST Parameter
TYPE (BindVar|CmdLine|ProcessInput|EnvVar|Connection|int|String|StringArray|
boolean) "CmdLine">
<!ELEMENT FatalErrors (Error*)>
<!ELEMENT IgnorableErrors (Error*)>
<!ELEMENT Error (#PCDATA)>
<!ATTLIST Error
Type CDATA #REQUIRED>
<!ELEMENT ValidIfSet (ValidIf*)>
<!ATTLIST ValidIfSet
DBTYPE CDATA #IMPLIED
DBVERSION CDATA #IMPLIED
OSNAME CDATA #IMPLIED
OPERATION_TYPE CDATA "ALL"
OPERATOR (OR|AND) "OR">
<!ELEMENT ValidIf (CustomQueryFilter?)>
<!ATTLIST ValidIf
DBTYPE CDATA #IMPLIED
DBVERSION CDATA #IMPLIED
OSNAME CDATA #IMPLIED
OPERATION_TYPE CDATA "ALL">
<!ELEMENT CustomQueryFilter (#PCDATA)>
<!ATTLIST CustomQueryFilter
DATA_TYPE (STRING|NUMBER) "STRING"
COMPARE_OPERATOR (EQ|GT|LT|NE|GE|LE|COMPARE_VERSION) "EQ"
VALUE CDATA #REQUIRED >
C.2.1.4 Storage Attributes Configuration File
RCU maintains the list of tablespaces/datafiles and their attributes to be created. This
way the tablespaces and datafiles attributes can be modified externally.
The Storage Attributes configuration file is called Storage.dtd and is located in the
ORACLE_HOME/oracle_common/rcu/config (on UNIX operating systems) or
ORACLE_HOME\oracle_common\rcu\config (on Windows operating systems)
directory:
<?xml version="1.0" encoding="UTF-8" ?>
<!ELEMENT StorageAttributes ( ComponentStorageFiles?, TablespaceAttributes*)>
<!ELEMENT ComponentStorageFiles (StorageFile*)>
<!ATTLIST StorageFile
ID CDATA #REQUIRED>
<!ELEMENT StorageFile (#PCDATA)>
<!ELEMENT TablespaceAttributes (ValidIfSet?,
ValidIf?,Type?,DefaultTemp?,BlockSize?,ExtentSize?,PageSize?,AutoResize?,IncreaseSize
?,MaxSize?,Bigfile?,AutoSegmentSpaceManagement?, DatafilesList)>
<!ATTLIST TablespaceAttributes
NAME CDATA #REQUIRED
OMF (TRUE|FALSE) "FALSE">
RCU Configuration Files
Extending Repository Creation Utility to Configure Custom Application Repositories C-7

<!ELEMENT ValidIfSet (ValidIf*)>
<!ATTLIST ValidIfSet
DBTYPE CDATA #IMPLIED
DBVERSION CDATA #IMPLIED
OSNAME CDATA #IMPLIED
OPERATOR (OR|AND) "OR">
<!ELEMENT ValidIf (CustomQueryFilter?)>
<!ATTLIST ValidIf
DBTYPE CDATA #IMPLIED
DBVERSION CDATA #IMPLIED
OSNAME CDATA #IMPLIED >
<!ELEMENT Type (#PCDATA)>
<!ELEMENT DefaultTemp (#PCDATA)>
<!ELEMENT BlockSize (#PCDATA)>
<!ELEMENT ExtentSize (#PCDATA)>
<!ELEMENT PageSize (#PCDATA)>
<!ATTLIST PageSize
UNIT (KB|NoUnit) 'KB'>
<!ELEMENT AutoResize (#PCDATA)>
<!ELEMENT IncreaseSize (#PCDATA)>
<!ATTLIST IncreaseSize
UNIT (KB|MB|GB) 'MB'>
<!ELEMENT MaxSize (#PCDATA)>
<!ATTLIST MaxSize
UNIT (KB|MB|GB) 'MB'>
<!ELEMENT Bigfile (#PCDATA)>
<!ELEMENT AutoSegmentSpaceManagement (#PCDATA)>
<!ELEMENT DatafilesList (DatafileAttributes+)>
<!ELEMENT DatafileAttributes (Size, Reuse?, AutoExtend?, Increment?, Maxsize?)>
<!ATTLIST DatafileAttributes
ID CDATA #REQUIRED>
<!ELEMENT Size (#PCDATA)>
<!ATTLIST Size
UNIT (KB|MB|GB) 'MB'>
<!ELEMENT Reuse (#PCDATA)>
<!ELEMENT AutoExtend (#PCDATA)>
<!ELEMENT Increment (#PCDATA)>
<!ATTLIST Increment
UNIT (KB|MB|GB) 'KB'>
<!ELEMENT Maxsize (#PCDATA)>
<!ATTLIST Maxsize
UNIT (KB|MB|GB) 'MB'>
C.2.2 Component Repository Configuration File
A Component Repository Configuration File (component.xml) lists the pre-
requisites and the list of scripts or actions that need to be performed to load or drop a
schema. This file is provided and maintained by component owners. This
configuration file is referenced from the Component List Configuration File
(ComponentInfo.xml).
Each component.xml file can be found in the ORACLE_HOME/
oracle_common/rcu/integrationcomponent/component.xml (on UNIX
operating systems) or ORACLE_HOME\oracle_common\rcu
\integrationcomponent\component.xml (on Windows operating systems) file.
Component owners can use a set of predefined RCU parameters which will be
substituted at runtime by RCU based on user input. Here is the list of predefined
parameters:
RCU Configuration Files
C-8 Creating Schemas with the Repository Creation Utility

Table C-1 Predefined RCU Parameters
RCU Parameter Description
%ORACLE_HOME% Location of the Oracle home directory.
%SCRIPT_HOME% Location where scripts are located. It may be same as ORACLE_HOME.
%SCHEMA_USER% Database schema name (owner) entered by the user in RCU.
%SCHEMA_PASSWORD% Database schema password entered by the user in RCU.
%ADDITIONAL_SCHEMA_USER% Additional schema users as defined in the ComponentInfo.xml file
%ADDITIONAL_SCHEMA_PASSWORD<n>
%
Password for the additional schema users.
%DEFAULT_TABLESPACE% Default tablespace assigned to the component by the user.
%TEMPORARY_TABLESPACE% Temporary tablespace assigned to the component by the user.
%ADDITIONAL_TABLESPACE<n>% Additional tablespace assigned to the component by the user. Up to
three additional tablespaces are supported.
%DEFAULT_PERMANENT_TABLESPACE% Default permanent tablespace in the database (for example, USERS or
SYSTEM) is none is set.
%DEFAULT_TEMP_TABLESPACE% Default temporary tablespace in the database (for example, TEMP in
Oracle shipped databases or SYSTEM) if none is set.
%DATAFILE_LOCATION% Default location where the tablespace/datafile will be created.
%JDBC_CONNECT_STRING% JDBC connect string.
%PREFIX_NAME% User-specified prefix for schema and tablespace names.
%CONNECTION% Already-connected java.sql.Connection object to be passed into
JavaAction.
%DBADMIN_USER% Database admin user that is provided on the Database Connection
Details.
%DBADMIN_PASSWORD% Database admin user password that is provided on the Database
Connection Details.
%DBADMIN_ROLE% Database admin user role that is provided on the Database
Connection Details.
%DB_HOSTNAME% Database hostname that is provided on the Database Connection
Details.
%DB_SERVICE% Database service name.
%DB_PORTNUMBER% Database port number that is provided on the Database Connection
Details.
%RCU_HOME% Directory where RCU is installed.
%SQLPLUS_HOME% ORACLE_HOME where SQL*Plus is located.
%RCU_LOG_LOCATION% Location of the directory where RCU log files are created.
%DATABASE_NMAE% Database name (for SQLServer database).
RCU Configuration Files
Extending Repository Creation Utility to Configure Custom Application Repositories C-9

Below is a sample Component Repository Configuration file for OPSS (opss.xml),
which lists the series of prerequisites and actions:
<?xml version="1.0" encoding="UTF-8" ?>
<!DOCTYPE RepositoryConfig SYSTEM "RepositoryConfig.dtd">
<RepositoryConfig COMP_ID="OPSS">
<!-- Prerequisites for OPSS -->
<PrerequisiteDescriptor>
<!-- ORACLE Prerequisites -->
<DBPrerequisite PREREQ_TYPE="TablespaceFreeMB" DATA_TYPE="NUMBER"
COMPARE_OPERATOR="GT">
<ValidIf DBTYPE="ORACLE" />
<PrereqIdentifier>%DEFAULT_TABLESPACE%</PrereqIdentifier>
<PrereqValue>50</PrereqValue>
</DBPrerequisite>
<DBPrerequisite PREREQ_TYPE="TablespaceFreeMB" DATA_TYPE="NUMBER"
COMPARE_OPERATOR="GT">
<ValidIf DBTYPE="ORACLE" />
<PrereqIdentifier>%TEMPORARY_TABLESPACE%</PrereqIdentifier>
<PrereqValue>50</PrereqValue>
</DBPrerequisite>
<!-- ORACLE EBR Prerequisites -->
<DBPrerequisite PREREQ_TYPE="TablespaceFreeMB" DATA_TYPE="NUMBER"
COMPARE_OPERATOR="GT">
<ValidIf DBTYPE="EBR" />
<PrereqIdentifier>%DEFAULT_TABLESPACE%</PrereqIdentifier>
<PrereqValue>50</PrereqValue>
</DBPrerequisite>
<DBPrerequisite PREREQ_TYPE="TablespaceFreeMB" DATA_TYPE="NUMBER"
COMPARE_OPERATOR="GT">
<ValidIf DBTYPE="EBR" />
<PrereqIdentifier>%TEMPORARY_TABLESPACE%</PrereqIdentifier>
<PrereqValue>50</PrereqValue>
</DBPrerequisite>
<!-- SQLServer Prerequisites -->
<!-- DB2 Prerequisites -->
</PrerequisiteDescriptor>
<PrerequisiteDescriptor TYPE="DROP">
<!-- ORACLE Prerequisites -->
<DBPrerequisite PREREQ_TYPE="CustomSQL" DATA_TYPE="NUMBER"
COMPARE_OPERATOR="EQ">
<ValidIf DBTYPE="ORACLE" />
<PrereqIdentifier>
select count(*) from v$session where username='%SCHEMA_USER%'
</PrereqIdentifier>
<PrereqValue>0</PrereqValue>
<PrereqErrorMsg>
The schema owner %SCHEMA_USER% is connected to the
database. Please disconnect and try again.
</PrereqErrorMsg>
</DBPrerequisite>
<!-- ORACLE EBR Prerequisites -->
<DBPrerequisite PREREQ_TYPE="CustomSQL" DATA_TYPE="NUMBER"
RCU Configuration Files
C-10 Creating Schemas with the Repository Creation Utility

COMPARE_OPERATOR="EQ">
<ValidIf DBTYPE="EBR" />
<PrereqIdentifier>select count(*) from v$session where
username='%SCHEMA_USER%'</PrereqIdentifier>
<PrereqValue>0</PrereqValue>
<PrereqErrorMsg NLS_ID="WC_USER_CONNECTED">The schema owner
%SCHEMA_USER% is connected to the database. Please disconnect and try again.</
PrereqErrorMsg>
</DBPrerequisite>
<!-- SQLServer Prerequisites -->
<!-- DB2 Prerequisites -->
</PrerequisiteDescriptor>
<!-- Creating the OPSS Schema and Setting it to valid in the Registry -->
<ExecutionDescriptor>
<Action TYPE="Java" PERCENT_PROGRESS="20">
<Command
TYPE="METHOD">oracle.ias.version.SchemaVersionUtil:utilCreateRegistryEntry</Command>
<Parameters>
<Parameter TYPE="Connection"></Parameter>
<Parameter TYPE="String">OPSS</Parameter>
<Parameter TYPE="String">Oracle Platform Security Services</Parameter>
<Parameter TYPE="String">%PREFIX_NAME%</Parameter>
<Parameter TYPE="String">OPSS</Parameter>
<Parameter TYPE="String">OPSS</Parameter>
<Parameter TYPE="String">%SCHEMA_USER%</Parameter>
<Parameter TYPE="String">12.1.2.0.0</Parameter>
<Parameter TYPE="String">LOADING</Parameter>
</Parameters>
</Action>
<Action TYPE="JDBCSqlScript" PERCENT_PROGRESS="40">
<ValidIf DBTYPE="ORACLE" />
<Command TYPE="SCRIPT">%SCRIPT_HOME%/opss/scripts/opss_user.sql</Command>
<Parameters>
<Parameter TYPE="CmdLine">%SCHEMA_USER%</Parameter>
<Parameter TYPE="CmdLine">%SCHEMA_PASSWORD%</Parameter>
<Parameter TYPE="CmdLine">%DEFAULT_TABLESPACE%</Parameter>
<Parameter TYPE="CmdLine">%TEMPORARY_TABLESPACE%</Parameter>
</Parameters>
<IgnorableErrors>
<Error Type="ORA-01918">user name does not exist</Error>
</IgnorableErrors>
</Action>
<Action TYPE="JDBCSqlScript" PERCENT_PROGRESS="20">
<ValidIf DBTYPE="EBR" />
<Command TYPE="SCRIPT">%SCRIPT_HOME%/opss/scripts/oracleEbr/opss_user.sql</
Command>
<Parameters>
<Parameter TYPE="CmdLine">%SCHEMA_USER%</Parameter>
<Parameter TYPE="CmdLine">%SCHEMA_PASSWORD%</Parameter>
<Parameter TYPE="CmdLine">%DEFAULT_TABLESPACE%</Parameter>
<Parameter TYPE="CmdLine">%TEMPORARY_TABLESPACE%</Parameter>
<Parameter TYPE="CmdLine">%EDITION_NAME%</Parameter>
</Parameters>
<IgnorableErrors>
<Error Type="ORA-01918">user name does not exist</Error>
RCU Configuration Files
Extending Repository Creation Utility to Configure Custom Application Repositories C-11

</IgnorableErrors>
</Action>
<Action TYPE="JDBCSqlScript" PERCENT_PROGRESS="40">
<ValidIf DBTYPE="SQLSERVER" />
<Command TYPE="SCRIPT">%SCRIPT_HOME%/opss/scripts/sqlserver/opss_user.sql</
Command>
<Parameters>
<Parameter TYPE="CmdLine">%SCHEMA_USER%</Parameter>
<Parameter TYPE="CmdLine">%SCHEMA_PASSWORD%</Parameter>
<Parameter TYPE="CmdLine">%DATABASE_NAME%</Parameter>
</Parameters>
</Action>
<Action TYPE="JDBCSqlScript" PERCENT_PROGRESS="40">
<ValidIf DBTYPE="IBMDB2"/>
<Command TYPE="SCRIPT">%SCRIPT_HOME%/opss/scripts/db2/opss_user.sql</
Command>
<Parameters>
<Parameter TYPE="CmdLine">%SCHEMA_USER%</Parameter>
<Parameter TYPE="CmdLine">%DEFAULT_TABLESPACE%</Parameter>
<Parameter TYPE="CmdLine">%SCHEMA_USER%</Parameter>
</Parameters>
</Action>
<Action TYPE="JDBCSqlScript" PERCENT_PROGRESS="60">
<ValidIf DBTYPE="ORACLE" />
<Command TYPE="SCRIPT">%SCRIPT_HOME%/opss/scripts/opss_tables.sql</Command>
<Parameters>
<Parameter TYPE="CmdLine">%SCHEMA_USER%</Parameter>
</Parameters>
<IgnorableErrors>
<Error Type="ORA-00942">table or view does not exist</Error>
</IgnorableErrors>
</Action>
<Action TYPE="JDBCSqlScript" PERCENT_PROGRESS="60">
<ValidIf DBTYPE="EBR" />
<Command TYPE="SCRIPT">%SCRIPT_HOME%/opss/scripts/oracleEbr/
opss_tables.sql</Command>
<Parameters>
<Parameter TYPE="CmdLine">%SCHEMA_USER%</Parameter>
<Parameter TYPE="CmdLine">%EDITION_NAME%</Parameter>
</Parameters>
<IgnorableErrors>
<Error Type="ORA-00942">table or view does not exist</Error>
</IgnorableErrors>
</Action>
<Action TYPE="JDBCSqlScript" PERCENT_PROGRESS="60">
<ValidIf DBTYPE="SQLSERVER" />
<Command TYPE="SCRIPT">%SCRIPT_HOME%/opss/scripts/sqlserver/
opss_tables.sql</Command>
<Parameters>
<Parameter TYPE="CmdLine">%DATABASE_NAME%</Parameter>
</Parameters>
</Action>
<Action TYPE="JDBCSqlScript" PERCENT_PROGRESS="60">
<ValidIf DBTYPE="IBMDB2" />
<Command TYPE="SCRIPT">%SCRIPT_HOME%/opss/scripts/db2/opss_tables.sql</
Command>
<Parameters>
<Parameter TYPE="CmdLine">%SCHEMA_USER%</Parameter>
RCU Configuration Files
C-12 Creating Schemas with the Repository Creation Utility

<Parameter TYPE="CmdLine">%DEFAULT_TABLESPACE%</Parameter>
<Parameter TYPE="CmdLine">%TEMPORARY_TABLESPACE%</Parameter>
</Parameters>
</Action>
<Action TYPE="JDBCSqlScript" PERCENT_PROGRESS="70">
<ValidIf DBTYPE="ORACLE" />
<Command TYPE="SCRIPT">%SCRIPT_HOME%/opss/scripts/opss_version.sql</Command>
<Parameters>
<Parameter TYPE="CmdLine">%SCHEMA_USER%</Parameter>
</Parameters>
</Action>
<Action TYPE="JDBCSqlScript" PERCENT_PROGRESS="70">
<ValidIf DBTYPE="EBR" />
<Command TYPE="SCRIPT">%SCRIPT_HOME%/opss/scripts/oracleEbr/
opss_version.sql</Command>
<Parameters>
<Parameter TYPE="CmdLine">%SCHEMA_USER%</Parameter>
<Parameter TYPE="CmdLine">%EDITION_NAME%</Parameter>
</Parameters>
</Action>
<Action TYPE="JDBCSqlScript" PERCENT_PROGRESS="70">
<ValidIf DBTYPE="SQLSERVER" />
<Command TYPE="SCRIPT">%SCRIPT_HOME%/opss/scripts/sqlserver/
opss_version.sql</Command>
<Parameters>
<Parameter TYPE="CmdLine">%DATABASE_NAME%</Parameter>
</Parameters>
</Action>
<Action TYPE="JDBCSqlScript" PERCENT_PROGRESS="70">
<ValidIf DBTYPE="IBMDB2" />
<Command TYPE="SCRIPT">%SCRIPT_HOME%/opss/scripts/db2/opss_version.sql</
Command>
<Parameters>
<Parameter TYPE="CmdLine">%SCHEMA_USER%</Parameter>
</Parameters>
</Action>
<Action TYPE="JDBCSqlScript" PERCENT_PROGRESS="80">
<ValidIf DBTYPE="ORACLE" />
<Command TYPE="SCRIPT">%SCRIPT_HOME%/opss/scripts/opss_gencatalog.sql</
Command>
<Parameters>
<Parameter TYPE="CmdLine">%SCHEMA_USER%</Parameter>
</Parameters>
</Action>
<Action TYPE="JDBCSqlScript" PERCENT_PROGRESS="80">
<ValidIf DBTYPE="SQLSERVER" />
<Command TYPE="SCRIPT">%SCRIPT_HOME%/opss/scripts/sqlserver/
opss_gencatalog.sql</Command>
<Parameters>
<Parameter TYPE="CmdLine">%DATABASE_NAME%</Parameter>
</Parameters>
</Action>
<Action TYPE="JDBCSqlScript" PERCENT_PROGRESS="80">
<ValidIf DBTYPE="IBMDB2" />
<Command TYPE="SCRIPT">%SCRIPT_HOME%/opss/scripts/db2/opss_gencatalog.sql</
Command>
RCU Configuration Files
Extending Repository Creation Utility to Configure Custom Application Repositories C-13

<Parameters>
<Parameter TYPE="CmdLine">%SCHEMA_USER%</Parameter>
</Parameters>
</Action>
<Action TYPE="JDBCSqlScript" PERCENT_PROGRESS="80">
<ValidIf DBTYPE="EBR" />
<Command TYPE="SCRIPT">%SCRIPT_HOME%/opss/scripts/oracleEbr/
opss_gencatalog.sql</Command>
<Parameters>
<Parameter TYPE="CmdLine">%SCHEMA_USER%</Parameter>
<Parameter TYPE="CmdLine">%EDITION_NAME%</Parameter>
</Parameters>
</Action>
<Action TYPE="JDBCSqlScript" CONNECT_AS_OWNER="TRUE" PERCENT_PROGRESS="100">
<ValidIf DBTYPE="ORACLE" />
<Command TYPE="SCRIPT">%SCRIPT_HOME%/opss/scripts/upgd_mgmt_schema.sql</
Command>
</Action>
<Action TYPE="Java">
<Command
TYPE="METHOD">oracle.ias.version.SchemaVersionUtil:utilSetComponentValid</Command>
<Parameters>
<Parameter TYPE="String">OPSS</Parameter>
</Parameters>
</Action>
</ExecutionDescriptor>
<!-- Deleting the OPSS Schema and removing it from the Registry -->
<DeleteDescriptor>
<Action TYPE="JDBC" PERCENT_PROGRESS="50">
<ValidIf DBTYPE="ORACLE" />
<Command TYPE="INLINE">DROP USER %SCHEMA_USER% CASCADE</Command>
</Action>
<Action TYPE="JDBC" PERCENT_PROGRESS="50">
<ValidIf DBTYPE="EBR" />
<Command TYPE="INLINE">DROP USER %SCHEMA_USER% CASCADE</Command>
</Action>
<Action TYPE="JDBCSqlScript" PERCENT_PROGRESS="20">
<ValidIf DBTYPE="SQLSERVER" />
<Command TYPE="SCRIPT">%SCRIPT_HOME%/opss/scripts/sqlserver/
opss_drop_table.sql</Command>
<Parameters>
<Parameter TYPE="CmdLine">%DATABASE_NAME%</Parameter>
</Parameters>
</Action>
<Action TYPE="JDBCSqlScript" PERCENT_PROGRESS="50">
<ValidIf DBTYPE="SQLSERVER" />
<Command TYPE="SCRIPT">%SCRIPT_HOME%/opss/scripts/sqlserver/
opss_drop_user.sql</Command>
<Parameters>
<Parameter TYPE="CmdLine">%DATABASE_NAME%</Parameter>
<Parameter TYPE="CmdLine">%SCHEMA_USER%</Parameter>
</Parameters>
</Action>
<Action TYPE="Java" PERCENT_PROGRESS="50">
<ValidIf DBTYPE="IBMDB2" />
<Command
RCU Configuration Files
C-14 Creating Schemas with the Repository Creation Utility

TYPE="METHOD">oracle.sysman.assistants.common.dbutil.jdbc.DB2DropUtil:dropCompRepos</
Command>
<Parameters>
<Parameter TYPE="Connection"></Parameter>
<Parameter TYPE="String">%SCHEMA_USER%</Parameter>
</Parameters>
</Action>
<Action TYPE="Java" PERCENT_PROGRESS="100">
<Command
TYPE="METHOD">oracle.ias.version.SchemaVersionUtil:utilDropRegistryEntry</Command>
<Parameters>
<Parameter TYPE="Connection"></Parameter>
<Parameter TYPE="String">OPSS</Parameter>
<Parameter TYPE="String">%PREFIX_NAME%</Parameter>
<Parameter TYPE="String">OPSS</Parameter>
</Parameters>
</Action>
</DeleteDescriptor>
</RepositoryConfig>
C.2.3 Component List Configuration File
The Component List configuration file (ComponentInfo.xml) lists all the
components, their respective configuration files and their default user and tablespace
mappings. This file also lists the high-level pre-requisite checks and high level actions
(like creating schema_version_registry table) to be done globally for all the
components. Also, a list of global Ignorable or Fatal errors can be specified.
Note:
RCU uses dynamic discovery to detect the available components. As a result,
all of the components might not be listed in the Component List configuration
file.
This file can be found in the ORACLE_HOME/oracle_common/rcu/config (on
UNIX operating systems) or ORACLE_HOME\oracle_common\rcu\config (on
Windows operating systems) directory.
Below is a sample ComponentInfo.xml file:
<?xml version="1.0" encoding="UTF-8" ?>
<!-- DOCTYPE ComponentInfo SYSTEM "dtds/ComponentInfo.dtd" -->
<!DOCTYPE ComponentInfo SYSTEM "ComponentInfo.dtd" []>
<ComponentInfo VERSION="11.0.0.0" TYPE="AS_REPOSITORY"
RESOURCE_BUNDLE_PACKAGE="oracle.sysman.rcu.as.ASBundle">
<Display NLS_ID="ASREP_ID">Oracle AS Repository Components</Display>
<PrefixSettings USE_SCHEMA_PREFIX="TRUE" USE_TABLESPACE_PREFIX="TRUE">
<DetectQuery>
Select distinct mrc_name from schema_version_registry
</DetectQuery>
<DetectQuery TYPE="IBMDB2">
Select distinct mrc_name from NULLID.schema_version_registry
</DetectQuery>
<DetectQuery TYPE="JAVADB">
Select distinct mrc_name from ORACLEFMW.schema_version_registry
</DetectQuery>
</PrefixSettings>
RCU Configuration Files
Extending Repository Creation Utility to Configure Custom Application Repositories C-15

<!-- AS Common GROUP START -->
<Component ID="AS_COMMON" IS_GROUPING_COMPONENT="TRUE">
<Display NLS_ID="AS_COMMON_ID">AS Common Schemas</Display>
</Component>
<Component ID="SOA" IS_GROUPING_COMPONENT="TRUE">
<Display NLS_ID="SOA">SOA Suite</Display>
</Component>
<Component ID="ODI_REPOSITORIES" IS_GROUPING_COMPONENT="TRUE">
<Display NLS_ID="ODI_REPOSITORIES">Oracle Data Integrator</Display>
</Component>
<ComponentConfigFiles>
<ConfigFile ID="MDS">%RCU_HOME%/../oracle_common/common/sql/mds/
mds_ComponentInfo.xml</ConfigFile>
<ConfigFile ID="IAU">%RCU_HOME%/../oracle_common/common/sql/iau/
iau_ComponentInfo.xml</ConfigFile>
<ConfigFile ID="OPSS">%RCU_HOME%/../oracle_common/common/sql/opss/
opss_ComponentInfo.xml</ConfigFile>
<ConfigFile ID="UCSMESSAGING">%RCU_HOME%/../oracle_common/common/sql/
ucs.messaging/ucs.messaging_ComponentInfo.xml</ConfigFile>
<ConfigFile ID="WLS">%RCU_HOME%/../oracle_common/common/sql/wlsservices/
wlsservices_ComponentInfo.xml</ConfigFile>
<ConfigFile ID="ESS">%RCU_HOME%/../oracle_common/common/sql/ess/
ess_ComponentInfo.xml</ConfigFile>
<ConfigFile ID="SOAINFRA">%RCU_HOME%/../soa/common/sql/soainfra/
soainfra_ComponentInfo.xml</ConfigFile>
<ConfigFile ID="ODI">%RCU_HOME%/../odi/common/sql/odi/odi_ComponentInfo.xml</
ConfigFile>
<ConfigFile ID="OER">%RCU_HOME%/../oer/common/sql/oer/oer_ComponentInfo.xml</
ConfigFile>
<ConfigFile ID="OWLCS">%RCU_HOME%/../oracle_common/common/sql/ucs.callcontrol/
ucs.callcontrol_ComponentInfo.xml</ConfigFile>
<ConfigFile ID="SVCTBL">%RCU_HOME%/../oracle_common/common/sql/svctbl/
svctbl_ComponentInfo.xml</ConfigFile>
<ConfigFile ID="MFT">%RCU_HOME%/../mft/common/sql/mft/mft_ComponentInfo.xml</
ConfigFile>
</ComponentConfigFiles>
<PrerequisiteDescriptor>
<DBPrerequisiteSet OPERATOR="OR">
<ValidIf DBTYPE="ORACLE" />
<DBPrerequisite PREREQ_TYPE="InitParameter" DATA_TYPE="NUMBER"
COMPARE_OPERATOR="GE">
<PrereqIdentifier>SHARED_POOL_SIZE</PrereqIdentifier>
<PrereqValue UNIT="KB">147456</PrereqValue>
</DBPrerequisite>
<DBPrerequisite PREREQ_TYPE="InitParameter" DATA_TYPE="NUMBER"
COMPARE_OPERATOR="GE">
<PrereqIdentifier>SGA_MAX_SIZE</PrereqIdentifier>
<PrereqValue UNIT="KB">147456</PrereqValue>
</DBPrerequisite>
</DBPrerequisiteSet>
<DBPrerequisiteSet OPERATOR="AND">
<ValidIf DBTYPE="ORACLE" />
<DBPrerequisite PREREQ_TYPE="CustomSQL" DATA_TYPE="NUMBER"
RCU Configuration Files
C-16 Creating Schemas with the Repository Creation Utility

COMPARE_OPERATOR="EQ" SOFT="TRUE">
<ValidIf DBTYPE="ORACLE">
<CustomQueryFilter DATA_TYPE="NUMBER" COMPARE_OPERATOR="EQ" VALUE="1">
select 1 from dual where exists (select column_name from dba_tab_columns
where table_name(+) like 'V_$INSTANCE' and column_name(+) = 'EDITION') union select
0 from dual where not exists (select column_name from dba_tab_columns where
table_name(+) like 'V_$INSTANCE' and column_name(+) = 'EDITION')
</CustomQueryFilter>
</ValidIf>
<PrereqIdentifier>select count (*) from V_$INSTANCE where EDITION =
'XE'</PrereqIdentifier>
<PrereqValue>0</PrereqValue>
<PrereqErrorMsg>
The database you are connecting is not a
supported version. Refer to the certification matrix for supported DB versions.
</PrereqErrorMsg>
</DBPrerequisite>
<DBPrerequisite PREREQ_TYPE="CustomSQL" DATA_TYPE="NUMBER" COMPARE_OPERATOR="EQ">
<ValidIf DBTYPE="ORACLE">
<CustomQueryFilter DATA_TYPE="NUMBER" COMPARE_OPERATOR="EQ" VALUE="1">
select 1 from dual where exists (select column_name from dba_tab_columns
where table_name(+) like 'V_$INSTANCE' and column_name(+) = 'EDITION') union select
0 from dual where not exists (select column_name from dba_tab_columns where
table_name(+) like 'V_$INSTANCE' and column_name(+) = 'EDITION')
</CustomQueryFilter>
</ValidIf>
<PrereqIdentifier>select count(*) from product_component_version
where product like 'Oracle%Database%' AND version >= '12.0.0.0.0' AND version <
'12.1.0.1.0'</PrereqIdentifier>
<PrereqValue>0</PrereqValue>
<PrereqErrorMsg>
The database you are connecting is not a supported
version. Enter Database with version equal to or higher than 12.1.0.1.0 in 12c.
Refer to the certification matrix for supported DB versions.
</PrereqErrorMsg>
</DBPrerequisite>
<DBPrerequisite PREREQ_TYPE="CustomSQL" DATA_TYPE="NUMBER" COMPARE_OPERATOR="EQ"
SOFT="TRUE">
<ValidIf DBTYPE="ORACLE">
<CustomQueryFilter DATA_TYPE="NUMBER" COMPARE_OPERATOR="EQ" VALUE="1">
select 1 from dual where exists (select column_name from dba_tab_columns
where table_name(+) like 'V_$INSTANCE' and column_name(+) = 'EDITION') union select
0 from dual where not exists (select column_name from dba_tab_columns where
table_name(+) like 'V_$INSTANCE' and column_name(+) = 'EDITION')
</CustomQueryFilter>
</ValidIf>
<PrereqIdentifier>select count(*) from product_component_version where product
like 'Oracle%Database%' AND version > '12.1.0.1.9'</PrereqIdentifier>
<PrereqValue>0</PrereqValue>
<PrereqErrorMsg>
The database you are connecting to, is a more recent one than the supported
version. Refer to the certification matrix for supported DB versions.
</PrereqErrorMsg>
</DBPrerequisite>
</DBPrerequisiteSet>
RCU Configuration Files
Extending Repository Creation Utility to Configure Custom Application Repositories C-17

<DBPrerequisite PREREQ_TYPE="InitParameter" DATA_TYPE="NUMBER"
COMPARE_OPERATOR="GE">
<ValidIf DBTYPE="ORACLE" />
<PrereqIdentifier>DB_BLOCK_SIZE</PrereqIdentifier>
<PrereqValue UNIT="KB">8</PrereqValue>
</DBPrerequisite>
<!--DBPrerequisite PREREQ_TYPE="CustomSQL" DATA_TYPE="STRING"
COMPARE_OPERATOR="NE">
<ValidIf DBTYPE="ORACLE" >
<CustomQueryFilter DATA_TYPE="NUMBER" COMPARE_OPERATOR="EQ" VALUE="0">
select 1 from dual where exists (select column_name from dba_tab_columns
where table_name(+) like 'V_$INSTANCE' and column_name(+) = 'EDITION') union select
0 from dual where not exists (select column_name from dba_tab_columns where
table_name(+) like 'V_$INSTANCE' and column_name(+) = 'EDITION')
</CustomQueryFilter>
</ValidIf>
<PrereqIdentifier>version</PrereqIdentifier>
<PrereqValue>11.1.0.6.0</PrereqValue>
<PrereqErrorMsg>
The database you are connecting is 11.1.0.6.0
version. 11.1.0.6.0 is not a supported version. The database version should be
11.1.0.7.0 or greater.
</PrereqErrorMsg>
</DBPrerequisite-->
<DBPrerequisite PREREQ_TYPE="DBVersion" DATA_TYPE="STRING"
COMPARE_OPERATOR="GE">
<ValidIf DBTYPE="ORACLE" >
<CustomQueryFilter DATA_TYPE="NUMBER" COMPARE_OPERATOR="EQ" VALUE="0">
select 1 from dual where exists (select column_name from dba_tab_columns
where table_name(+) like 'V_$INSTANCE' and column_name(+) = 'EDITION') union select
0 from dual where not exists (select column_name from dba_tab_columns where
table_name(+) like 'V_$INSTANCE' and column_name(+) = 'EDITION')
</CustomQueryFilter>
</ValidIf>
<PrereqIdentifier>version</PrereqIdentifier>
<PrereqValue>10.2.0.4.0</PrereqValue>
<PrereqErrorMsg>
The database you are connecting is not a supported version. Enter Database with
version equal to or higher than 10.2.0.4.0 in 10g or version equal to or higher than
11.1.0.7.0 in 11g. Refer to the certification matrix for supported DB versions
</PrereqErrorMsg>
</DBPrerequisite>
<DBPrerequisite PREREQ_TYPE="CustomSQL" DATA_TYPE="NUMBER" COMPARE_OPERATOR="EQ">
<ValidIf DBTYPE="ORACLE" >
<CustomQueryFilter DATA_TYPE="NUMBER" COMPARE_OPERATOR="EQ" VALUE="0">
select 1 from dual where exists (select column_name from dba_tab_columns
where table_name(+) like 'V_$INSTANCE' and column_name(+) = 'EDITION') union select
0 from dual where not exists (select column_name from dba_tab_columns where
table_name(+) like 'V_$INSTANCE' and column_name(+) = 'EDITION')
</CustomQueryFilter>
</ValidIf>
<PrereqIdentifier>select count(*) from product_component_version where
product like 'Oracle%Database%' AND version BETWEEN '11' AND '11.1.0.6.0' </
PrereqIdentifier>
<PrereqValue>0</PrereqValue>
<PrereqErrorMsg>
The database you are connecting is not a supported
version. Enter Database with version equal to or higher than 10.2.0.4.0 in 10g or
version equal to or higher than 11.1.0.7.0 in 11g. Refer to the certification matrix
RCU Configuration Files
C-18 Creating Schemas with the Repository Creation Utility

for supported DB versions
</PrereqErrorMsg>
</DBPrerequisite>
<DBPrerequisite PREREQ_TYPE="CustomSQL" DATA_TYPE="NUMBER" COMPARE_OPERATOR="EQ">
<ValidIf DBTYPE="IBMDB2"/>
<PrereqIdentifier>select count(*) from syscat.tablespaces where tbspace
= 'SYSCATSPACE' and pagesize >= 32768
</PrereqIdentifier>
<PrereqValue>1</PrereqValue>
<PrereqErrorMsg>
Component : RCU
Error : Database prerequisite check failed.
Cause : Database: '%DATABASE_NAME%' needs to be
configured with
default pagesize 32768 or 32K.
Action : Modify the default of the current database
or create a new
database with the required default pagesize.
</PrereqErrorMsg>
</DBPrerequisite>
<DBPrerequisite PREREQ_TYPE="CustomSQL" DATA_TYPE="STRING" COMPARE_OPERATOR="EQ">
<ValidIf DBTYPE="SQLSERVER" />
<PrereqIdentifier>SELECT count(*) where
CAST(SERVERPROPERTY('productversion') as VARCHAR(20)) like '1.%' or
CAST(SERVERPROPERTY('productversion') as VARCHAR(20)) like '4.%' or
CAST(SERVERPROPERTY('productversion') as VARCHAR(20)) like '6.%' or
CAST(SERVERPROPERTY('productversion') as VARCHAR(20)) like '7.%' or
CAST(SERVERPROPERTY('productversion') as VARCHAR(20)) like '8.%'</PrereqIdentifier>
<PrereqValue>0</PrereqValue>
<PrereqErrorMsg>
The database you are connecting is not a supported version. Enter
Database with version equal to or higher than 2005. Refer to the certification
matrix for supported DB versions.
</PrereqErrorMsg>
</DBPrerequisite>
<DBPrerequisite PREREQ_TYPE="CustomSQL" DATA_TYPE="STRING" COMPARE_OPERATOR="EQ">
<ValidIf DBTYPE="IBMDB2" />
<PrereqIdentifier>select count(*) FROM TABLE
(sysproc.env_get_inst_info()) where INT(substr(service_level, POSSTR(service_level,
'v')+1, LOCATE('.', service_level,POSSTR(service_level, 'v') +1) -
POSSTR(service_level, 'v') -1 ) ) = 9 AND INT(substr(service_level,
POSSTR(service_level, '.')+1, LOCATE('.',service_level,POSSTR(service_level, '.')
+1) - POSSTR(service_level, '.') -1 )) < 7 OR INT(substr(service_level,
POSSTR(service_level, 'v')+1, LOCATE('.', service_level,POSSTR(service_level, 'v')
+1) - POSSTR(service_level, 'v') -1 ) ) < 9</PrereqIdentifier>
<PrereqValue>0</PrereqValue>
<PrereqErrorMsg>
The database you are connecting is not a supported
version. Enter Database with version equal to or higher than 9.7. Refer to the
certification matrix for supported DB versions.
</PrereqErrorMsg>
</DBPrerequisite>
<DBPrerequisite PREREQ_TYPE="CustomSQL" DATA_TYPE="STRING"
COMPARE_OPERATOR="EQ">
<ValidIf DBTYPE="ORACLE" />
RCU Configuration Files
Extending Repository Creation Utility to Configure Custom Application Repositories C-19

<PrereqIdentifier>select GRANTED_ROLE from DBA_ROLE_PRIVS
where((GRANTED_ROLE='DBA' and GRANTEE=(select user from dual) and lower(SYS_CONTEXT
('USERENV', 'SESSION_USER'))='sys') OR(GRANTED_ROLE='DBA' and GRANTEE=(select user
from dual)))</PrereqIdentifier>
<PrereqValue>DBA</PrereqValue>
<PrereqErrorMsg>
User should have sysdba or dba privilages.
</PrereqErrorMsg>
</DBPrerequisite>
<DBPrerequisite PREREQ_TYPE="CustomSQL" DATA_TYPE="STRING" COMPARE_OPERATOR="EQ">
<ValidIf DBTYPE="SQLSERVER" />
<PrereqIdentifier>select Is_Member('db_owner')</PrereqIdentifier>
<PrereqValue>1</PrereqValue>
<PrereqErrorMsg>
User should have sysdba or dba privilages.
</PrereqErrorMsg>
</DBPrerequisite>
<DBPrerequisite PREREQ_TYPE="CustomSQL" DATA_TYPE="STRING"
COMPARE_OPERATOR="EQ" SOFT="TRUE">
<ValidIf DBTYPE="ORACLE" />
<PrereqIdentifier>select value from nls_database_parameters where
parameter = 'NLS_CHARACTERSET'</PrereqIdentifier>
<PrereqValue>AL32UTF8</PrereqValue>
<PrereqErrorMsg>
The database you are connecting is with non-AL32UTF8
character set. Oracle strongly recommends using AL32UTF8 as the database character
set.
</PrereqErrorMsg>
</DBPrerequisite>
<DBPrerequisite PREREQ_TYPE="CustomSQL" DATA_TYPE="NUMBER" COMPARE_OPERATOR="EQ"
SOFT="TRUE">
<ValidIf DBTYPE="ORACLE" >
<CustomQueryFilter DATA_TYPE="NUMBER" COMPARE_OPERATOR="EQ" VALUE="0">
select 1 from dual where exists (select column_name from dba_tab_columns
where table_name(+) like 'V_$INSTANCE' and column_name(+) = 'EDITION') union select
0 from dual where not exists (select column_name from dba_tab_columns where
table_name(+) like 'V_$INSTANCE' and column_name(+) = 'EDITION')
</CustomQueryFilter>
</ValidIf>
<PrereqIdentifier>select count(*) from product_component_version where
product like 'Oracle%Database%' AND version BETWEEN '10.2.0.6.0' AND '10.9.9.9.9' </
PrereqIdentifier>
<PrereqValue>0</PrereqValue>
<PrereqErrorMsg>
The database you are connecting to, is a more recent than the
supported version. Refer to the certification matrix for supported DB versions.
</PrereqErrorMsg>
</DBPrerequisite>
<DBPrerequisite PREREQ_TYPE="CustomSQL" DATA_TYPE="NUMBER"
COMPARE_OPERATOR="EQ" SOFT="TRUE">
<ValidIf DBTYPE="ORACLE" >
<CustomQueryFilter DATA_TYPE="NUMBER" COMPARE_OPERATOR="EQ" VALUE="0">
select 1 from dual where exists (select column_name from dba_tab_columns
where table_name(+) like 'V_$INSTANCE' and column_name(+) = 'EDITION') union select
0 from dual where not exists (select column_name from dba_tab_columns where
table_name(+) like 'V_$INSTANCE' and column_name(+) = 'EDITION')
RCU Configuration Files
C-20 Creating Schemas with the Repository Creation Utility

</CustomQueryFilter>
</ValidIf>
<PrereqIdentifier>select count(*) from product_component_version where
product like 'Oracle%Database%' AND version > '11.1.0.7.0' AND version <=
'11.1.9.9.9'</PrereqIdentifier>
<PrereqValue>0</PrereqValue>
<PrereqErrorMsg>
The database you are connecting to, is a more recent one than the
supported version. Refer to the certification matrix for supported DB versions.
</PrereqErrorMsg>
</DBPrerequisite>
<DBPrerequisite PREREQ_TYPE="CustomSQL" DATA_TYPE="NUMBER"
COMPARE_OPERATOR="EQ" SOFT="TRUE">
<ValidIf DBTYPE="ORACLE" >
<CustomQueryFilter DATA_TYPE="NUMBER" COMPARE_OPERATOR="EQ" VALUE="0">
select 1 from dual where exists (select column_name from dba_tab_columns
where table_name(+) like 'V_$INSTANCE' and column_name(+) = 'EDITION') union select
0 from dual where not exists (select column_name from dba_tab_columns where
table_name(+) like 'V_$INSTANCE' and column_name(+) = 'EDITION')
</CustomQueryFilter>
</ValidIf>
<PrereqIdentifier>select count(*) from product_component_version where
product like 'Oracle%Database%' AND version between '11.2.0.4.0' AND '11.2.9.9.9' </
PrereqIdentifier>
<PrereqValue>0</PrereqValue>
<PrereqErrorMsg>
The database you are connecting to, is a more recent one than the
supported version. Refer to the certification matrix for supported DB versions.
</PrereqErrorMsg>
</DBPrerequisite>
<DBPrerequisite PREREQ_TYPE="CustomSQL" DATA_TYPE="NUMBER" COMPARE_OPERATOR="EQ">
<ValidIf DBTYPE="ORACLE" >
<CustomQueryFilter DATA_TYPE="NUMBER" COMPARE_OPERATOR="EQ" VALUE="0">
select 1 from dual where exists (select column_name from dba_tab_columns
where table_name(+) like 'V_$INSTANCE' and column_name(+) = 'EDITION') union select
0 from dual where not exists (select column_name from dba_tab_columns where
table_name(+) like 'V_$INSTANCE' and column_name(+) = 'EDITION')
</CustomQueryFilter>
</ValidIf>
<PrereqIdentifier>select count(*) from product_component_version
where product like 'Oracle%Database%' AND version between '11.2.0.0.0' AND
'11.2.0.2.9' </PrereqIdentifier>
<PrereqValue>0</PrereqValue>
<PrereqErrorMsg>
The database you are connecting is not a supported
version. Enter Database with version equal to or higher than 11.2.0.3.0 in 11g.
Refer to the certification matrix for supported DB versions.
</PrereqErrorMsg>
</DBPrerequisite>
<!--
<DBPrerequisite PREREQ_TYPE="CustomSQL" DATA_TYPE="NUMBER" COMPARE_OPERATOR="EQ"
SOFT="TRUE">
<ValidIf DBTYPE="ORACLE" >
<CustomQueryFilter DATA_TYPE="NUMBER" COMPARE_OPERATOR="EQ" VALUE="0">
select 1 from dual where exists (select column_name from dba_tab_columns
where table_name(+) like 'V_$INSTANCE' and column_name(+) = 'EDITION') union select
0 from dual where not exists (select column_name from dba_tab_columns where
table_name(+) like 'V_$INSTANCE' and column_name(+) = 'EDITION')
</CustomQueryFilter>
RCU Configuration Files
Extending Repository Creation Utility to Configure Custom Application Repositories C-21

</ValidIf>
<PrereqIdentifier>select count(*) from product_component_version
where product like 'Oracle%Database%' AND version >= '12.2._._._' </
PrereqIdentifier>
<PrereqValue>0</PrereqValue>
<PrereqErrorMsg>
The database you are connecting to, is a more recent one than the
supported version. Refer to the certification matrix for supported DB versions.
</PrereqErrorMsg>
</DBPrerequisite>
<DBPrerequisite PREREQ_TYPE="CustomSQL" DATA_TYPE="NUMBER" COMPARE_OPERATOR="EQ">
<ValidIf DBTYPE="ORACLE" >
<CustomQueryFilter DATA_TYPE="NUMBER" COMPARE_OPERATOR="EQ" VALUE="0">
select 1 from dual where exists (select column_name from dba_tab_columns
where table_name(+) like 'V_$INSTANCE' and column_name(+) = 'EDITION') union select
0 from dual where not exists (select column_name from dba_tab_columns where
table_name(+) like 'V_$INSTANCE' and column_name(+) = 'EDITION')
</CustomQueryFilter>
</ValidIf>
<PrereqIdentifier>select count(*) from product_component_version where product
like 'Oracle%Database%' AND version like '12.0._._._' </PrereqIdentifier>
<PrereqValue>0</PrereqValue>
<PrereqErrorMsg>
The database you are connecting is not a supported
version. Enter Database with version equal to or higher than 12.1.0.0.0 in 12c.
Refer to the certification matrix for supported DB versions.
</PrereqErrorMsg>
</DBPrerequisite>
-->
<DBPrerequisite PREREQ_TYPE="CustomSQL" DATA_TYPE="STRING" COMPARE_OPERATOR="EQ"
SOFT="TRUE">
<ValidIf DBTYPE="SQLSERVER" />
<PrereqIdentifier>SELECT count(*) where
CAST(SERVERPROPERTY('productversion') as VARCHAR(20)) not like '1.%' and
CAST(SERVERPROPERTY('productversion') as VARCHAR(20)) not like '4.%' and
CAST(SERVERPROPERTY('productversion') as VARCHAR(20)) not like '6.%' and
CAST(SERVERPROPERTY('productversion') as VARCHAR(20)) not like '7.%' and
CAST(SERVERPROPERTY('productversion') as VARCHAR(20)) not like '8.%' and
CAST(SERVERPROPERTY('productversion') as VARCHAR(20)) not like '9.%' and
CAST(SERVERPROPERTY('productversion') as VARCHAR(20)) not like '10.%' </
PrereqIdentifier>
<PrereqValue>0</PrereqValue>
<PrereqErrorMsg>
The database you are connecting to, is a more recent than the
supported version. Refer to the certification matrix for supported DB versions.
</PrereqErrorMsg>
</DBPrerequisite>
<DBPrerequisite PREREQ_TYPE="CustomSQL" DATA_TYPE="STRING"
COMPARE_OPERATOR="EQ" SOFT="TRUE">
<ValidIf DBTYPE="IBMDB2" />
<PrereqIdentifier>select count(*) FROM TABLE (sysproc.env_get_inst_info()) where
INT(substr(service_level, POSSTR(service_level, 'v')+1, LOCATE('.', service_level,
POSSTR(service_level, 'v') +1) - POSSTR(service_level, 'v') -1 ) ) = 9 and
INT(substr(service_level, POSSTR(service_level, '.')+1, LOCATE('.', service_level,
POSSTR(service_level, '.') +1) - POSSTR(service_level, '.') -1 )) > 7 or
INT(substr(service_level, POSSTR(service_level, 'v')+1, LOCATE('.', service_level,
POSSTR(service_level, 'v') +1) - POSSTR(service_level, 'v') -1 ) ) > 9</
PrereqIdentifier>
RCU Configuration Files
C-22 Creating Schemas with the Repository Creation Utility

<PrereqValue>0</PrereqValue>
<PrereqErrorMsg>
The database you are connecting to, is a more recent than
the supported version. Refer to the certification matrix for supported DB versions.
</PrereqErrorMsg>
</DBPrerequisite>
<DBPrerequisite PREREQ_TYPE="Java" DATA_TYPE="STRING" COMPARE_OPERATOR="NE"
SOFT="TRUE">
<ValidIf DBTYPE="JAVADB" />
<PrereqIdentifier>%RCU_HOME%/../oracle_common/rcu/config/
JavaDB.jar:javadbproject.JavaDB:checkJavaDBVersion</PrereqIdentifier>
<PrereqValue>SOFTPASS</PrereqValue>
<PrereqErrorMsg>
The database you are connecting to, is a more recent than the supported
version. Refer to the certification matrix for supported DB versions.
</PrereqErrorMsg>
</DBPrerequisite>
<DBPrerequisite PREREQ_TYPE="Java" DATA_TYPE="STRING" COMPARE_OPERATOR="NE">
<ValidIf DBTYPE="JAVADB" />
<PrereqIdentifier>%RCU_HOME%/../oracle_common/rcu/config/
JavaDB.jar:javadbproject.JavaDB:checkJavaDBVersion</PrereqIdentifier>
<PrereqValue>FAIL</PrereqValue>
<PrereqErrorMsg>
The database you are connecting is not a supported version. Enter
Database with version equal to or higher than 10.5.3.0. Refer to the certification
matrix for supported DB versions.
</PrereqErrorMsg>
</DBPrerequisite>
<DBPrerequisite PREREQ_TYPE="CustomSQL" DATA_TYPE="NUMBER" COMPARE_OPERATOR="EQ">
<ValidIf DBTYPE="MYSQL" />
<PrereqIdentifier>select version() < '5.5.14'</PrereqIdentifier>
<PrereqValue>0</PrereqValue>
<PrereqErrorMsg>
The database you are connecting is not a supported
version. Enter Database with version equal to or higher than 5.5.14. Refer to the
certification matrix for supported DB versions.
</PrereqErrorMsg>
</DBPrerequisite>
<DBPrerequisite PREREQ_TYPE="CustomSQL" DATA_TYPE="NUMBER"
COMPARE_OPERATOR="EQ" SOFT="TRUE">
<ValidIf DBTYPE="MYSQL" />
<PrereqIdentifier>select version() > '5.6' or version() =
'5.6'</PrereqIdentifier>
<PrereqValue>0</PrereqValue>
<PrereqErrorMsg>
The database you are connecting to, is a more recent than
the supported version. Refer to the certification matrix for supported DB versions.
</PrereqErrorMsg>
</DBPrerequisite>
<DBPrerequisite PREREQ_TYPE="CustomSQL" DATA_TYPE="STRING" COMPARE_OPERATOR="EQ">
<ValidIf DBTYPE="MYSQL" />
<PrereqIdentifier>select VARIABLE_VALUE from
INFORMATION_SCHEMA.GLOBAL_VARIABLES where VARIABLE_NAME = 'INNODB_FILE_PER_TABLE'</
RCU Configuration Files
Extending Repository Creation Utility to Configure Custom Application Repositories C-23

PrereqIdentifier>
<PrereqValue>ON</PrereqValue>
<PrereqErrorMsg>
DB Init Param Prerequisite failure for INNODB_FILE_PER_TABLE.
Its value should be 'ON'.
</PrereqErrorMsg>
</DBPrerequisite>
<DBPrerequisite PREREQ_TYPE="CustomSQL" DATA_TYPE="STRING" COMPARE_OPERATOR="EQ">
<ValidIf DBTYPE="MYSQL" />
<PrereqIdentifier>select VARIABLE_VALUE from
INFORMATION_SCHEMA.GLOBAL_VARIABLES where VARIABLE_NAME = 'INNODB_FILE_FORMAT'</
PrereqIdentifier>
<PrereqValue>Barracuda</PrereqValue>
<PrereqErrorMsg>
DB Init Param Prerequisite failure for INNODB_FILE_FORMAT. Its
value should be 'Barracuda'.
</PrereqErrorMsg>
</DBPrerequisite>
<DBPrerequisite PREREQ_TYPE="CustomSQL" DATA_TYPE="STRING" COMPARE_OPERATOR="EQ">
<ValidIf DBTYPE="MYSQL" />
<PrereqIdentifier>select VARIABLE_VALUE from
INFORMATION_SCHEMA.GLOBAL_VARIABLES where VARIABLE_NAME = 'INNODB_LARGE_PREFIX'</
PrereqIdentifier>
<PrereqValue>ON</PrereqValue>
<PrereqErrorMsg>
DB Init Param Prerequisite failure for INNODB_LARGE_PREFIX.
Its value should be 'ON'.
</PrereqErrorMsg>
</DBPrerequisite>
<DBPrerequisite PREREQ_TYPE="CustomSQL" DATA_TYPE="STRING" COMPARE_OPERATOR="EQ">
<ValidIf DBTYPE="MYSQL" />
<PrereqIdentifier>select VARIABLE_VALUE from
INFORMATION_SCHEMA.GLOBAL_VARIABLES where VARIABLE_NAME
='log_bin_trust_function_creators'</PrereqIdentifier>
<PrereqValue>ON</PrereqValue>
<PrereqErrorMsg>
DB Init Param Prerequisite failure for
log_bin_trust_function_creators. Its value should be 'ON'.
</PrereqErrorMsg>
</DBPrerequisite>
</PrerequisiteDescriptor>
<ExecutionDescriptor TYPE="PreLoad">
<Action TYPE="Java" PERCENT_PROGRESS="60">
<ValidIf DBTYPE="ORACLE,EBR">
<CustomQueryFilter DATA_TYPE="NUMBER" COMPARE_OPERATOR="EQ" VALUE="0">
select count(*) from dba_views where VIEW_NAME=
'SCHEMA_VERSION_REGISTRY'
</CustomQueryFilter>
</ValidIf>
<Command
TYPE="METHOD">oracle.ias.version.SchemaVersionUtil:utilCreateRegistryTable</Command>
<Parameters>
<Parameter TYPE="Connection"></Parameter>
</Parameters>
</Action>
<Action TYPE="Java" PERCENT_PROGRESS="60">
RCU Configuration Files
C-24 Creating Schemas with the Repository Creation Utility

<ValidIf DBTYPE="SQLSERVER">
<CustomQueryFilter DATA_TYPE="NUMBER" COMPARE_OPERATOR="EQ" VALUE="0">
select count(*) from INFORMATION_SCHEMA.TABLES where
TABLE_NAME='SCHEMA_VERSION_REGISTRY'
</CustomQueryFilter>
</ValidIf>
<Command
TYPE="METHOD">oracle.ias.version.SchemaVersionUtil:utilCreateRegistryTable</Command>
<Parameters>
<Parameter TYPE="Connection"></Parameter>
</Parameters>
</Action>
<Action TYPE="Java" PERCENT_PROGRESS="60">
<ValidIf DBTYPE="IBMDB2">
<CustomQueryFilter DATA_TYPE="NUMBER" COMPARE_OPERATOR="EQ" VALUE="0">
select count(*) from syscat.tables where
TABNAME='SCHEMA_VERSION_REGISTRY'
</CustomQueryFilter>
</ValidIf>
<Command
TYPE="METHOD">oracle.ias.version.SchemaVersionUtil:utilCreateRegistryTable</Command>
<Parameters>
<Parameter TYPE="Connection"></Parameter>
</Parameters>
</Action>
<Action TYPE="Java" PERCENT_PROGRESS="60">
<ValidIf DBTYPE="JAVADB">
<CustomQueryFilter DATA_TYPE="NUMBER" COMPARE_OPERATOR="EQ"
VALUE="0">
SELECT COUNT(*) FROM SYS.SYSTABLES INNER JOIN SYS.SYSSCHEMAS ON
SYS.SYSTABLES.SCHEMAID = SYS.SYSSCHEMAS.SCHEMAID WHERE SCHEMANAME='ORACLEFMW' AND
TABLENAME='SCHEMA_VERSION_REGISTRY_T'
</CustomQueryFilter>
</ValidIf>
<Command
TYPE="METHOD">oracle.ias.version.SchemaVersionUtil:utilCreateRegistryTable</Command>
<Parameters>
<Parameter TYPE="Connection"></Parameter>
</Parameters>
</Action>
<Action TYPE="Java" PERCENT_PROGRESS="60">
<ValidIf DBTYPE="MYSQL">
<CustomQueryFilter DATA_TYPE="NUMBER" COMPARE_OPERATOR="EQ" VALUE="0">
select count(*) from INFORMATION_SCHEMA.TABLES where
TABLE_NAME='SCHEMA_VERSION_REGISTRY'
</CustomQueryFilter>
</ValidIf>
<Command
TYPE="METHOD">oracle.ias.version.SchemaVersionUtil:utilCreateRegistryTable</Command>
<Parameters>
<Parameter TYPE="Connection"></Parameter>
</Parameters>
</Action>
</ExecutionDescriptor>
<ExecutionDescriptor TYPE="PostLoad">
<Action TYPE="Java" PERCENT_PROGRESS="60">
<ValidIf DBTYPE="EBR"/>
<Command
RCU Configuration Files
Extending Repository Creation Utility to Configure Custom Application Repositories C-25

TYPE="METHOD">oracle.ias.version.SchemaVersionUtil:utilSetEditionName</Command>
<Parameters>
<Parameter TYPE="String">%EDITION_NAME%</Parameter>
</Parameters>
</Action>
<Action TYPE="Java">
<ValidIf DBTYPE="ORACLE,EBR"/>
<Command
TYPE="METHOD">com.oracle.cie.rcu.ComponentSchemaUtil:loadCompSchemaInfo</Command>
<Parameters>
<Parameter TYPE="Connection"></Parameter>
<Parameter TYPE="String">%SERVICE_TABLE_STRING%</Parameter>
<Parameter TYPE="String">%PREFIX_NAME%</Parameter>
<Parameter TYPE="String">%DB_HOSTNAME%</Parameter>
<Parameter TYPE="String">%DB_SERVICE%</Parameter>
<Parameter TYPE="String">%DB_PORTNUMBER%</Parameter>
</Parameters>
</Action>
<Action TYPE="Java">
<ValidIf DBTYPE="SQLSERVER,IBMDB2,MYSQL,JAVADB"/>
<Command
TYPE="METHOD">com.oracle.cie.rcu.ComponentSchemaUtil:loadNonOracleCompSchemaInfo</
Command>
<Parameters>
<Parameter TYPE="Connection"></Parameter>
<Parameter TYPE="String">%SERVICE_TABLE_STRING%</Parameter>
<Parameter TYPE="String">%PREFIX_NAME%</Parameter>
<Parameter TYPE="String">%DB_HOSTNAME%</Parameter>
<Parameter TYPE="String">%DB_PORTNUMBER%</Parameter>
<Parameter TYPE="String">%DATABASE_NAME%</Parameter>
</Parameters>
</Action>
</ExecutionDescriptor>
<FatalErrors>
<Error Type="ORA-17439">Invalid SQL type</Error>
<Error Type="ORA-01435">user does not exist</Error>
<Error Type="ORA-01435">user does not exist</Error>
<Error Type="ORA-00955">name is already used by an existing object</Error>
<Error Type="ORA-01031">name is already used by an existing object</Error>
</FatalErrors>
<IgnorableErrors>
<Error Type="ORA-02289">sequence does not exist</Error>
<Error Type="ORA-00904">invalid identifier</Error>
<Error Type="ORA-01920">user name conflicts with another user or role name</
Error>
<Error Type="ORA-01418">specified index does not exist</Error>
<Error Type="ORA-00942">table or view does not exist</Error>
<Error Type="ORA-06512">Not found</Error>
<Error Type="ORA-01403">no data found</Error>
<Error Type="ORA-04043">does not exist</Error>
<Error Type="ORA-04080">Trigger does not exist</Error>
<Error Type="ORA-00959">Tablespace does not exist</Error>
<Error Type="ORA-24035">AQ agent not subscriber</Error>
<Error Type="ORA-24185">Transformation not found</Error>
<Error Type="ORA-24042">Does not exist</Error>
<Error Type="ORA-24088">Does not exist</Error>
RCU Configuration Files
C-26 Creating Schemas with the Repository Creation Utility

</IgnorableErrors>
</ComponentInfo>
C.2.4 Soft-Prerequisite Support
In the ComponentInfo.xml file, If a particular <DBPrerequisiteSet> or
<DBPrerequisite> is not mandatory, then you can use the soft-prerequisite option
by setting the SOFT attribute to TRUE. When a soft-prerequisite is not met, a pop-up
dialog window with an error or warning message will appear; the user will have the
option to ignore the message or abort the operation. You can define a soft-prerequisite
at the <DBPrerequisiteSet> level, the <DBPrerequisite> level, or both; if both
are defined, then <DBPrerequisiteSet> will take higher precedence.
Below is an example of setting a soft-prerequisite at the <DBPrerequisite> level:
<DBPrerequisiteSet>
...
<DBPrerequisite PREREQ_TYPE="CustomSQL" DATA_TYPE="STRING" COMPARE_OPERATOR="EQ"
SOFT="TRUE">
<PrereqIdentifier>select value from nls_database_parameters where parameter =
'NLS_CHARACTERSET'</PrereqIdentifier>
<PrereqValue>AL32UTF8</PrereqValue>
<PrereqErrorMsg>
The database you are connecting is with non-AL32UTF8 character set.
Oracle strongly recommends using AL32UTF8 as the database character
set.
</PrereqErrorMsg>
</DBPrerequisite>
...
<DBPrerequisiteSet>
C.2.5 Default Tablespaces Configuration File
The default tablespaces configuration file (Storage.xml) lists the components for
which tablespaces are created out-of-the-box. This file is located in the ORACLE_HOME/
oracle_common/rcu/config (on UNIX operating systems) or ORACLE_HOME
\oracle_common\rcu\config (on Windows operating systems) directory.
The actual tablespace configuration file for each component is located in the
ORACLE_HOME/oracle_common/rcu/integrationcomponent/
component_Storage.xml (on UNIX operating systems) or ORACLE_HOME
\oracle_common\rcu\integrationcomponent\component_Storage.xml (on
Windows operating systems) file. Each component has its own tablespaces
configuration file.
Below is a sample opss_Storage.xml file:
<?xml version="1.0" encoding="UTF-8" ?>
<!-- OPSS START -->
<TablespaceAttributes NAME="IAS_OPSS">
<Type>Permanent</Type>
<DefaultTemp>False</DefaultTemp>
<Bigfile>False</Bigfile>
<DatafilesList>
<DatafileAttributes ID="%DATAFILE_LOCATION%/ias_opss.dbf">
<Size UNIT="MB">60</Size>
<Reuse>True</Reuse>
<AutoExtend>True</AutoExtend>
</DatafileAttributes>
</DatafilesList>
RCU Configuration Files
Extending Repository Creation Utility to Configure Custom Application Repositories C-27

</TablespaceAttributes>
<!-- OPSS END -->
C.3 RCU Script Writing Guidelines
Below are some common RCU script writing guidelines:
Schema user names and passwords should not be hard coded. They should be coded
as substitutable variables.
• If schema user needs to be created, it should be created first using the parameters
passed in by RCU.
• Tablespace and temporary tablespace references should not be hard coded; they
should be coded as variables.
• Do not use CONNECT; instead, use "ALTER SESSION SET CURRENT_SCHEMA
= <SCHEMA_OWNER>" after creating the schema user.
• The set of ignorable and fatal ORA errors (if any) should be listed in the RCU XML
component configuration file.
• Avoid any "shutdown" or "startup" that would bounce the database instance.
• SCHEMA_VERSION_REGISTRY should be updated before and after loading
schema. This can be done using JavaAction as shown in Java Code Using
JavaAction or with in the component scripts using SCHEMA_VERSION PL/SQL
package.
• Block comments that contain line comments (/* -- comment */) are not supported.
C.3.1 Guidelines for RCU JDBC Engine Compliant SQL*Plus Scripts
Below are some guidelines for writing RCU JDBC Engine SQL*Plus scripts:
• All statements must be terminated with appropriate terminating chars. CREATE
PACKAGE, TYPE needs to be terminated with ";" with "/" on the next line. All
other statements (Create TABLE, VIEW, etc.) need to be terminated by ";" or "/"
(only one of them, not both).
• EXECUTE calls should be replaced with "BEGIN/END blocks".
• DEFINE statements should be in one line, no comments in the same line and no ";"
at the end.
• SET, SHOW, SPOOL, WHENEVER, BREAK, EXIT statements are simply ignored.
• HOST command is not supported yet.
• VARIABLE and COL(UMN) are not supported.
Dynamically calling another SQL Script within a PL/SQL block using the following
technique is not supported:
VARIABLE initfile VARCHAR2(32)
COLUMN :initfile NEW_VALUE init_file NOPRINT;
BEGIN
IF (some condition) THEN
:initfile := 'initcdc.sql';
ELSE
RCU Script Writing Guidelines
C-28 Creating Schemas with the Repository Creation Utility

:initfile := 'nothing.sql';
END IF;
END;
/
SELECT :initfile FROM DUAL;
@@&init_file
The work around is to have a separate Action with "ValidIf" tag to specify the
condition.
C.3.2 Guidelines for Pure JDBC Scripts
Below are some guidelines for writing Pure JDBC scripts for RCU:
• Should not contain any SQL*Plus directives (like SET, WHENEVER, etc.).
• All DEFINES should be changed to PL/SQL variable declarations.
• All SQL statements should be wrapped in EXECUTE IMMEDIATE.
• PL/SQL style comments are allowed, But SQL*Plus style (REM) comments are not
allowed.
• DROP statements preceding CREATE statements do not work. DROP should only
be done after checking for the existence of the object. Ideally, all DROP statements
should put into different PL/SQL script and RCU can call this script before calling
a CREATE script, if that is desired.
• Contents of the script file should be a valid PL/SQL block, which can be called
within Connection.prepareCall().
C.3.3 Guidelines for SQL*Plus Scripts
Below are some guidelines for writing SQL*Plus scripts for RCU:
• Should not have any "exit" statements or "WHENEVER ERROR EXIT" directives.
This would cause RCU SQL*Plus session to exit unexpectedly and may impact
other component scripts to be executed later.
• Scripts should not have any spool commands. RCU would generate a spool log for
each component.
C.3.4 Guidelines for SQL Server-Based Scripts
Below are some guidelines for writing SQL Server-based scripts for RCU:
• Support is a subset of what is supported in t-sql scripts that can be executed by
sqlcmd.
• "ValidIf" tags should be added around all database-specific Actions and
Prerequisites. For example:
<DBPrerequisite PREREQ_TYPE="TablespaceFreeMB" DATA_TYPE="NUMBER"
COMPARE_OPERATOR="GT">
<ValidIf DBTYPE="ORACLE" />
<PrereqIdentifier>%DEFAULT_TABLESPACE%</PrereqIdentifier>
<PrereqValue>50</PrereqValue>
</DBPrerequisite>
• RCU supports recursive variable definitions such as:
RCU Script Writing Guidelines
Extending Repository Creation Utility to Configure Custom Application Repositories C-29

setvar var1 value1
setvar var2 $(var1)
• There should be a "go" statement to end blocks of statements. All statements
preceding the "go" statement will be executed as a single statement over JDBC.
• The JDBC connection is created in the auto-commit "on" mode.
• Currently, begin transaction and commit transaction statements are not supported.
• Variables passed to scripts via the XML file will be passed as follows:
Script.sql –v v1=value1 v2=value2
This is only for scripts called using the XML files. If a script calls another script, you
can use any other variable name.
RCU Script Writing Guidelines
C-30 Creating Schemas with the Repository Creation Utility

D
Troubleshooting Repository Creation Utility
This appendix contains information to help you troubleshoot any issues you might
encounter while running the Repository Creation Utility (RCU).
This chapter contains the following sections:
• General Troubleshooting Tips
• RCU Log Files
• Need More Help?
D.1 General Troubleshooting Tips
If you encounter an error during installation:
• Read the Oracle Fusion Middleware Release Notes for the latest updates. The most
current version of the release notes is available on Oracle Technology Network in
the Oracle Fusion Middleware Documentation page.
Select the documentation library for your specific product release to view the
release notes.
• Verify that your computer meets the requirements specified in the Oracle Fusion
Middleware System Requirements and Specifications document.
Select the document that is applicable for your release.
• Verify that your environment meets the certification requirements for your release
and platform, as specified on the Oracle Fusion Middleware Supported System
Configurations page.
• Make sure that your database is up and running.
• If you entered incorrect information on one of the screens, use the navigation pane
on the left hand side of the graphical interface to return to that screen.
• If an error occurred while running RCU:
1.
Note the error and review the installation log files (see RCU Log Files).
2.
Correct the issue that caused the error. Depending on the type of error, you
may either continue with your RCU operation, or be forced to restart RCU.
3.
Continue or restart RCU to complete your desired operation.
D.2 RCU Log Files
The main RCU log file is written to the /tmp/
RCUdate_timestamp_random_number/logs (on UNIX operating systems) or C:
Troubleshooting Repository Creation Utility
D-1

\Users\user_name\AppData\Local\Temp
\RCUdate_timestamp_random_number\logs (on Windows operating systems)
directory.
For example, on a UNIX operating system:
/tmp/RCU2014-01-02_03-00_412547075/logs/rcu.log
Accessing RCU Log Files on Windows
On Windows operating systems, the AppData folder might be hidden. To be able to
navigate to the RCU log files on Windows, ensure that the AppData folder is visible:
1.
From the Start menu, navigate to Control Panel > Appearance and
Personalization > Folder Options.
The Folder Options window appears.
2.
Select the View tab.
3.
Under Advanced settings, ensure that Show hidden files, folders, and drives is
selected and click OK.
RCU Component Log Files
In addition to the general log file, each component writes a log file of its own. All
component log files are also written to the same directory as the rcu.log file.
Table D-1 lists the component log file names in alphabetical order by log file name.
Table D-1 RCU Component Log File Names
Component
Log File Name
Analytics activities.log
Business Intelligence Platform biplatform.log
Oracle WebCenter Enterprise Capture capture.log
Oracle WebCenter Content Server — Complete content.log
Oracle WebCenter Content Server — Search Only contentsearch.log
Discussions discussions.log
EDQ Config Repository edq_conf.log
EDQ Results Repository edq_res.log
Oracle Enterprise Scheduler ess.log
Audit Services iau.log
Audit Services Append iau_append.log
Audit Services Viewer iau_viewer.log
Metadata Services mds.log
Managed File Transfer mft.log
RCU Log Files
D-2 Creating Schemas with the Repository Creation Utility

Component Log File Name
Master and Work Repository odi.log
Monitor Server oggmon.log
Oracle Platform Security Services opss.log
Portlet Producers portlet.log
SOA Infrastructure soainfra.log
Common Infrastructure Services stb.log
User Messaging Service ucsums.log
Veridata Repository veridata.log
WebCenter Sites wcsites.log
WebCenter Sites — Visitor Services wcsitesvs.log
Portal and Services webcenter.log
WebLogic Services wls.log
D.3 Need More Help?
If this appendix does not solve the problem you encountered, try looking for a
solution on My Oracle Support (formerly Oracle MetaLink):
https://support.oracle.com/
If you are unable to find a solution for your problem, open a service request.
Need More Help?
Troubleshooting Repository Creation Utility D-3

Need More Help?
D-4 Creating Schemas with the Repository Creation Utility
