ABS/BPPP Guide to Initial Pilot Checkout Appendix: Using Weight and Balance Tables
ABS/BPPP Guide to Initial Pilot Checkout:
Using Beech Weight and Balance Tables
Beech Pilot’s Operating Handbook (POH) weight and balance tables may appear complex, but
they are easy to use. The trick is to look at each chart in turn, gradually adding information as
your loading calculation progresses. This Appendix will use sample loading data from one
model of Beech Bonanza, the F33A. Use airplane-specific data and modify the technique
described as needed for other airplanes.
1. Loading Form
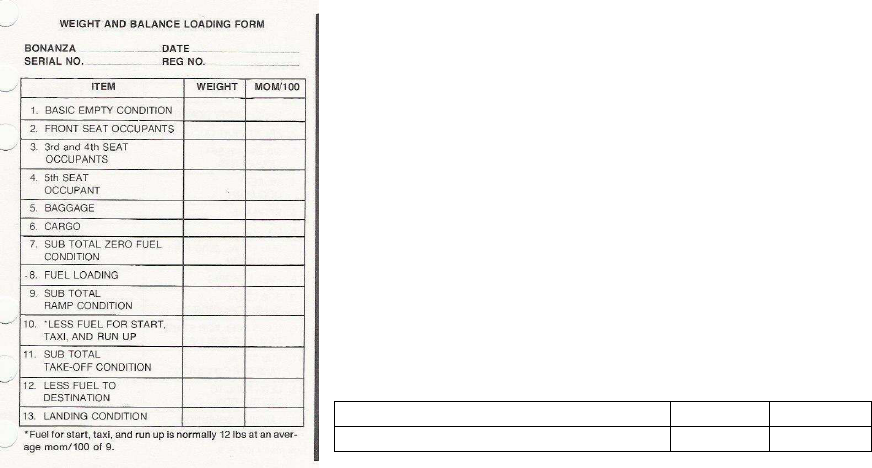
The POH contains a Loading Form to help simplify your
weight and balance calculation (left). The first step of your
weight and balance calculation is to enter the airplane’s basic
empty weight and moment on the form. In our example, the
airplane’s empty weight is 2372 lbs and its moment is 194500.
Note all calculations in the Beech POH divide moments by
100, so the empty moment for calculation purposes is 1945.
.
(left)
Fig. 1: POH loading form, IO-520 F33A
(below): Fig. 2: Empty condition data
ITEM WEIGHT MOM/100
1. BASIC EMPTY CONDITION 2372 1945
2. Front seat occupants
Next you’ll enter weights and moments for each airplane occupant. The loading form provides
one block each for front seat, 3
rd
/4
th
seat and optional 5
th
seat occupants.
The front seats have a range of travel fore and aft, the position of which affects the moment of
the seated occupant. If the seat is somewhere between fully forward and fully aft, multiply the
weight of the occupant by the arm of the location--the arm is the distance, in inches, aft of the
airplane’s datum, and weight multiplied by arm equals the moment. Remember to divide
moments by 100 if you derive the figure mathematically.

ABS/BPPP Guide to Initial Pilot Checkout Appendix: Using Weight and Balance Tables
Fig. 3: Aircraft occupants
For example, let’s say the pilot weighs 210 pounds and flies with the seat roughly halfway
between full forward and full aft, and the front-seat passenger weighs 120 pounds and rides with
the seat full aft for maximum legroom. In the case:
• Moment for the pilot is derived mathematically: (210 lbs X an arm of 87)/100 = 183.
• Moment for the passenger can be found directly on the table = 107.
• Total front seat occupant weight, then is 330 lbs, and the moment is 290. Enter these
numbers on the loading form (see figure 4).
ITEM WEIGHT MOM/100
1. BASIC EMPTY CONDITION 2372 1945
2. FRONT SEAT OCCUPANTS 330 290
Fig. 4: Including front seat occupant data
3. Rear seat occupants
Use the seating weights and moments table exactly the same way to find the moments for rear-
seat occupants. Let’s say in our example the combined weight of occupants of seats 3 and 4 is
280 pounds, and both passengers ride with their seat all the way back for maximum legroom.
You can find the moment individually for each passenger and add them together; you can find
the moment for 140 lbs on the table and double it to account for double the weight (280 lbs), or
you can multiply 280 lbs by the arm of 127 for the aft-most seat position and divide the result by
100 (see figure 3). Any of these methods derive a moment of 356.

ABS/BPPP Guide to Initial Pilot Checkout Appendix: Using Weight and Balance Tables
For purposes of our illustration let’s assume the optional 5
th
seat is not installed. Because the
seat is in the baggage area and because weight in the seat is so far aft it tends to have a very
detrimental effect on center of gravity location, most Model 33 and 35 airplanes do not have this
seat installed. If you do have this seat, use the occupant’s weight and the table to find the
moment. Since the seat is fixed to the floor and cannot move fore and aft, there is only one arm
for the optional seat.
Model 36 Bonanzas and some Model 35 Bonanzas have optional 5
th
and 6
th
seats, with a single
block on the form for these seats combined. Note that Model 36, A36 and G36 have a placard
limiting the maximum combined passenger weight of the 5
th
and 6
th
seats, usually limited to 250
lbs. See the placard near the rearmost seats in the individual airplane for the limit that applies
to that aircraft. Find the moment of optional-seat occupants using the same table or
mathematical methods.
Enter the 3
rd
/4
th
and option seat passenger weights and moments onto the loading form (see
figure 5).
ITEM WEIGHT MOM/100
1. BASIC EMPTY CONDITION 2372 1945
2. FRONT SEAT OCCUPANTS 330 290
3. 3rd and 4th SEAT OCCUPANTS 280 356
4. 5th SEAT OCCUPANT 0 0
Fig. 5: Including rear seat occupant data
4. Baggage and cargo
Next, account for the baggage you have on board the
airplane. Let’s say each of the four aboard our sample
airplane has 15 pounds of baggage, all of which is secured in
the aft baggage compartment. Additionally, there is 10
pounds of aircraft gear in the aft baggage area, and the pilot
has a flight bag that weighs seven pounds and is kept behind
the front passenger seat, at the feet of the person in the rear,
right seat.
Using the Baggage and Cargo table from the POH, you’ll find
the total moment of the 70 pounds of materials in the aft
baggage area is 105. Note the maximum weight permitted in
the baggage area, 270 pounds, is the highest weight listed on
the table. The flight bag is “forward of the spar” as far as the
table is concerned, with an arm of 108 inches; the computed
moment is 7 X 10⁸/100 = 7.56, rounded to 8.
Fig. 6: Baggage and cargo table

ABS/BPPP Guide to Initial Pilot Checkout Appendix: Using Weight and Balance Tables
Enter these weights and moments on the table (see figure 7).
ITEM WEIGHT MOM/100
1. BASIC EMPTY CONDITION 2372 1945
2. FRONT SEAT OCCUPANTS 330 290
3. 3rd and 4th SEAT OCCUPANTS 280 356
4. 5th SEAT OCCUPANT 0 0
5. BAGGAGE 70 105
6. CARGO 7 8
Fig. 7: Including baggage and cargo data
A little more about the baggage/cargo table. If the airplane is flown with the rear seats removed
to carry more cargo, use the Forward of Spar column for items in the “well” between the aft
carry-through spar and the rear of the front seats, and the Aft of Spar column for weight in the
rear floorboards. Be sure to keep the area around the landing gear manual extension crank free
so you can crank down the landing gear if needed.
1979 and later A36s and all G36s additionally have a small aft baggage box behind seats 5 and
6. This area is limited to 70 pounds maximum; an additional column appears on the Baggage
and Cargo table for those airplanes to provide moment data for baggage in this space.
5. Zero fuel condition
The next step on the loading form is to total all the weights and moments so far, to derive the
zero fuel condition. This is the weight and balance of the airplane as you’ve loaded it but before
fuel is accounted for. Knowing this permits you to calculate the maximum amount of fuel you
can carry, and has another important use we’ll come back to at the end of our calculations. See
figure 8.
ITEM WEIGHT MOM/100
1. BASIC EMPTY CONDITION 2372 1945
2. FRONT SEAT OCCUPANTS 330 290
3. 3rd and 4th SEAT OCCUPANTS 280 356
4. 5th SEAT OCCUPANT 0 0
5. BAGGAGE 70 105
6. CARGO 7 8
7. SUBTOTAL ZERO FUEL CONDITION 3059 2704
Fig. 8: Zero fuel condition
6. Fuel loading
Now you can determine the maximum amount of fuel you can carry given your passenger and
baggage load. Find your airplane’s maximum ramp weight in the Limitations section of the
POH. For the sample F33A this limitation is 3412 lbs. Subtract the Zero Fuel Condition weight
from the maximum ramp weight to determine the weight allowance remaining—in our example
this is 353 lbs. Divide that weight by six to find the number of U.S. gallons that can be loaded

ABS/BPPP Guide to Initial Pilot Checkout Appendix: Using Weight and Balance Tables
and still remain below maximum ramp weight. In our example this comes to 58 gallons, or a
little more than ¾ full tanks. Note the Basic Empty Weight of the airplane includes placarded
unusable fuel, so unusable fuel is not counted in your derived fuel allowance. You can load up
to the full 58 gallons. For purposes of our example let’s say you do. Using the POH fuel
loading table, and the arm of 75 inches, the moment of 353 lbs./58 gallons of fuel divided by 100
is 264. As a crosscheck, these weights and moments come between the entries for 55 and 60
gallons on the table (see figure 9).
Fig. 9: Fuel loading
Enter these numbers onto the loading table. Total the zero fuel and fuel loading figures to come
up with the Ramp Condition, or the weight and balance state of the airplane before engine start
(see figure 10). As another crosscheck, if you’ve added the maximum permissible fuel the
Ramp Condition weight will equal the maximum ramp weight.
ITEM WEIGHT MOM/100
1. BASIC EMPTY CONDITION 2372 1945
2. FRONT SEAT OCCUPANTS 330 290
3. 3rd and 4th SEAT OCCUPANTS 280 356
4. 5th SEAT OCCUPANT 0 0
5. BAGGAGE 70 105
6. CARGO 7 8
7. SUBTOTAL ZERO FUEL CONDITION 3059 2704
8. FUEL LOADING 353 264
9. SUBTOTAL RAMP CONDITION 3412 2968
Fig. 10: Fuel load and ramp condition
7. Takeoff condition
You’re almost ready to check the weight and balance and center of gravity condition as loaded
for takeoff. On the bottom of the loading form you’ll see an allowance for fuel burn during
engine start, taxi and takeoff (see figure 11). This is meant to help you precisely determine the

ABS/BPPP Guide to Initial Pilot Checkout Appendix: Using Weight and Balance Tables
airplane’s fuel load (and the moment of that fuel) at the point the airplane lifts off—when weight
and balance becomes important. Note that if you have a very short taxi you may not burn quite
as much fuel before liftoff, and the POH provides no guidance. Also, if your engine has been
modified, or if you lean aggressively for ground operations, you may have a different fuel burn
on the ground. Use your best judgment.
Fig. 11: Fuel allowance for ground operation
You now have your takeoff condition weight and moment. If you based fuel loading on the
maximum available for a given fuel load, the takeoff weight should equal the airplane’s
maximum gross weight.
ITEM WEIGHT MOM/100
1. BASIC EMPTY CONDITION 2372 1945
2. FRONT SEAT OCCUPANTS 330 290
3. 3rd and 4th SEAT OCCUPANTS 280 356
4. 5th SEAT OCCUPANT 0 0
5. BAGGAGE 70 105
6. CARGO 7 8
7. SUBTOTAL ZERO FUEL CONDITION 3059 2704
8. FUEL LOADING 353 264
9. SUBTOTAL RAMP CONDITION 3412 2968
10.LESS FUEL FOR START, TAXI, RUNUP* 12 9
11.SUBTOTAL TAKEOFF CONDITION 3400 2959
Fig. 12: Takeoff condition
8. Envelope check
Now you can use the computed weight and moment data for your planned flight to see if the
airplane is within its certified flight envelope. On the Moment Limits vs. Weight chart (figure 13),
compare the airplane’s weight (the vertical scale) to the airplane’s moment (the sloping lines).
The point of intersection is the airplane’s c.g. condition with the current load.
An alternate method to use when it’s hard to determine whether the result is inside or outside
the envelope is to check mathematically. Center of gravity location is the total moment divided
by the total weight. Remember we’ve been dividing the moments by 100, so you’ll have to
multiply the computed moment by 100 to use this method. In this case the c.g. location is (2959
x 100)/3400, or 87.3. This is 87.3 inches aft of the datum. Look at the bottom of the chart and
you’ll see the permissible range of c.g. locations for a given weight. At 3400 pounds the forward
limit is 82.1 inches aft of datum, and the rear limit is 86.7 inches aft of datum. As loaded, our
F33A is outside the approved envelope. We’ll need to reduce or adjust the load to be safe, and
legal.

ABS/BPPP Guide to Initial Pilot Checkout Appendix: Using Weight and Balance Tables
Fig. 13: Loading envelope

ABS/BPPP Guide to Initial Pilot Checkout Appendix: Using Weight and Balance Tables
Let’s say after some re-packing, and perhaps even shipping some baggage ahead, you are able
to get the total baggage load down to 25 pounds. The new moment for baggage is 37.5,
rounded to 38, and your computed loading form now looks like figure 14:
ITEM WEIGHT MOM/100
1. BASIC EMPTY CONDITION 2372 1945
2. FRONT SEAT OCCUPANTS 330 290
3. 3rd and 4th SEAT OCCUPANTS 280 356
4. 5th SEAT OCCUPANT 0 0
5. BAGGAGE 25 38
6. CARGO 7 8
7. SUBTOTAL ZERO FUEL CONDITION 3014 2637
8. FUEL LOADING 353 264
9. SUBTOTAL RAMP CONDITION 3367 2901
10.LESS FUEL FOR START, TAXI, RUNUP* 12 9
11.SUBTOTAL TAKEOFF CONDITION 3355 2892
Fig. 14: Revised loading form
The revised, computed c.g. position for takeoff is (2892 x 100)/3355, or 86.2 inches aft of the
datum. It’s within limits, near the aft end of the envelope. See figure 15. A filled circle identifies
the location of the takeoff condition.
Center of gravity will change with fuel burn. In most factory configurations the c.g. will move aft,
toward the rear limit, as fuel is burned. Remember we said you’d use the zero fuel condition
again? Using the weight and moment as loaded but without any fuel, you’ll have the condition
of the airplane if you’ve flown all the way to fuel exhaustion (except for unusable fuel). Although
of course you would not do this “for real,” it’s a good check to determine whether your range will
be limited by center of gravity considerations. Using the zero fuel condition, plot the weight
(3014 pounds in our example) and the moment (2637) on the loading envelope chart. This is
indicated by an open circle in figure 15. As you can see, the zero fuel condition in this example
would be dangerously outside the loading envelope, aft. It would not be safe to fly to the
extreme range of the airplane as loaded.
C.G. location follows a straight line derivation in this factory-configuration fuel system. A line
drawn from the takeoff condition to the zero fuel condition exits the loading envelope at about
3275 pounds airplane weight. This is 80 pounds below the airplane’s takeoff weight; at six
pounds per gallon you can only burn about 13 gallons before going outside the approved (and
safe) loading envelope. At a very low-power cruise you might be able to fly one hour before you
need to be on the ground with minimum fuel reserves. Loaded as we’ve described, you’re fine
for a short hop of 100 miles or so, which may be enough to get you to your destination. But if
you’re traveling farther you’ll need to make refueling stops every hour or so, returning fuel load
to your original takeoff condition, to stay within the approved loading envelope.
This may be an extreme example, but it was created using actual loading information from a
typical F33A, so it is a real consideration at least for some airplanes. It’s your job as pilot-in-
command to determine the weight and balance limitations that apply to each flight you
contemplate.

ABS/BPPP Guide to Initial Pilot Checkout Appendix: Using Weight and Balance Tables
Fig. 15: Loading envelope
Tak
eoff
Zero fuel
